
Cheese Byte Robotics
3lb Battle Bot, competing under NHRL
Total Time spent: 28h
July 17, 2025
Started research on NHRL and 3LB robots
Total Time spent: 3h
After learning about Hackclub Highway, I have started to work towards my goal of building a Beetle weight battle bot. This idea came to mind months ago before halting my research due to other robotic competitions I have been involved in. During my time, today I had researched bots to give me inspiration for my robot. I've landed a final decision to do a vertical spinner with two separate blades, inspired by the Peter Bar Kit and one of the best bots, Lynx. After finding a bot to get inspired from, I looked into registration and events I could compete in.
Peter Bar Kit
LYNX
July 18, 2025
Started on Robot sketch
Total Time spent: 3h
Once I had a robot design set in mind, it was finally time to sketch out parts of the robot. I decided to start with the frame first since its a priority to make it beofre adding anything else like the motors and blades. The entire base I wanted would be around 8 by 8 inches in order to make it stable in a boxy way.
Inner Plate Sketch 1
Inner Plate Sketch 2

July 19, 2025
Started making Sketch from 2D to 3D
Total Time spent: 2h
After sketching out the inner plates, I extruded sketch to .5". The inner plates would be made out of HTPE material which is very strong and a light weight option for a beetle weight robot. Once completed, I created my outer armor plates which will hold my drive shafts and provide extra protection to my entire bot. The armor will be made out of PC (Polycarbonate) filament instead of HTPE as a TON of spares would be needed as it would take on hard hits.
Inner Plate
.webp)
Outer Plate
July 20, 2025
Added parts onto chassis/belly plate creation
Total Time spent: 3h
Once I had the inner and outer plates done, it was time to connect them all so it would form a structure. I created my belly and motor mounts and added it to the desired area from the sketch I made. I also added holes and mounts to support the drive motors and the belly plate in the bottom
Main Structure
.webp)
July 21, 2025
Created wheels and top mounting plates
Total Time spent: 4h
I started on making my own wheels since I would be able to change up the diamter of the wheel to what ever I desired. The bot would use 45mm Diamter wheels in order to ensure I have enough grip on the wooden floor of the arena. I made these wheels so that I would need a silicon mold which when hardened, it would have the grip I would need without having to use foam or printed wheels. After I have completed this I had started working on the top mounting plates for the rest of the structure. There will be 2 plates on the top, one for the main frame and one to mount the weapon motor. These plates would be made out of carbon fiber which offers strong and light weight solutions to what I need to stay under the 3LB limi set by NHRL.
Top plates
.webp)
Wheels
.webp)
July 22, 2025
Created the motor mount and custom pulley
Total Time spent: 4h
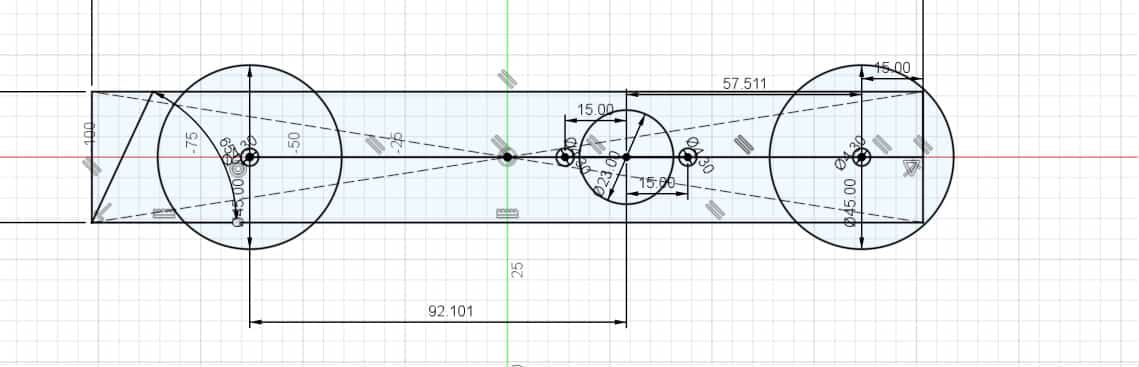
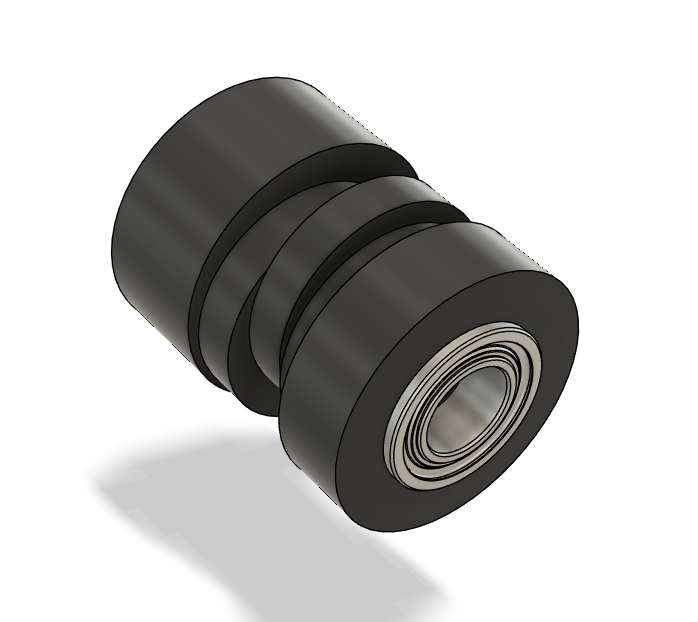
I have all of my main frame done, so I would need to focus on my weapon system. I chose to go with the Repeat 2836 as it offers a low cost and a fast option for the weapon I want to create. Before I started, I needed to create my own custom pulley. I decided the ratio to be 30Tooth to a 34Tooth on the weapon. I used a pulley generator to help me make the s3m tooth on the pulley then extruded it to 1/4 of a inch to support a 6mm thick belt. I then created the side walls so the pulley wouldn't slip, I made this entire thing modular and cncable to ensure I have tons of spares and that it would never break. After this was done I then created the motor mount, since the entire bell rotates I used the mounting holes in the back and supported it with the walls of my chassis, I then utilized the motor shaft to support the other end of the motor, including a bearing so when it was on, the shaft would smoothly rotate on the supporting end.
Custom pulley
.webp)
Motor mount
.webp)
July 23, 2025
Finalized weapon system
Total Time spent: 6h
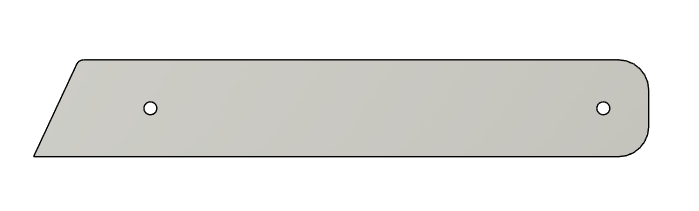
It was time to create the weapon system, after various iterations I had stuck to what was simple and easy to do. First I needed to find a screw and nut to support the entire mechanism, which I had found on palm beach robotics. I added it to the cad but it was too long for my liking, making me search for a better alternative. I searched in McMaster Carr to find an exact product that was shortened, best part was that it was made of Steel! Steel would be the strongest material I could find for this weapon so I designed around the shaft diameter and changed up my holes so it would easily fith through my mounting plates. After that was done, I had created my weapon blade, I wanted the diameter of it to be around 95mm and be .25" thick. I created a simple design which had two cutting edges on each side, which was the best if I wanted to have even weight and create a powerful impact. I connected these plates with 4 steel shafts and made spacers so the screws dont damage the blade. Once that was done I needed to make my pulley that will slide into the blade shafts, I took inspiration from the peter bar kit which used the same mechanism. Using the same technique, I was able to make my own and replicate the one from peter bar with a 34tooth belt pulley on the print. I also added the shaft patterns so I can just slide it into the connectors for the blades. I also made holes for bearings to fit in so it wouldn't scrape along the bar and would run smoothly instead. I then added all of the parts to create my finalized weapon system.
Blade
.webp)
3D printed Pulley
.webp)
Shaft mech
.webp)
Entire weapon system
.webp)
Pocketed weapon blade stress analysis
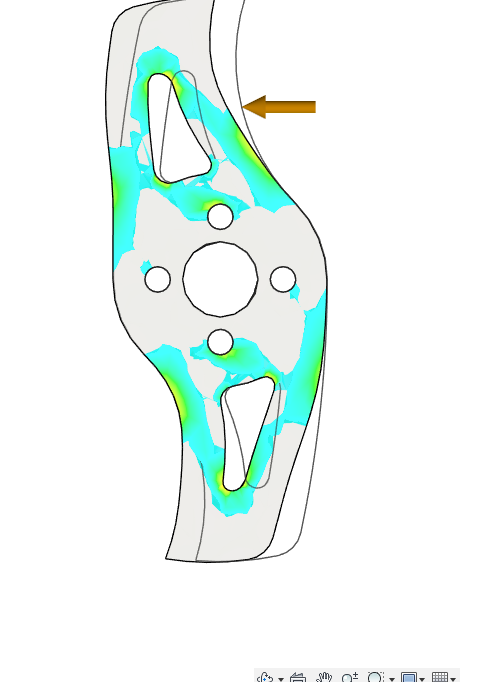
I created my own simulation on Fusion 360 to test the weapon's stress points when force is applied on it. This allowed me to create the most optimal blade which distributes force across a large portion of the blade minimizes stress concentrations, leading to improved durability and reduced risk of failure during high-impact scenarios.
July 24, 2025
Finalized bot
Total Time spent: 3h
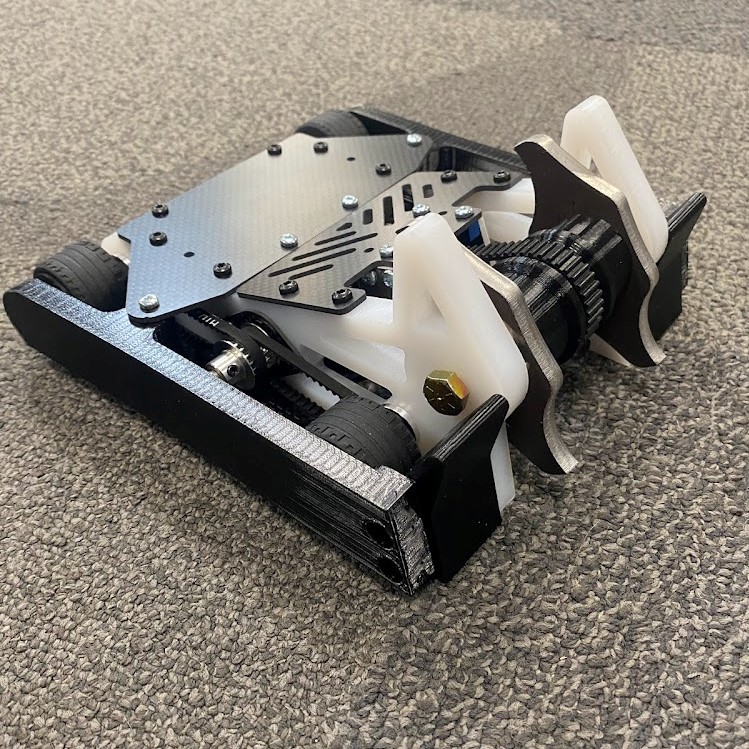
It was time to finalize this battle bot, after a lot of hours spent making each mechanism, I was done. I had to make sure every hole is the proper size and overall made sure everything was perfect and ready to build. There were some slight issues with material thickness so I had to rearrange a lot of the part but overall it was looking solid. I then calculated the entire weight and surprisingly, I had stayed under the weight limit! I had learned a lot from building this bot from scratch and valuble lessons that I could take into other projects besides battle bots. Overall amazing progress within the last couple days and I hope I get to do more of these in the future!
Finalized robot
.webp)
July 31, 2025
Created Shuffler Pods
Total Time spent: 3h
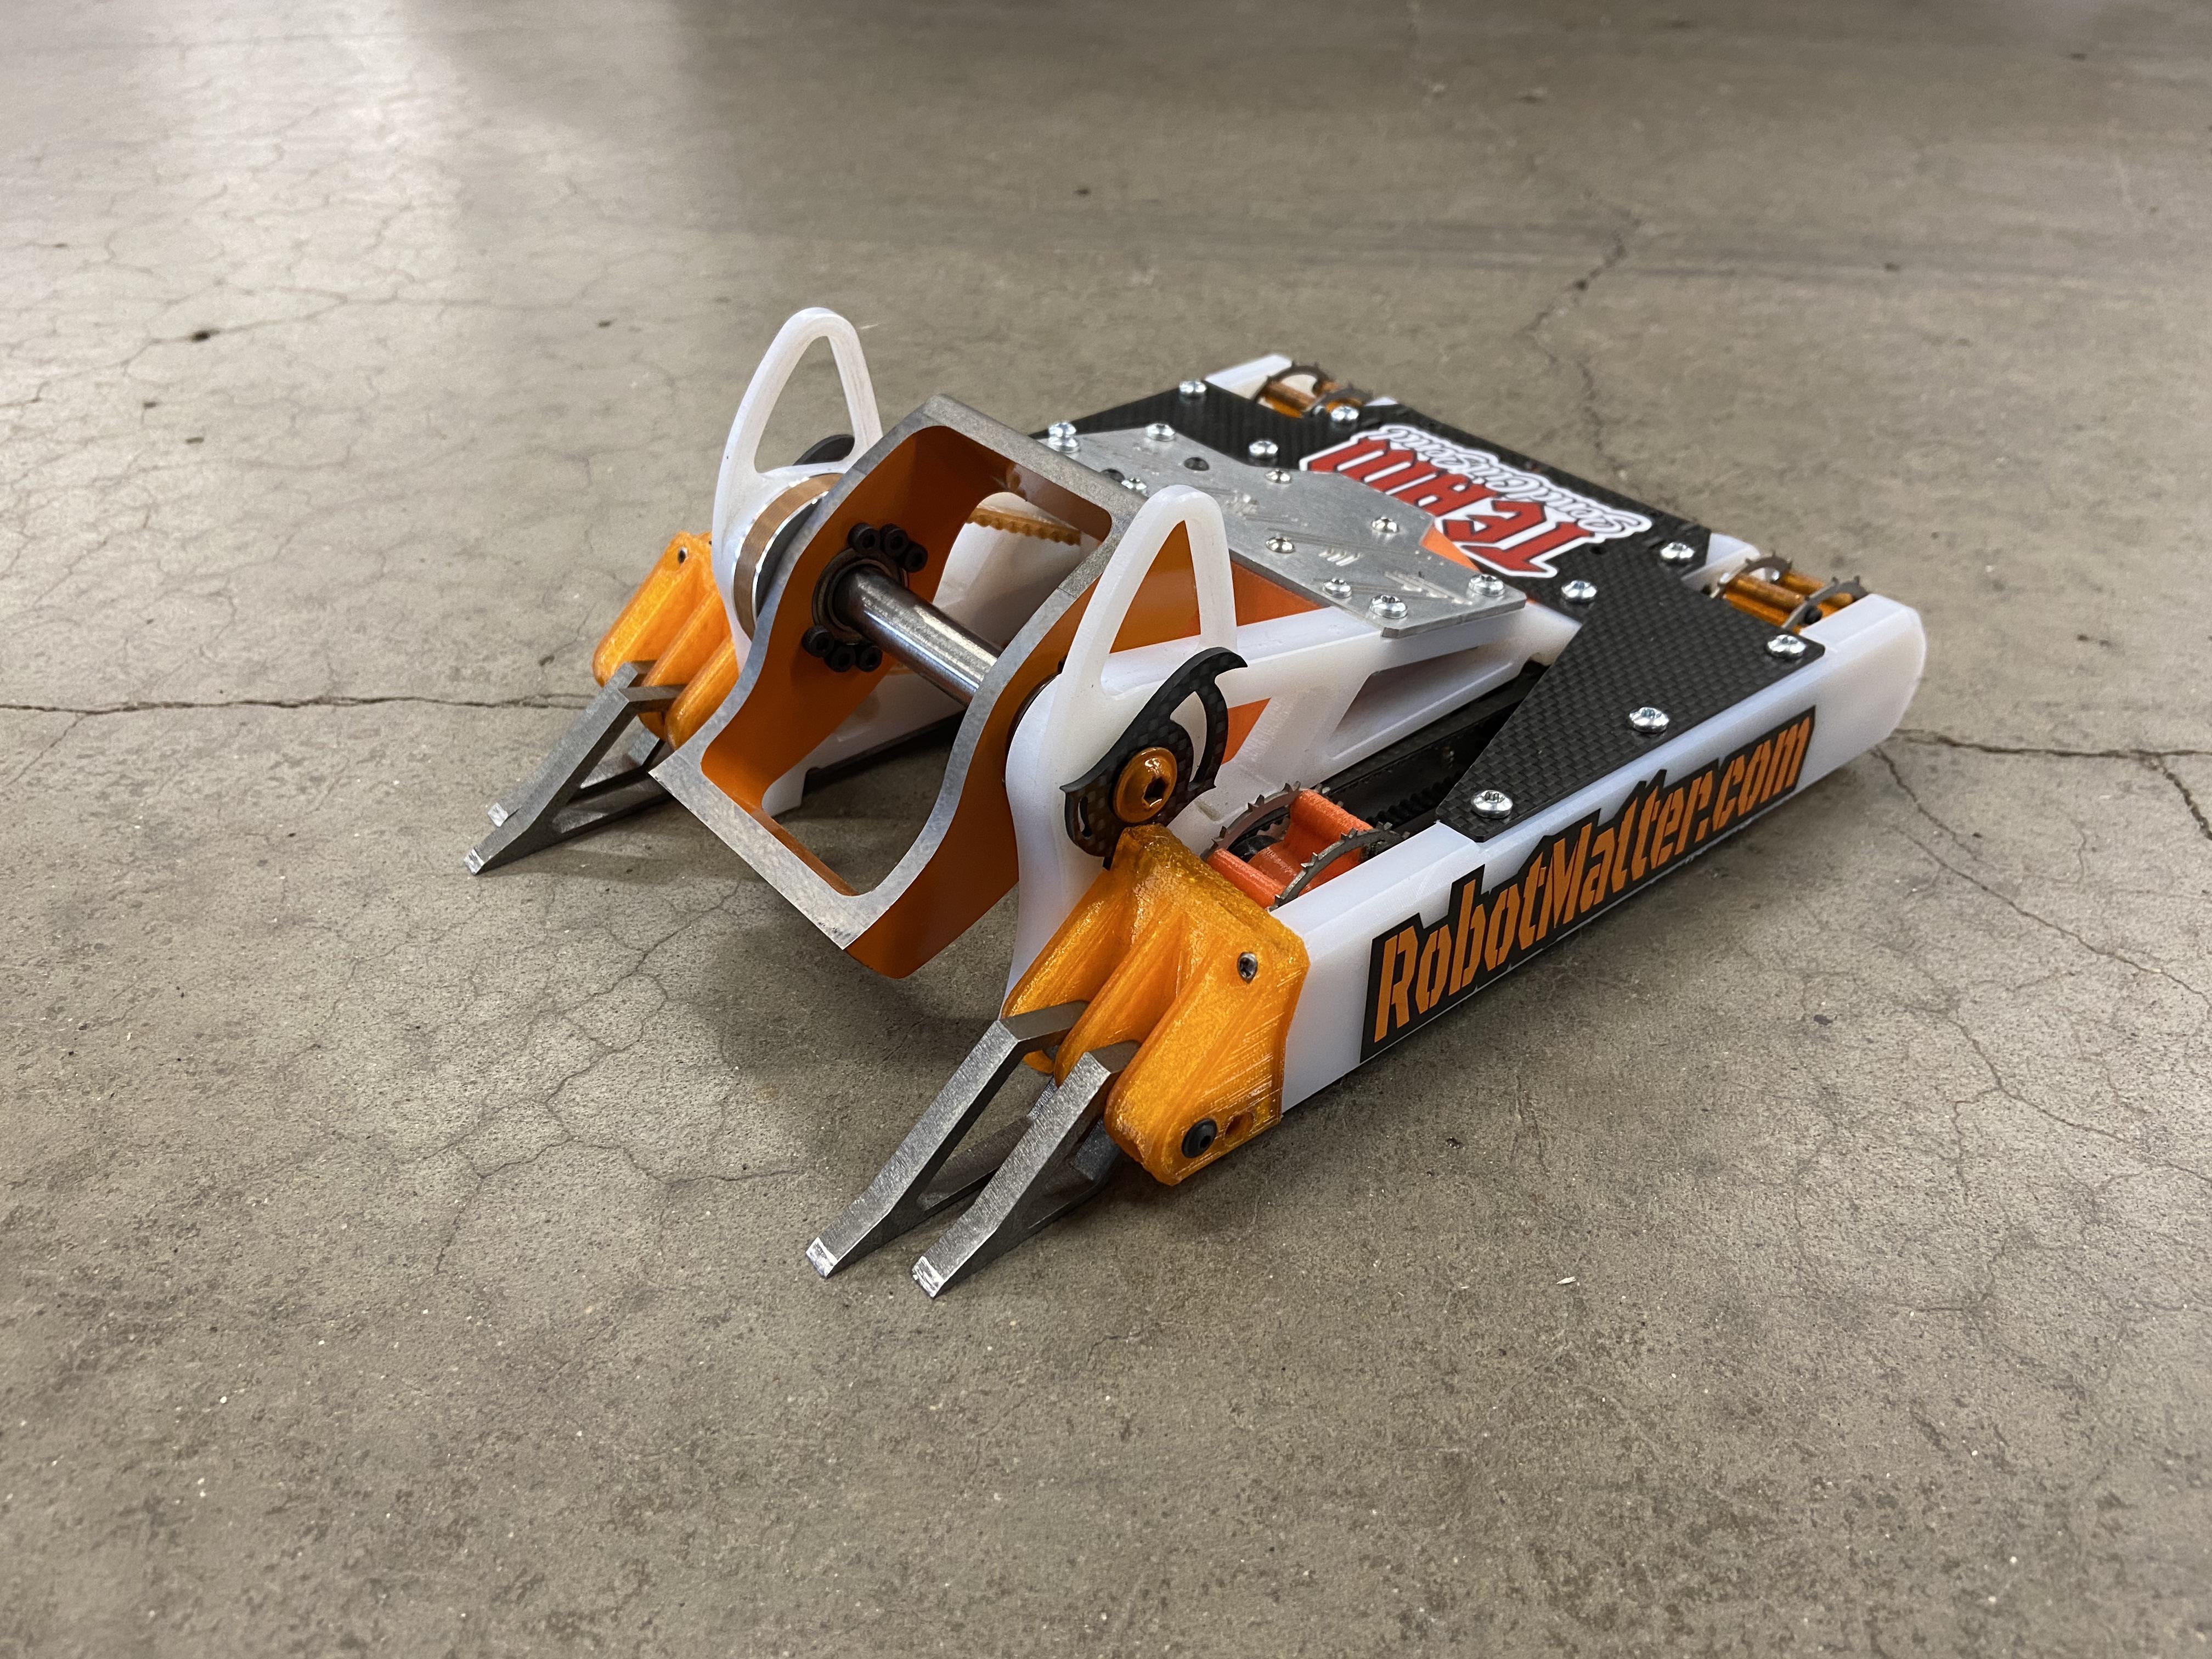
I wanted to spice up my bot a bit by adding a set of shuffler pods as its drive to replace the wheel drive. I looked into how other people did their shuffler pods and the math or secrets behind it. After doing some research, I learned that each leg of the pods had to be around 120 degrees apart from each other. After doing my research and some help from perspectives of other people, I started designing my shuffler pod. My main drive for the pod would be a repeat 1806 motor attached to the middle of the legs, with a print attatching to a hub mount allowing it to be driven with the motor. after I created by series of circles with bearings following the degree rotation I created the legs. The legs have 3 little feet on the bottom so it would just glide through the floor, the feet would also have a rubbery material to allow it to grip onto the floor. I also needed supports for these parts towards the ends of the legs, so utilizing the shafts that were meant for wheels were now used as supports to make sure that the legs dont just rotate around the motor axis.
Motor Mount
.webp)
Legs
.webp)
Leg support prints
Cheddar Shredder (Shuffler Pod Drive)
 v1.png)