
threedeeprinter - a custom 3D printer
28th May (day 1): initial research
i did some talking to people on Slack (@aryan, @souptik, @manan) and learnt quite a bit about how 3D printer work. i checked out some articles and videos on that topic.
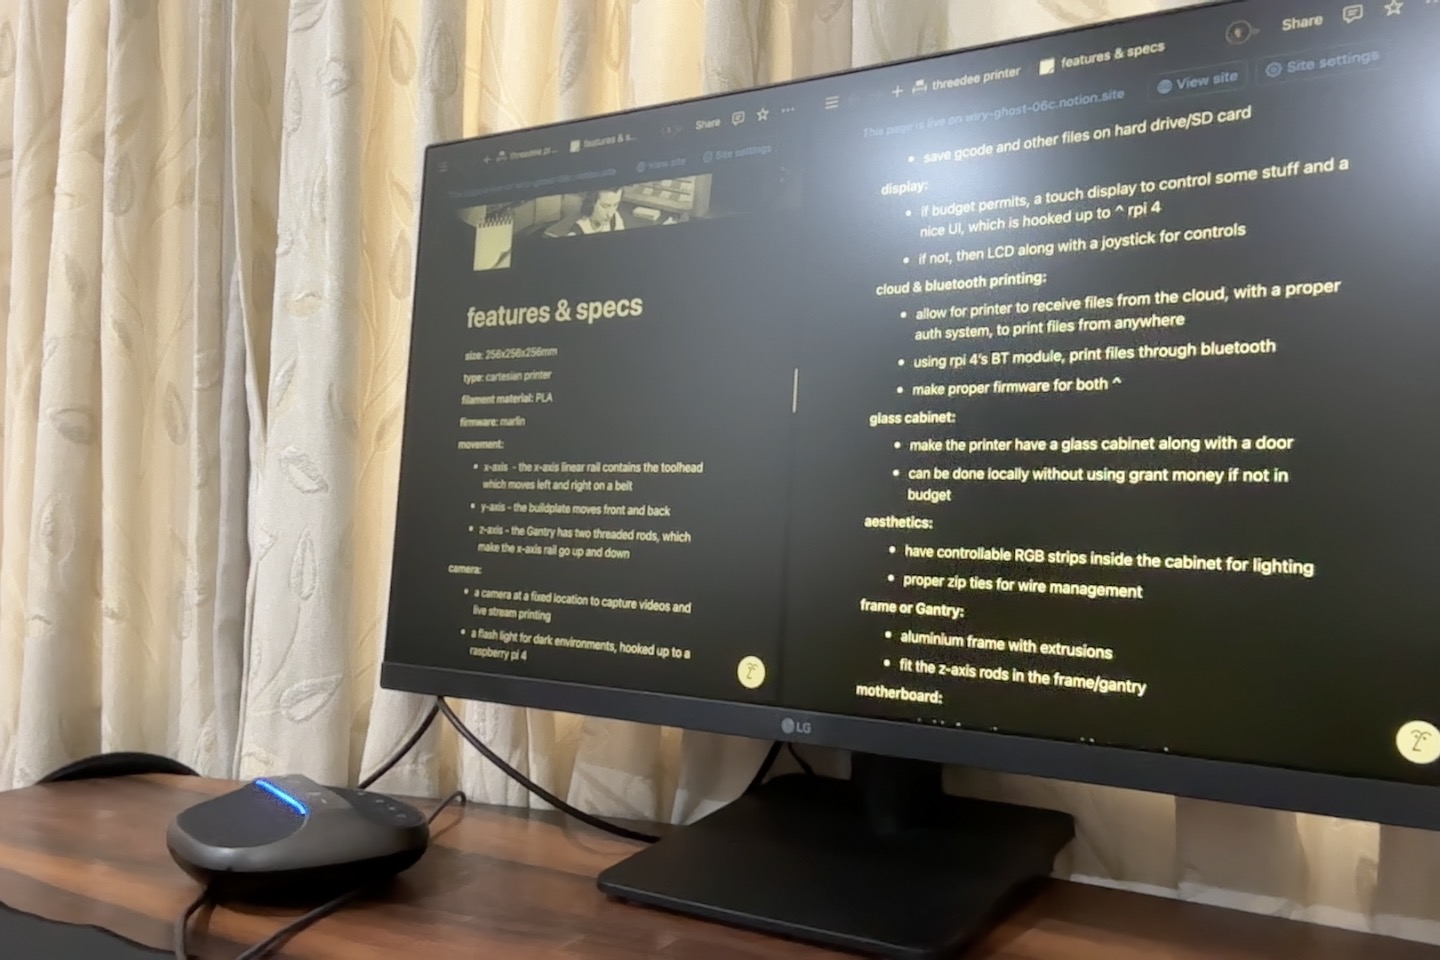
I decided on a few basic things:-
- printer material
- kinematics
- build volume
- other VERY cool features
Total time spent: 1.5 hours
29th May (day 2): more research and beginning work on Gantry
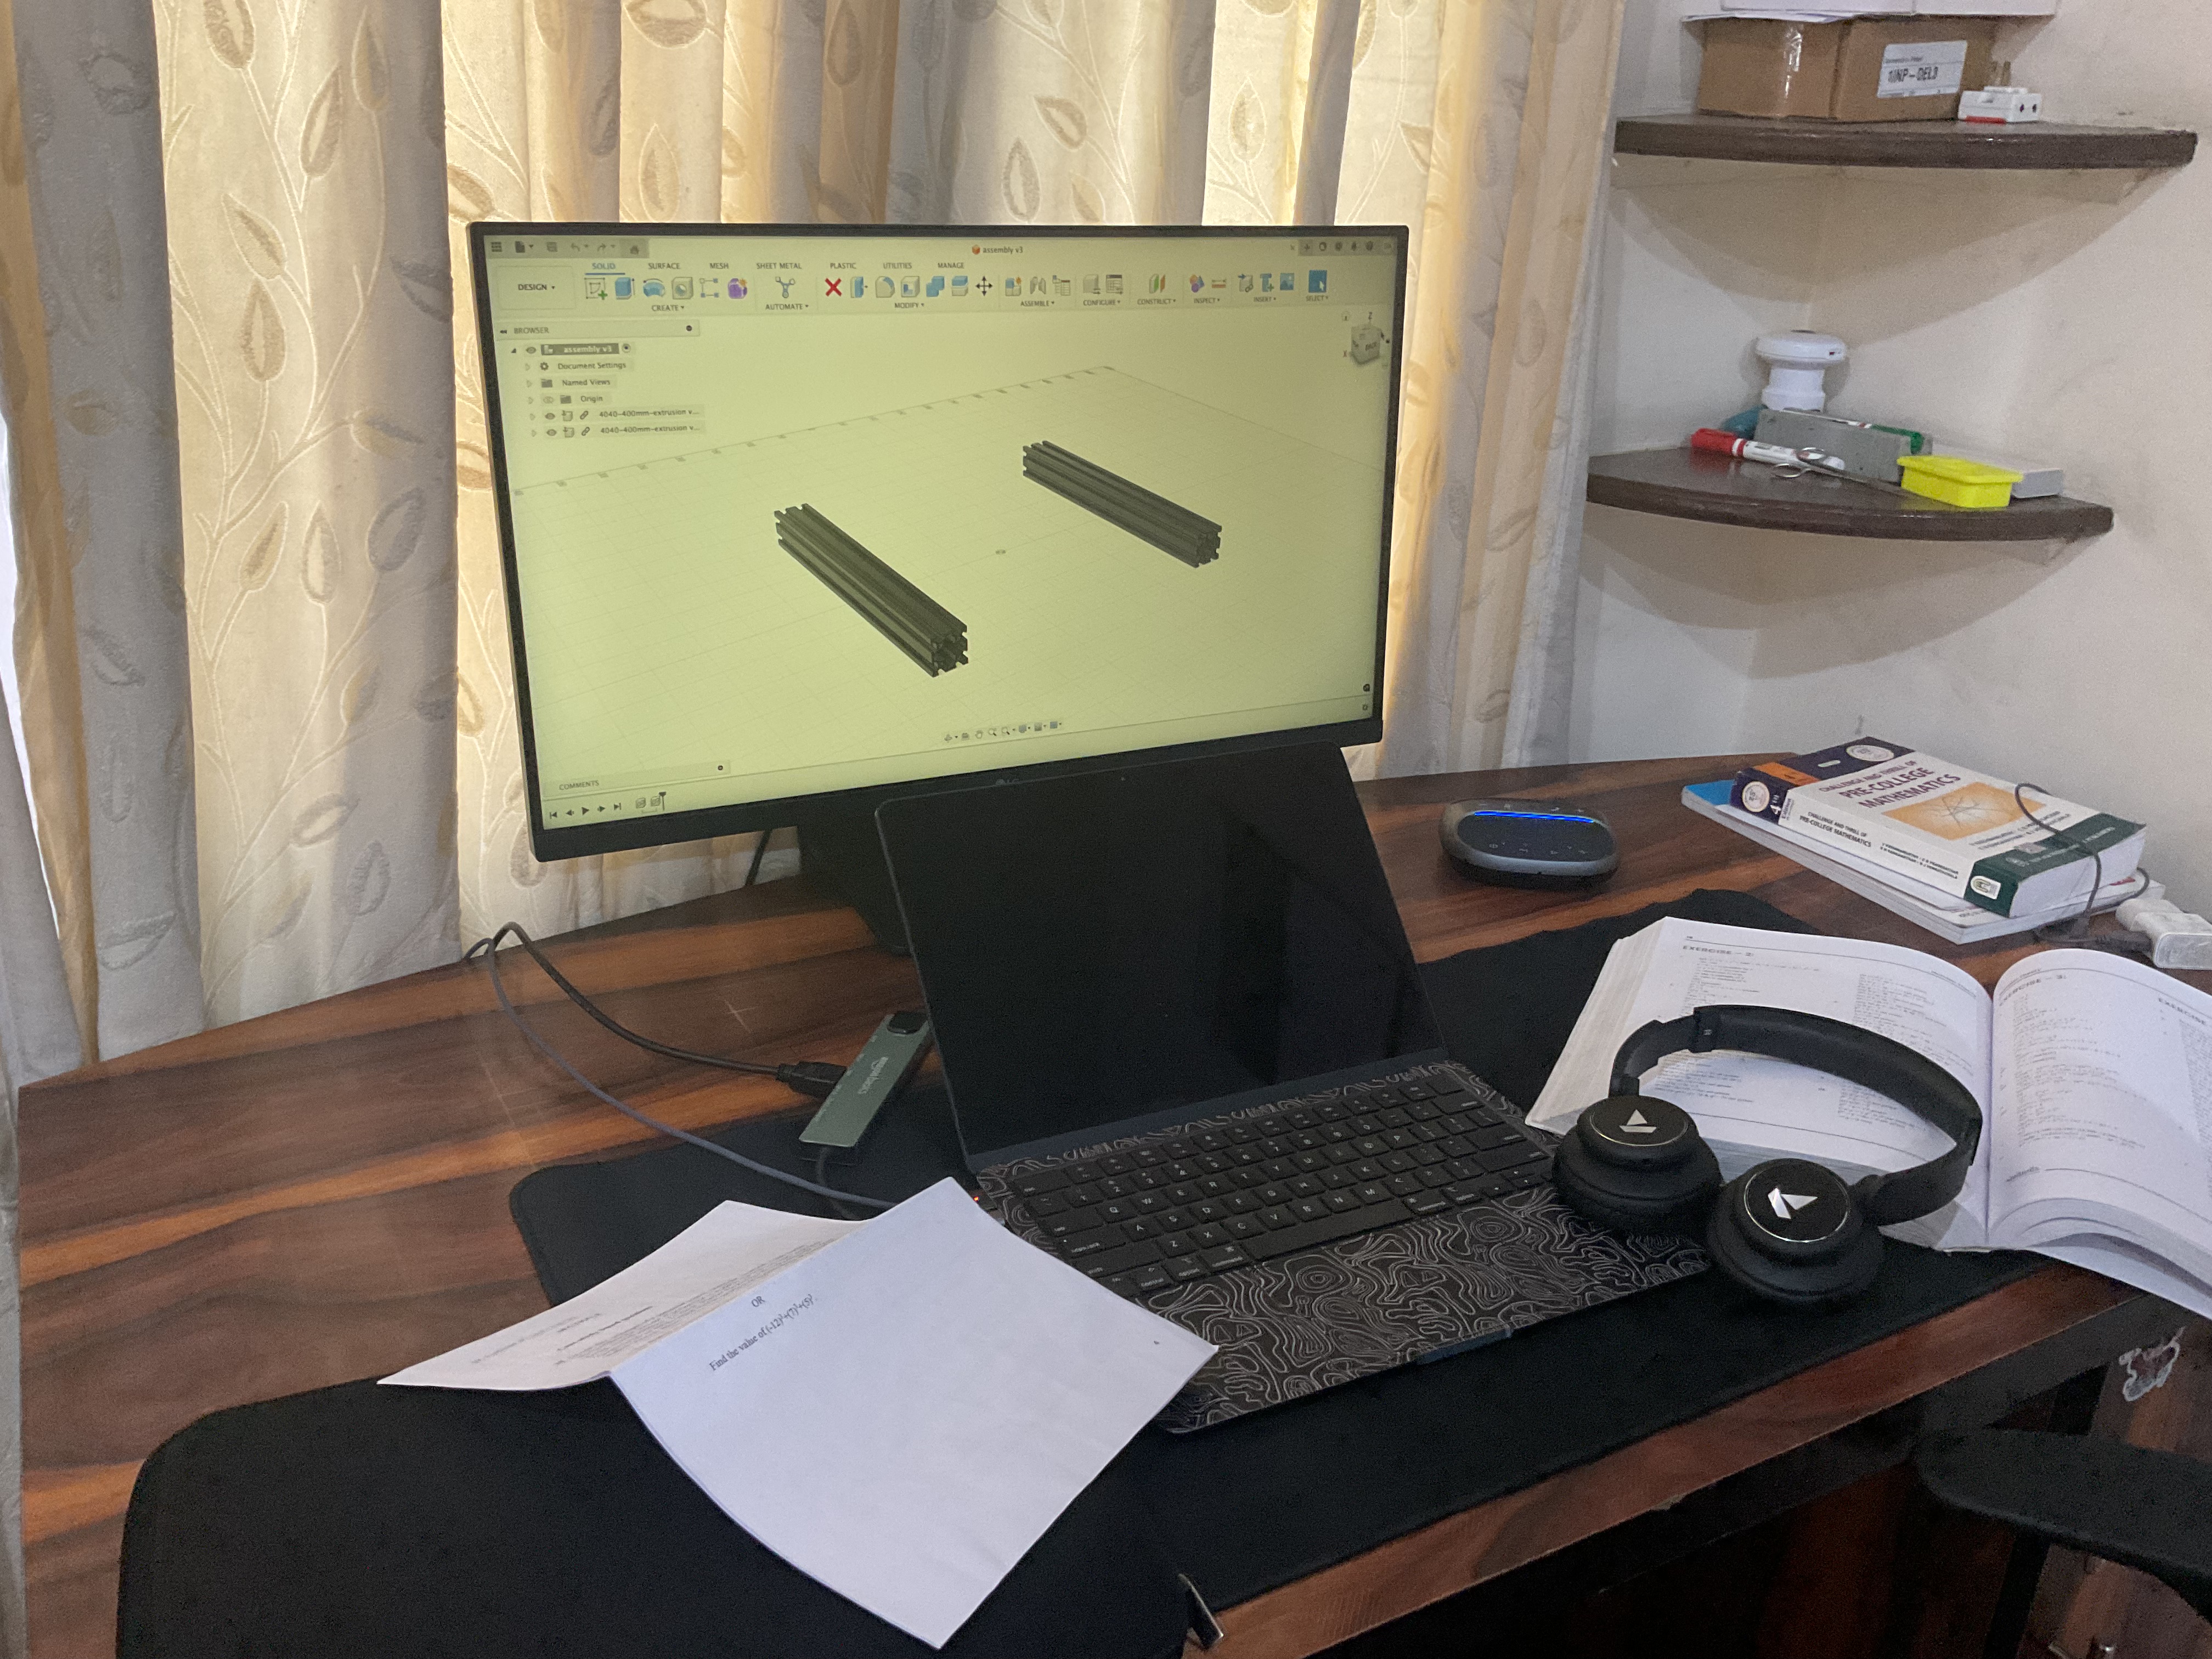
i checked the infill resources and docs, and looked at other very cool printers built by HC members. in the end, I decided to take one of the printers as my inspiration. i read an instructables article and began my work on the Gantry/frame.
i started with the base 4040 and 2040 extrusions.
Total time spent: 3 hours
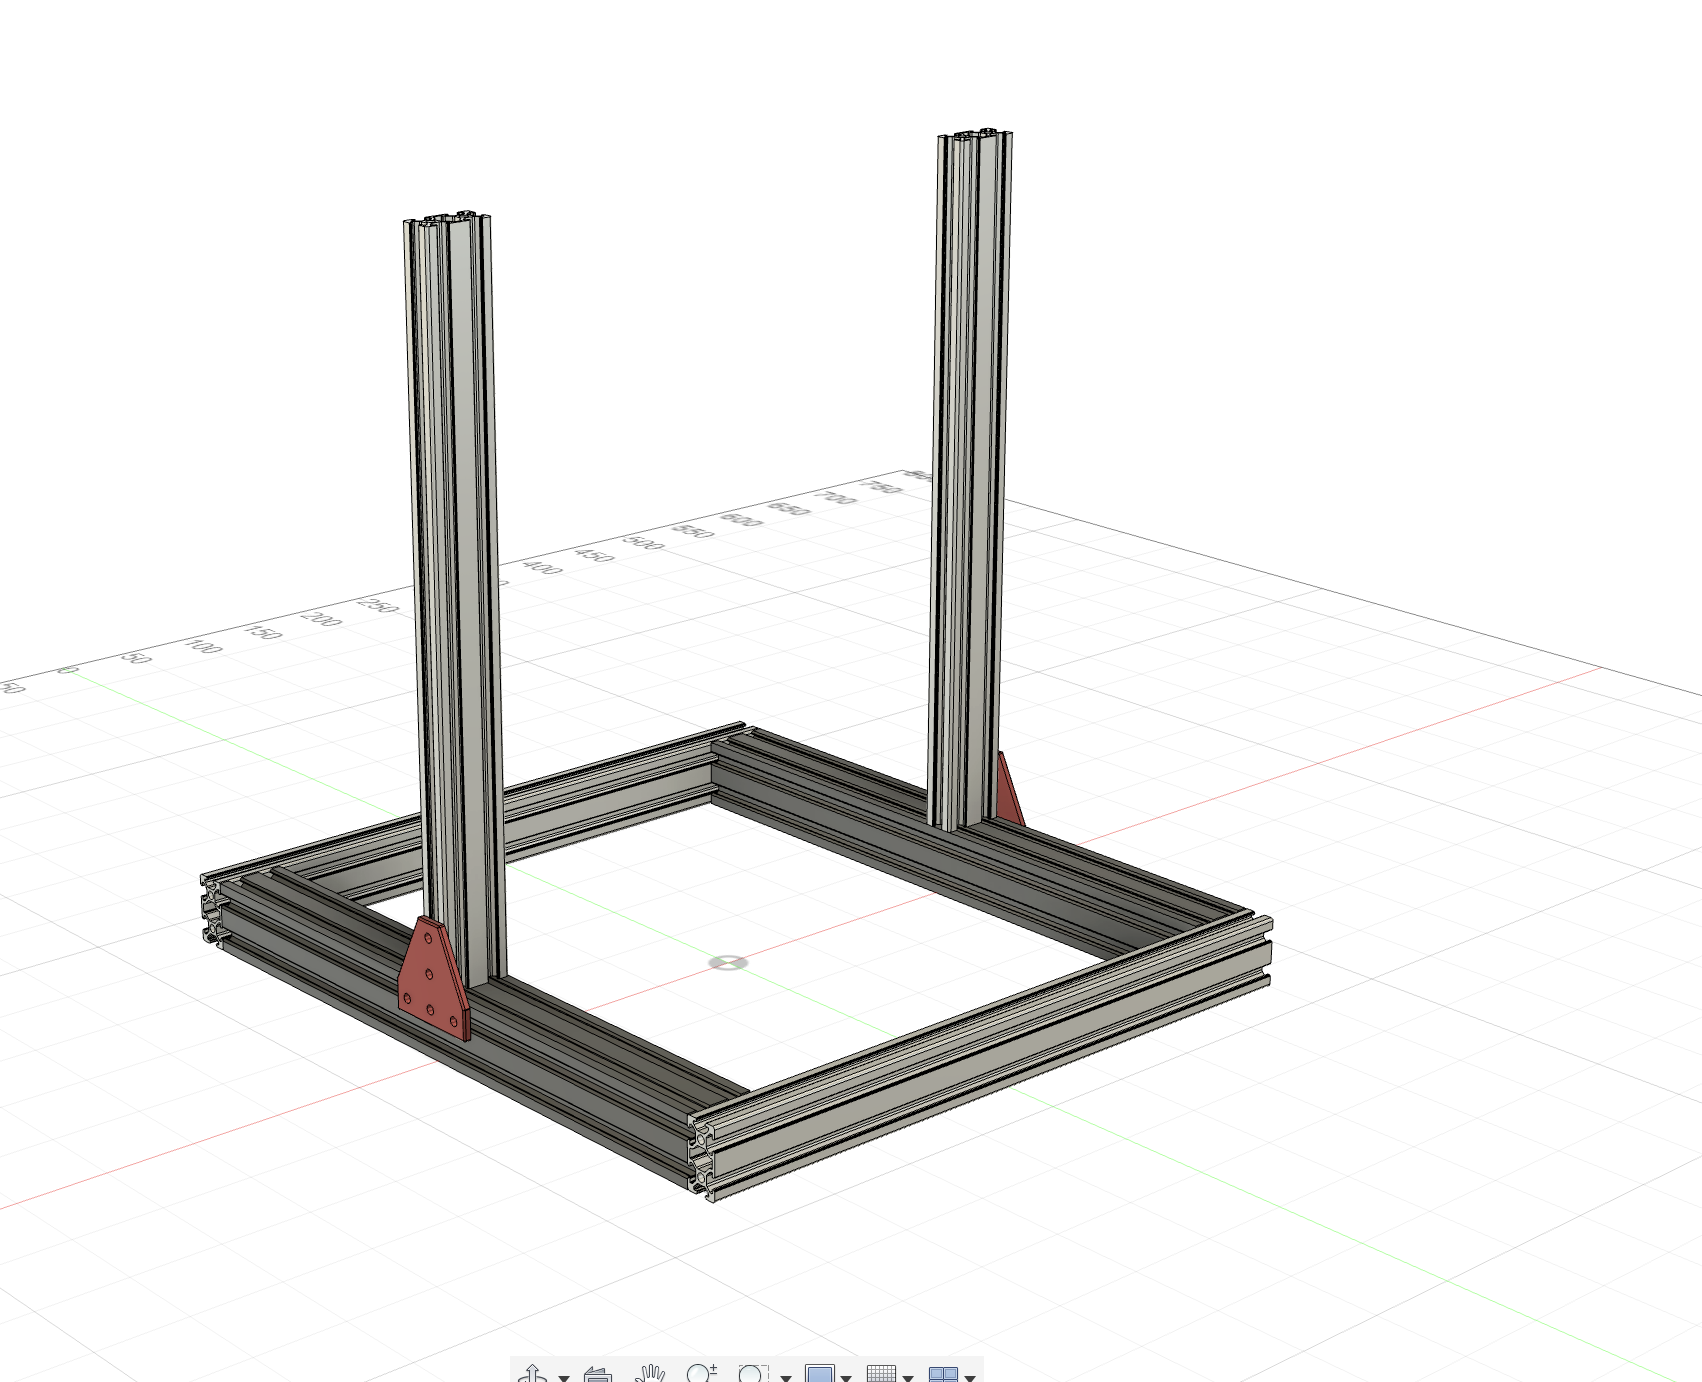
30th May (day 3): finish frame and almost complete y-axis
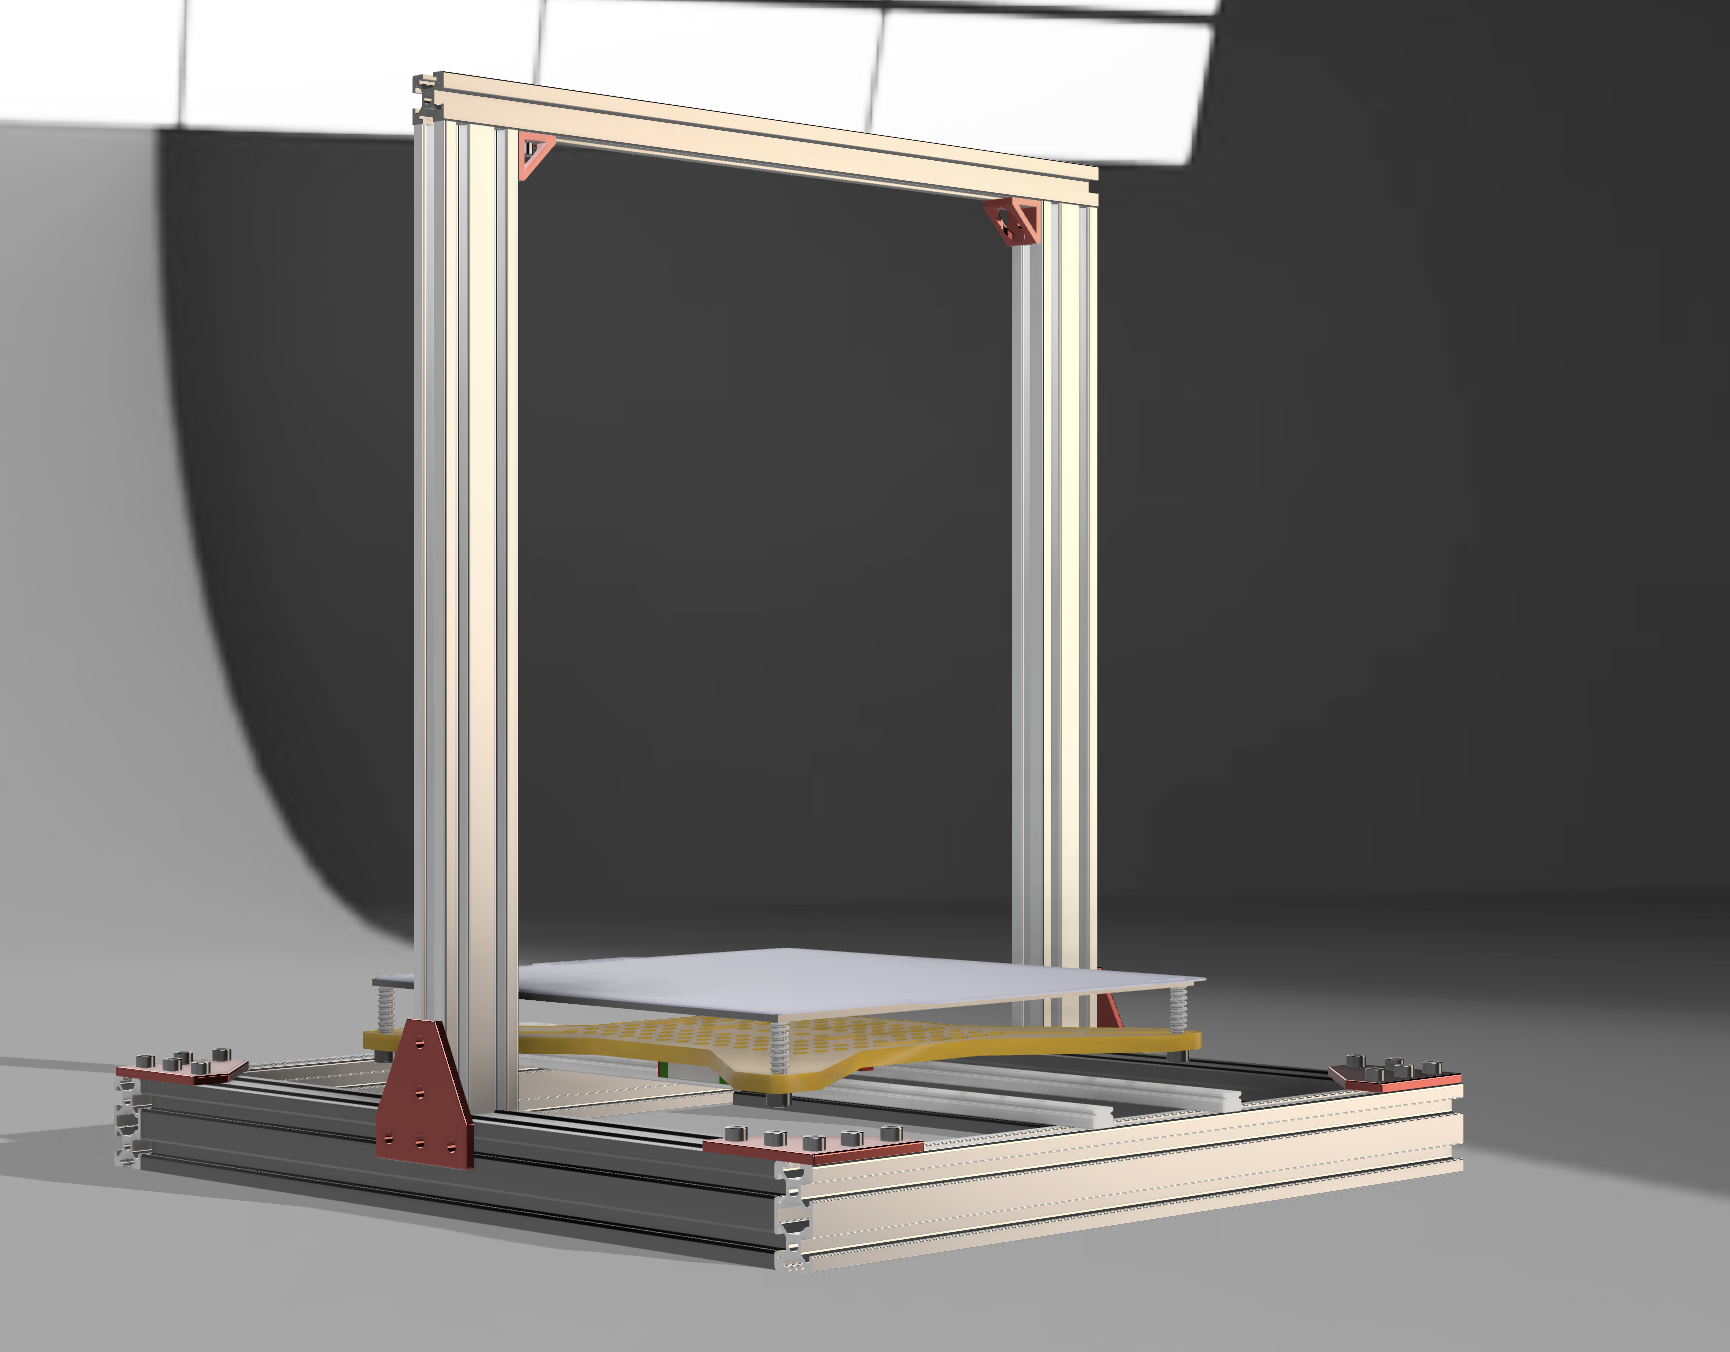
i started the day with finishing the the frame. I ended up using a mix of 4040s and 2040s for the base, and 2040s, 2020s for the vertical part. after finishing the frame, I literally had 0 idea how to proceed.
after a bit of reading, searching and watching, I thought to choose parts for my y-axis first. I ended up choosing the bed assembly, heatbed, build plate etc. I also did a bit of reading on linear rails vs rods for the bedslinger. I went with rails in the end. @Souptik on Slack helped me a lot in understand the working of the bed-slinger and provided some very cool youtube videos. I finished adding the carriage, heatbed, plate and rails.

Total time spent: 7 hours
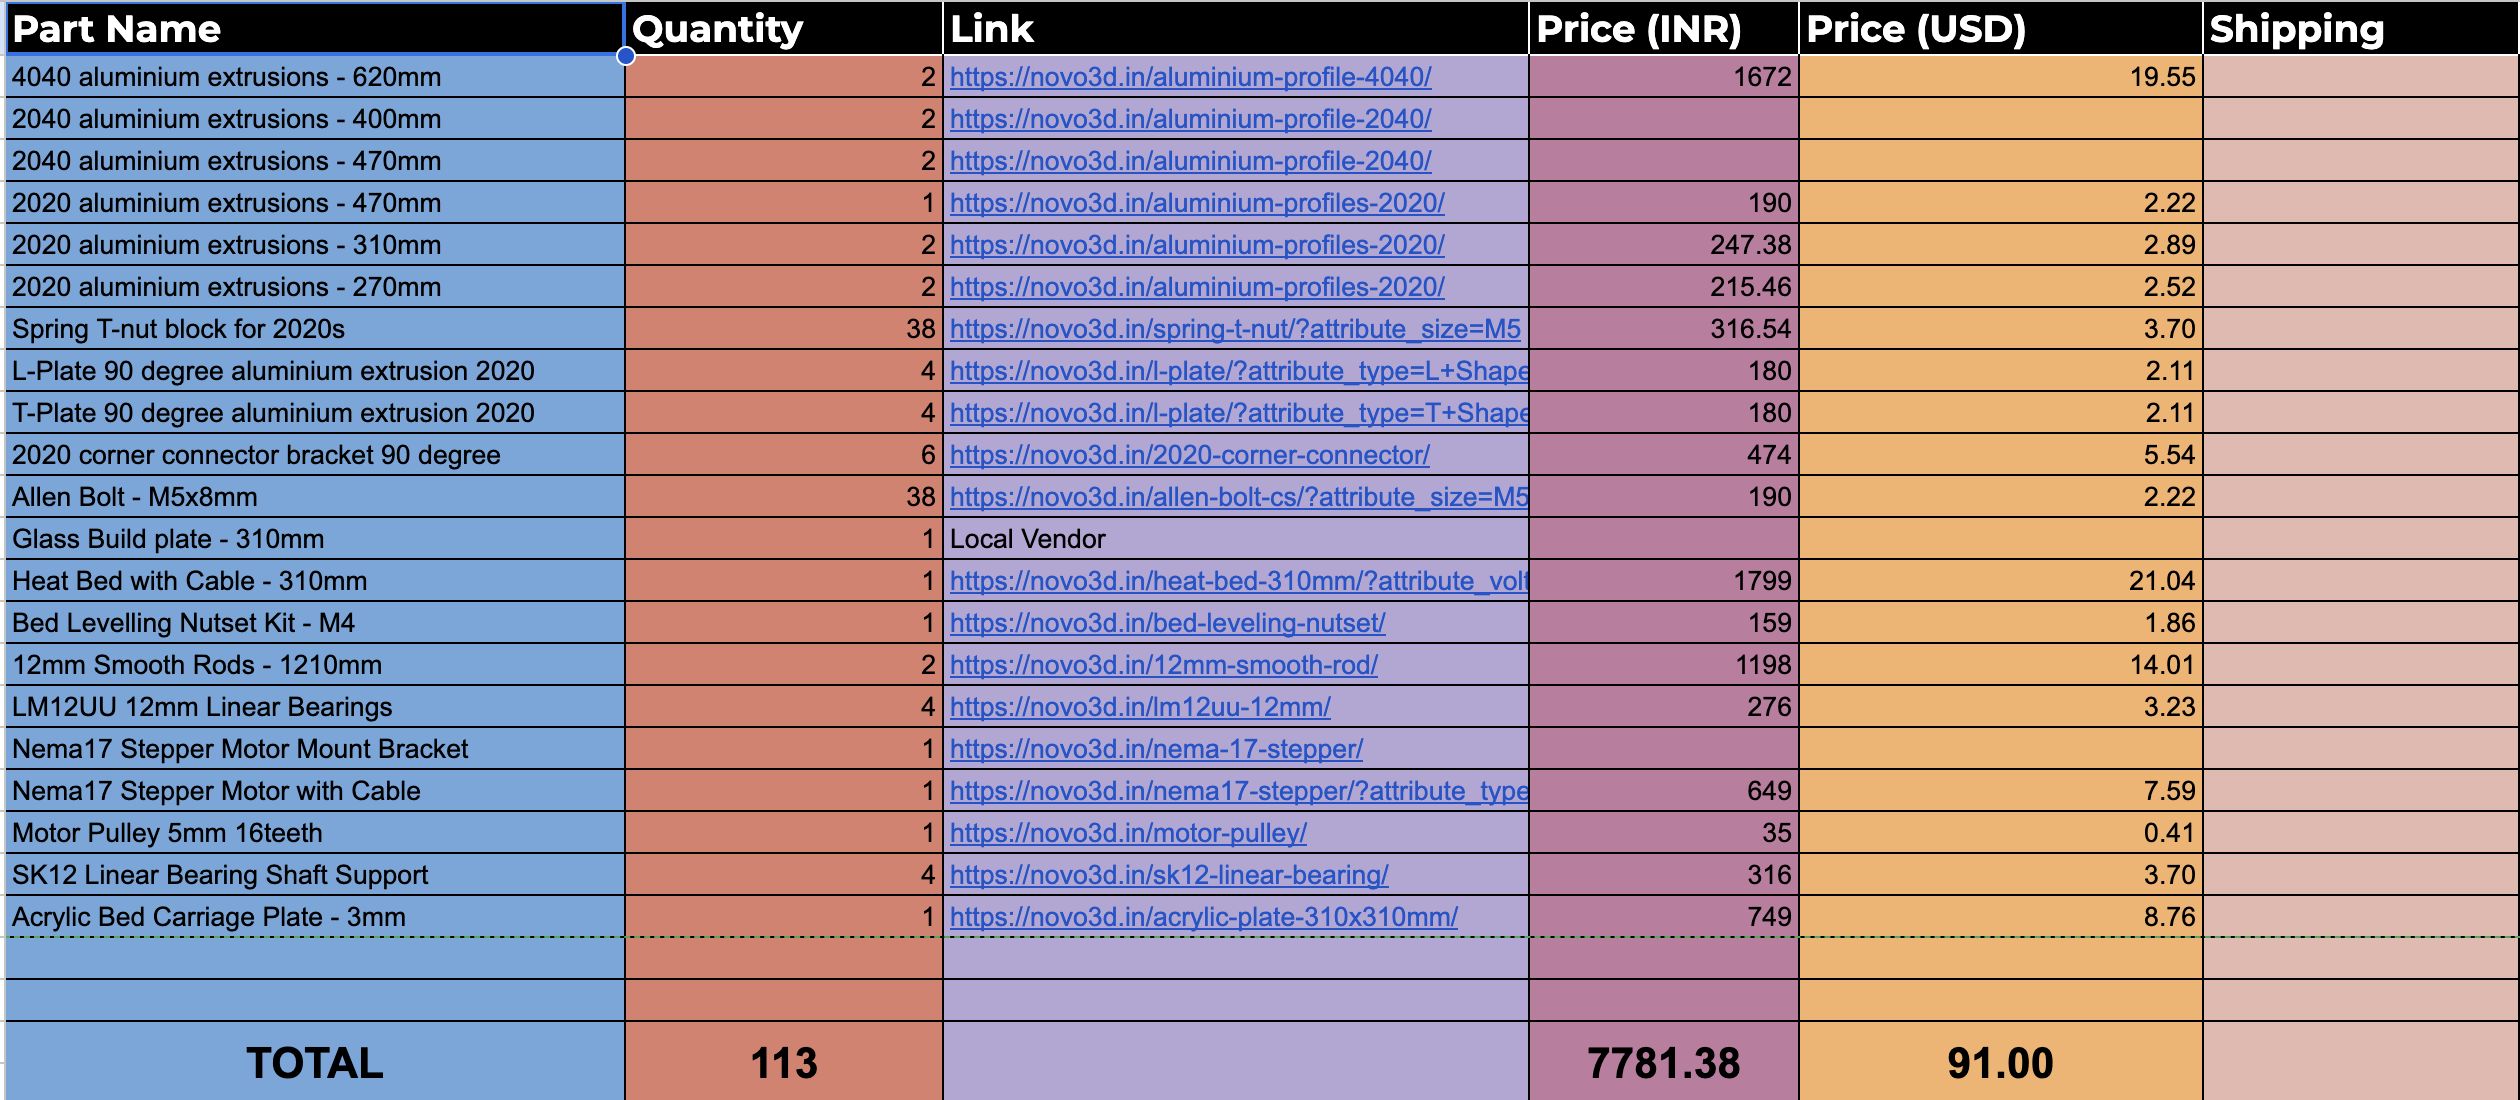
31st May (day 4): making the BOM & change of plans
I though of starting on the BOM today, and I was able to find most of the parts and already utilise 1/3rd of my budget 😭. However, I could not find a perfect sized heat bed on Indian sites. I decided to go with a 310mm x 310mm heatbed. But, my build plate was just 256x256, that would be a waste of heat and power :/ so I ended up changing my build volume to 310㎣.

Total time spent: 2 hours
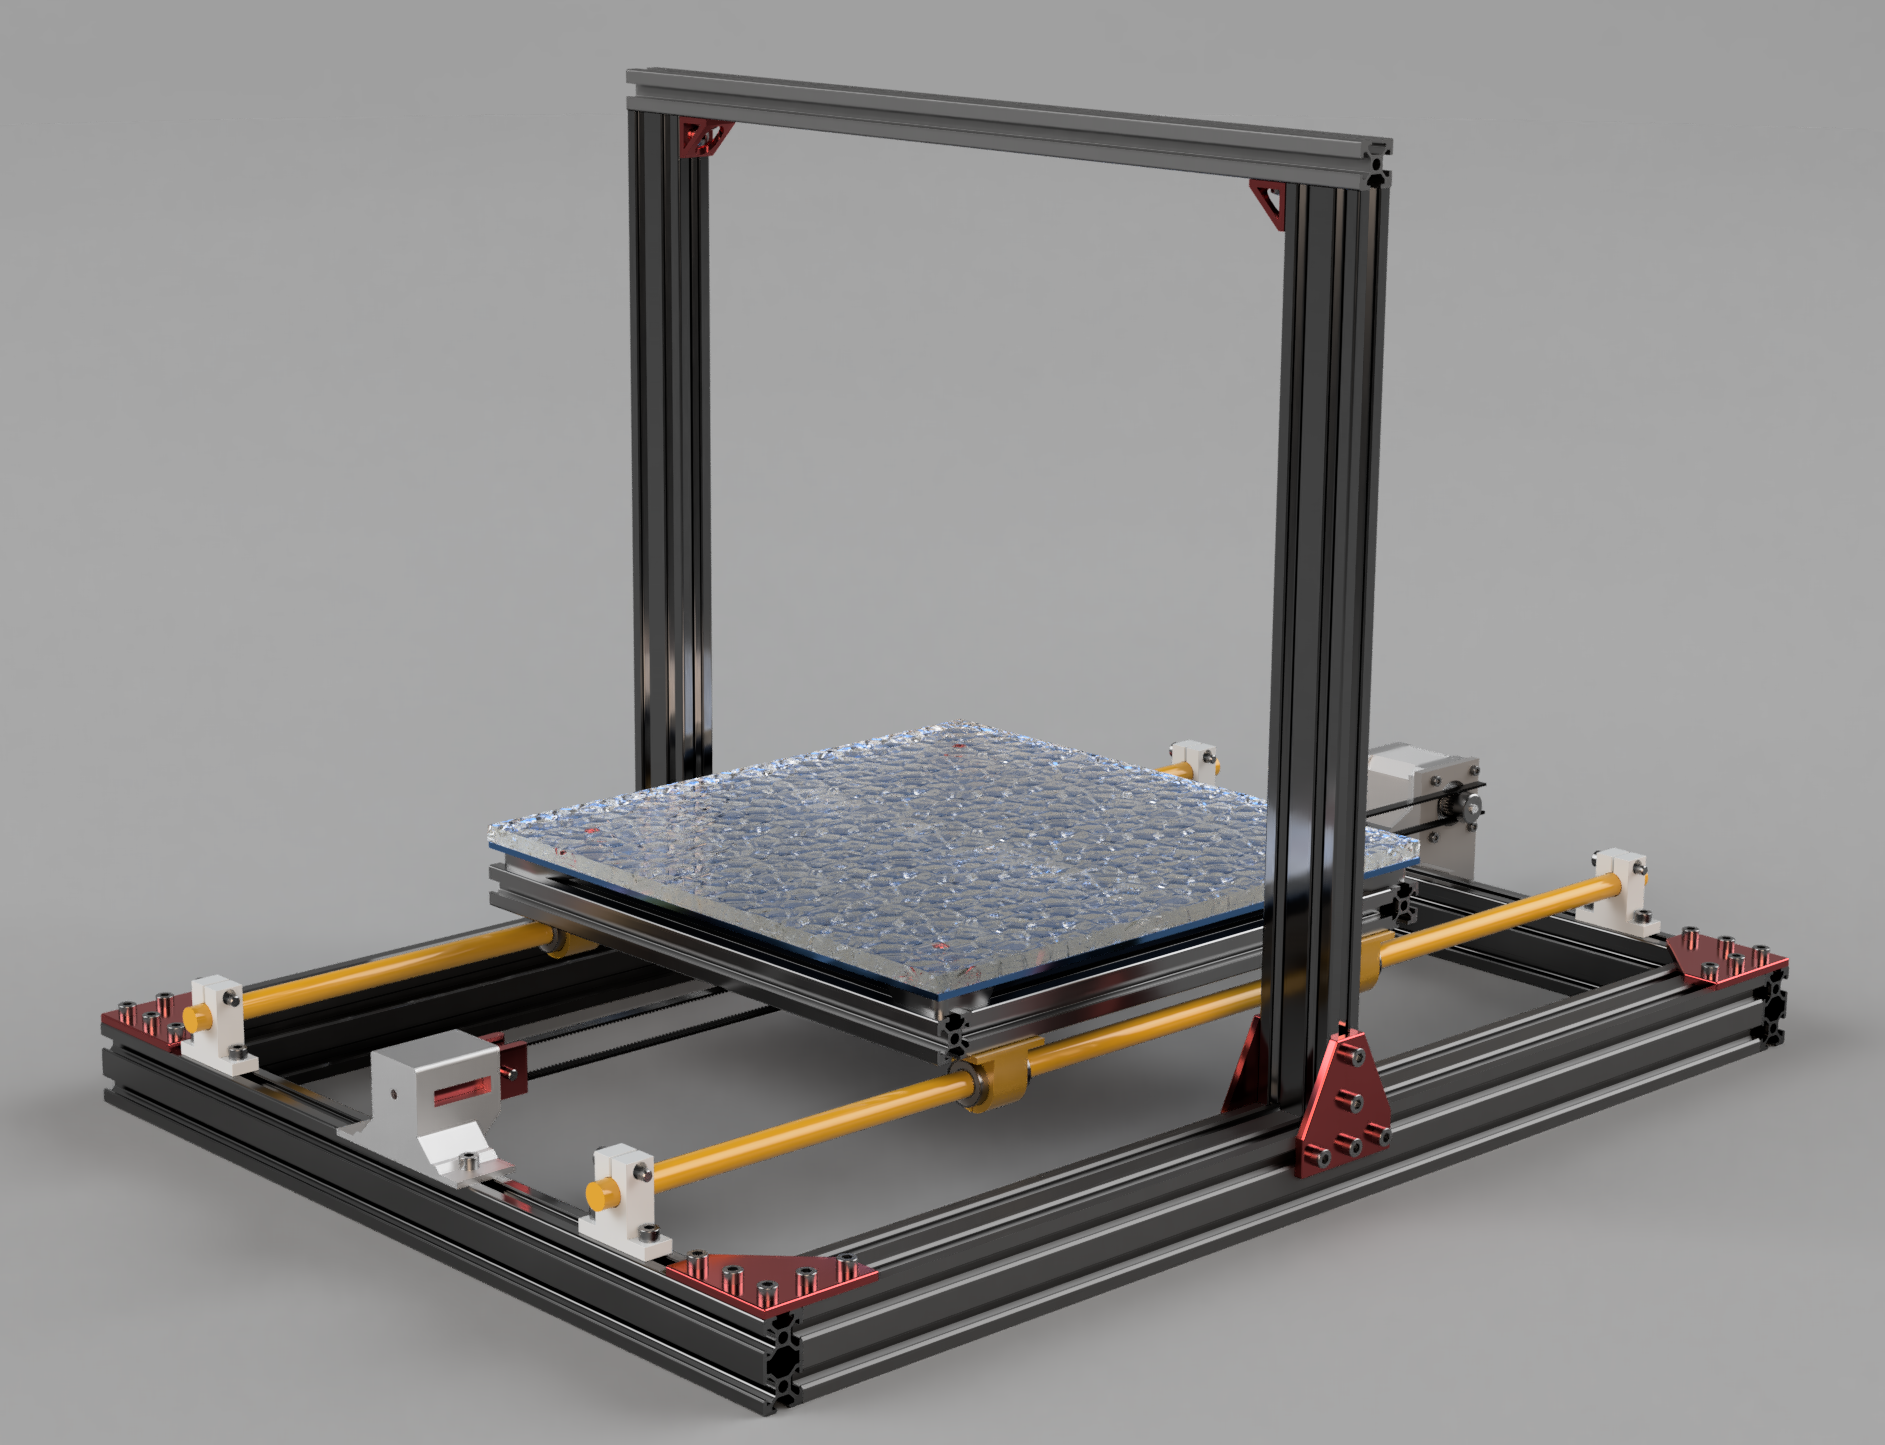
1st June (day 5): - more change of plans & pulley system
I initially thought of using linear rails for the y-axis bed slinger, but my BOM was already so pricy even though I wasn't close to being done. and the fact that rails are so hard to setup for me 😭. I chose rods instead of rails, changed my setup. Removed the original aluminium bed carriage I was buying, and used a square of 2020s instead to make it even cheaper. I installed the stepper motor, did some research on all the parts I had to use, and added the pulleys, belts, mounts, made some custom to be 3D printed mounts. And ended the day with being told that my part is un-printable 😭

Total time spent: 6 hours
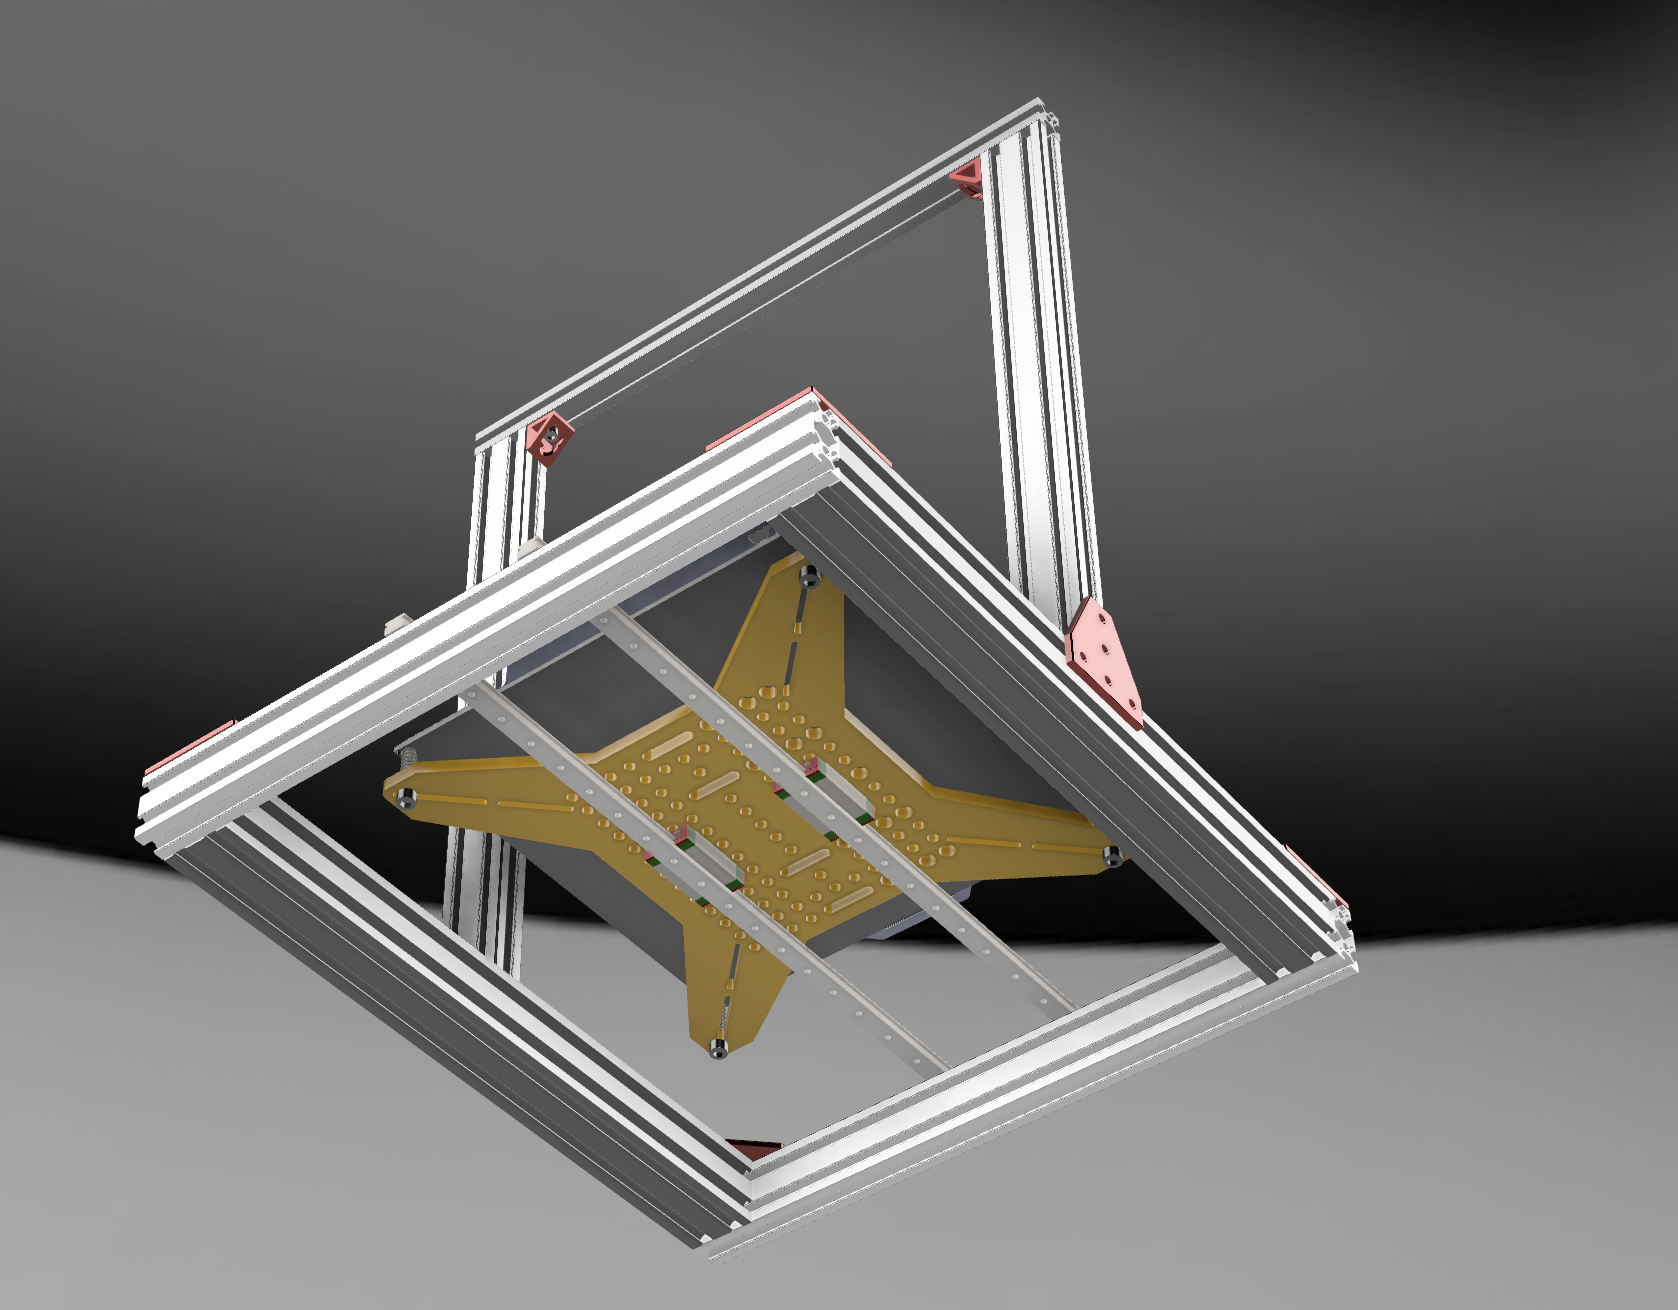
2nd June (day 6): - finish bed & pulley system
I spent most of my time today making the new updated BOM, I hit $90 so far which is way below what I expected. I'm also designing a diy belt tensioner for the idler-pulley. I also finished the bed system, with the 2020s, bed carriage plate, heatbed and build plate. I also finished the custom 3d printed holder for linear bearings on the 2020s.

Total time spent: 4 hours
3rd June (day 7): - finished y-axis
started the day, with adapting a idler-pulley holder to my design which is also a belt tensioner, I had to make a few changes to the holder to suit my orientation. cadded most of the fasteners except nuts, to make it easier to make a BOM for them. I also adapted the motor mount to suit my settings, and spent an hour tryna figure out how to connect the belt to my carriage 😭. I ended up using a small plate to hold them together.


Total time spent: 6 hours