
Mechanical PicoBoard W
A wireless bluetooth keyboard made with raspberry pi pico w
TOTAL TIME 46HRS
June 28th:
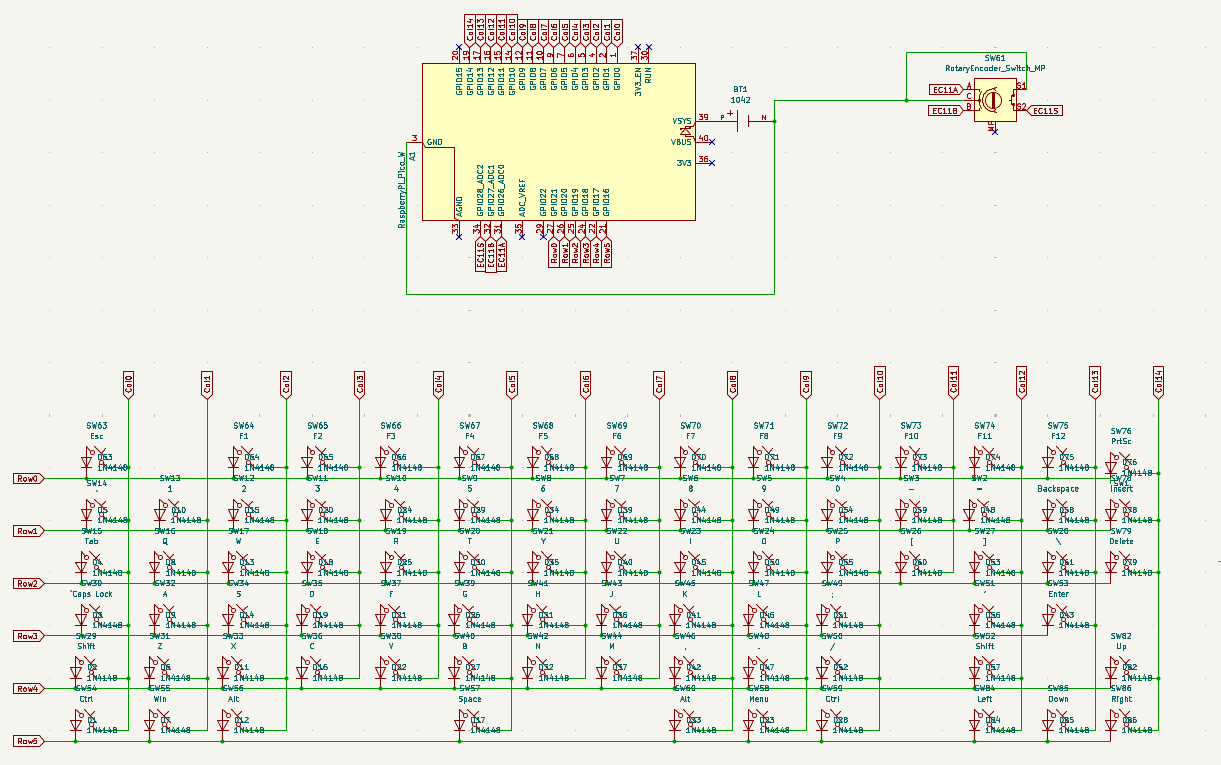
Today i started by making the basic schematic and researching on how the keyboard will actually work over bluetooth.

My initial impression was that ill have to program pico via arduino ide for ble, but it turns out that kmk has support for ble. Will probably save me a lot of trouble later on when making the firmware.
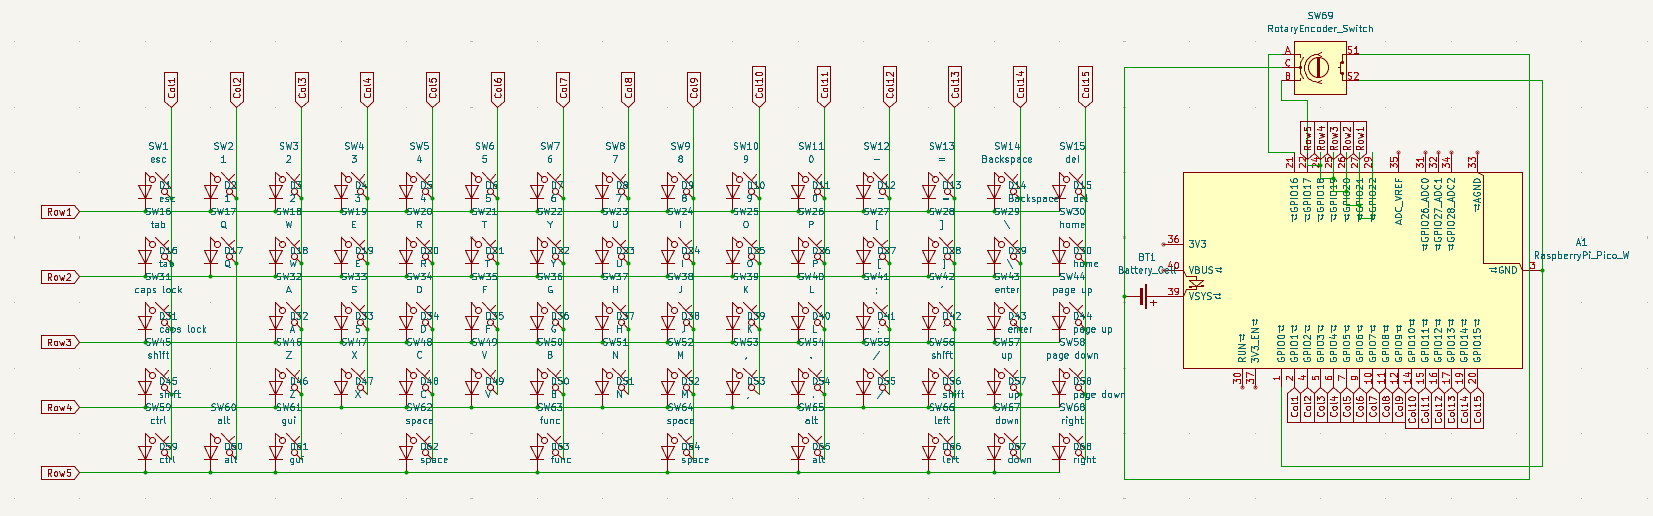
Also man did it take time to get all the keys in the schematic.
I will pretty sure change the matrix a lot while ill do the wiring in the pcb editor so i didnt think much about them right now.
Time Spent: 5h
June 29th:
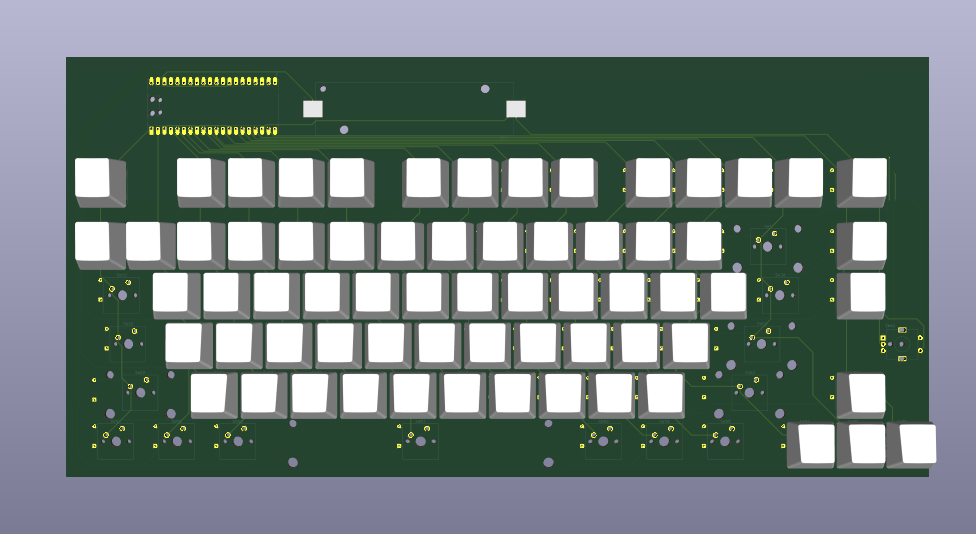
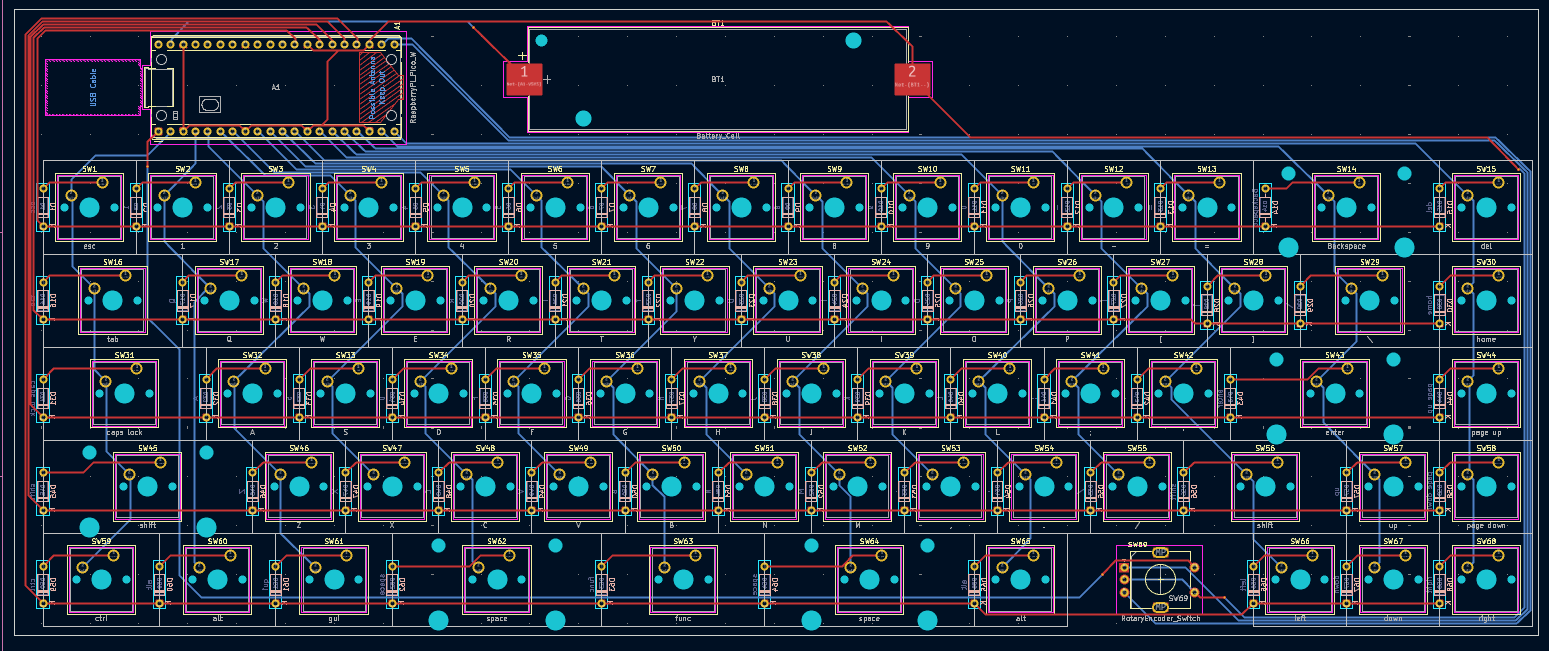
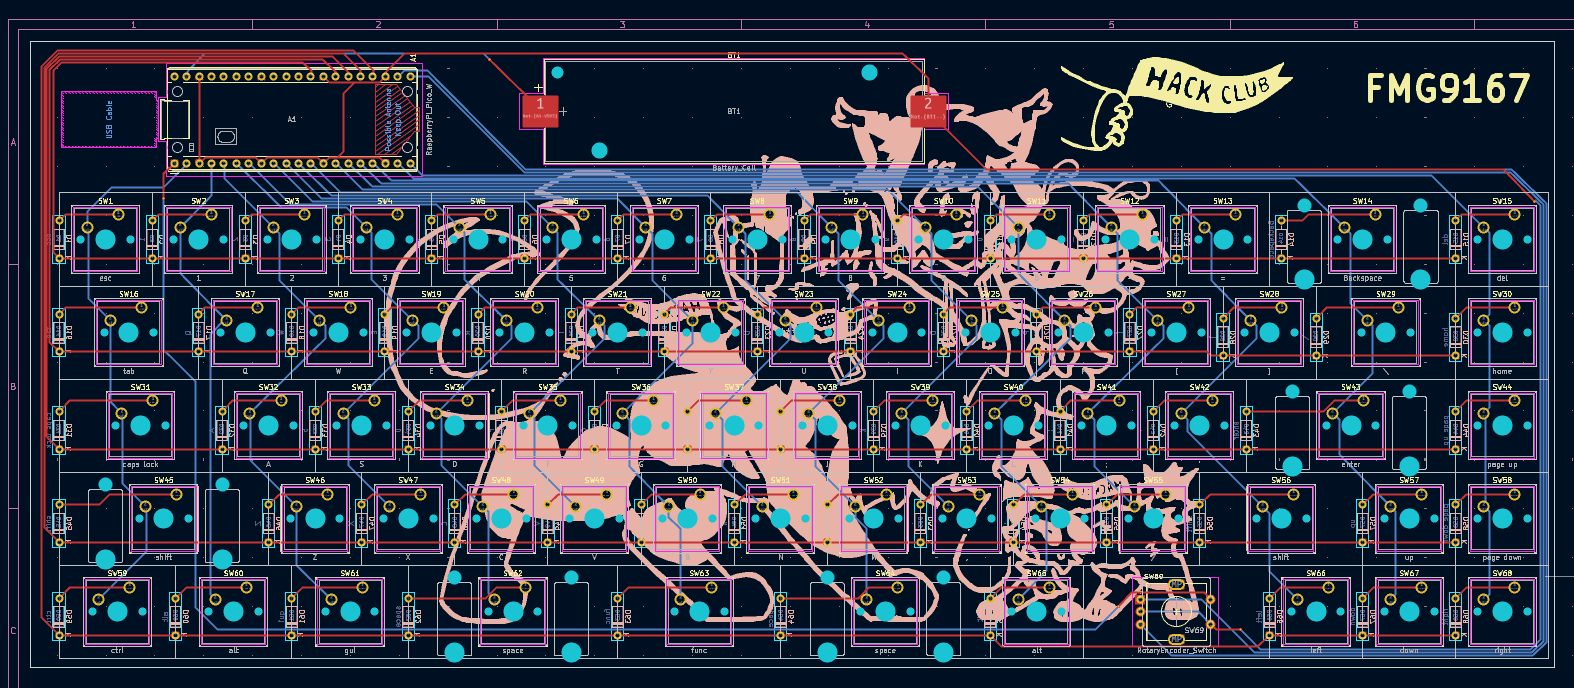
Today i started adding stuff on the pcb. I remembered that i can add the dxf of keyboard which helped a lot in placement of the keys, still it took a very long time (80 keys). Also i found an smd battery holder so im gonna be using that. Tomorrow ill probably work on the connections and if time remains, on the silkscreen art.
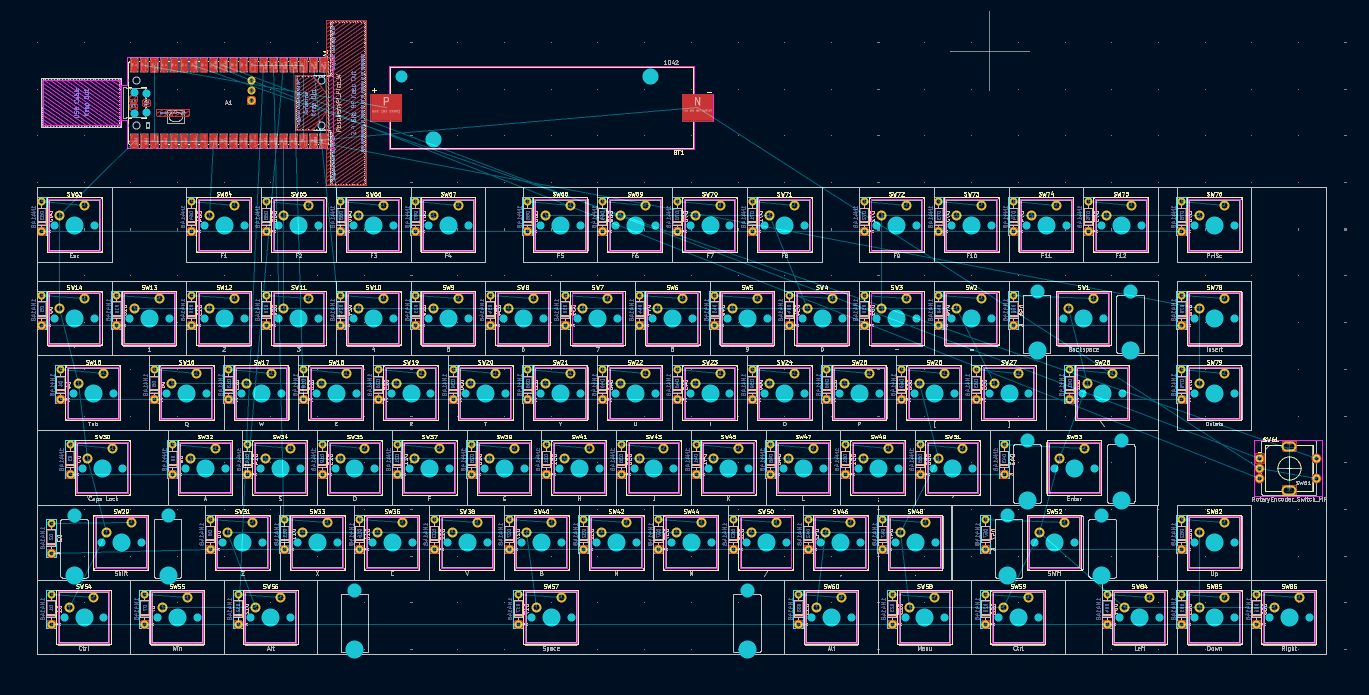
So many of the keys did not align with the dxf it was sooo painful having to fix most of the keys placement.
I also searched for some keycaps to use. Couldn't find anything cheap. Will either have them 3d printed or if i find some cheap enough keycaps ill use those.
Time Spent: 4h
June 30th:
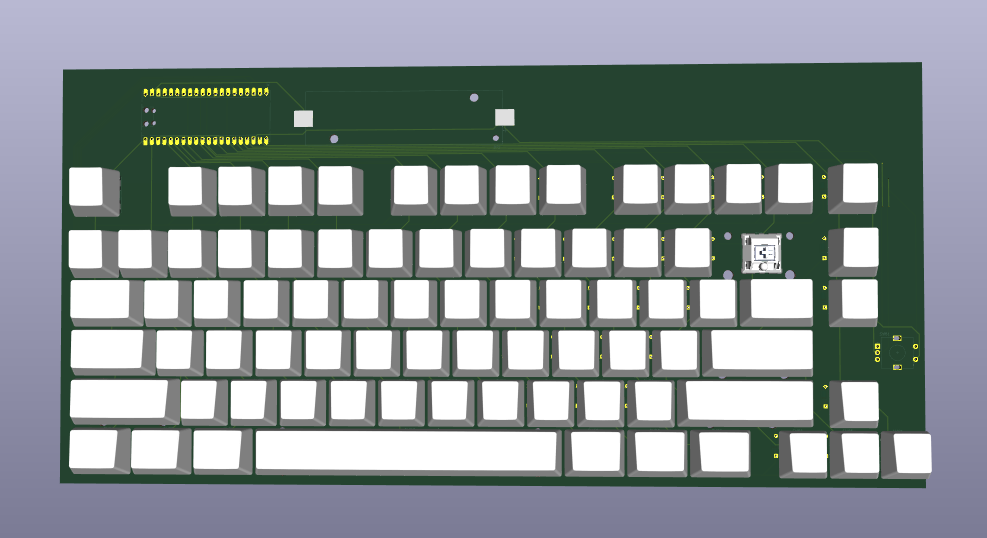
Today i wired all the diodes and switches. As i foreshadowed, i did change the schematic. But in the end i just gave up and created these long diagonal columns.
This time i actually used both the front and backside of the pcb, unlike in my macropad.
Now that i look at it, i think the pico and battery would have been better off beside the arrow keys.
Time Spent: 4h
July 5th:
I was pretty overwhelmed with studies for the past few days so couldnt do anything. I did check out some other people's journals and realized that i am writing too less stuff, so ill try to add more stuff.
Today i am adding the models to my pcb footprints for an easier cad later on.
Found some good models on gradcad
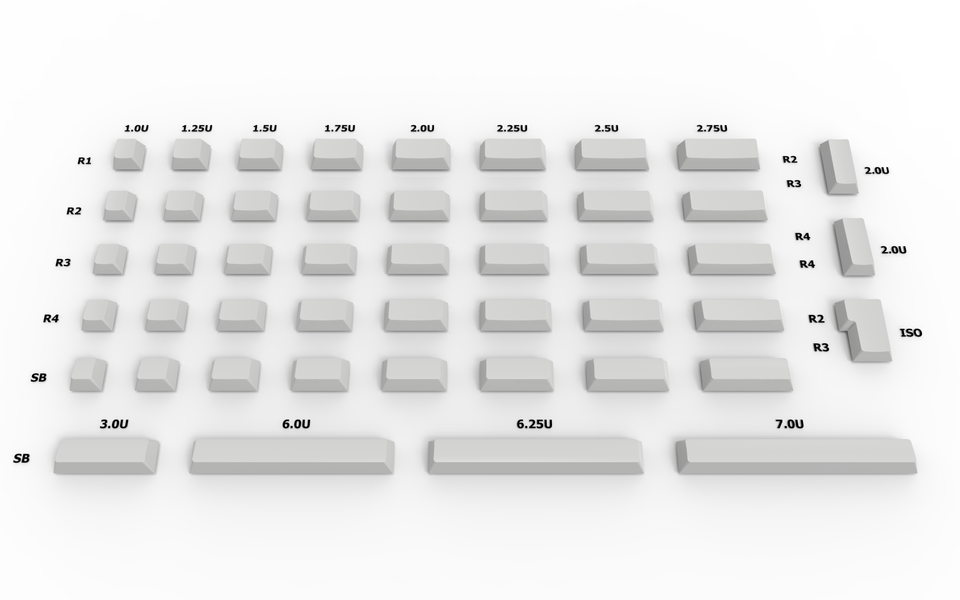

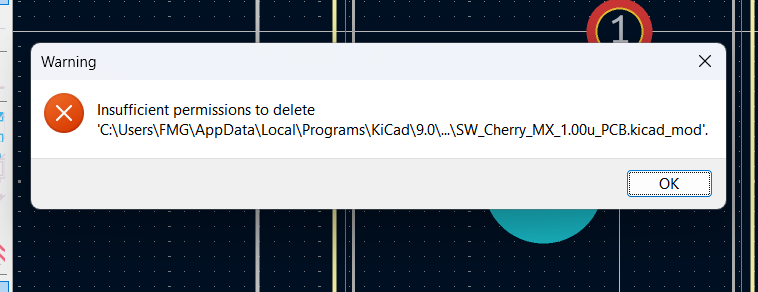
I started first with the 1x1 keys as they were the maximum in number. Upon trying to save, it repeatedly gave me permission error, which i bypassed by saving them as new footprints.
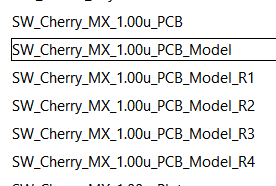
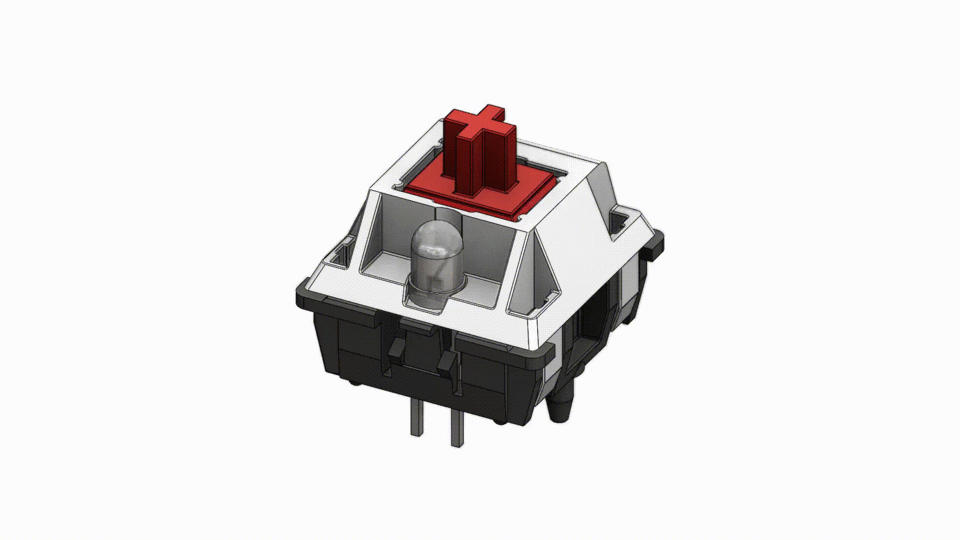
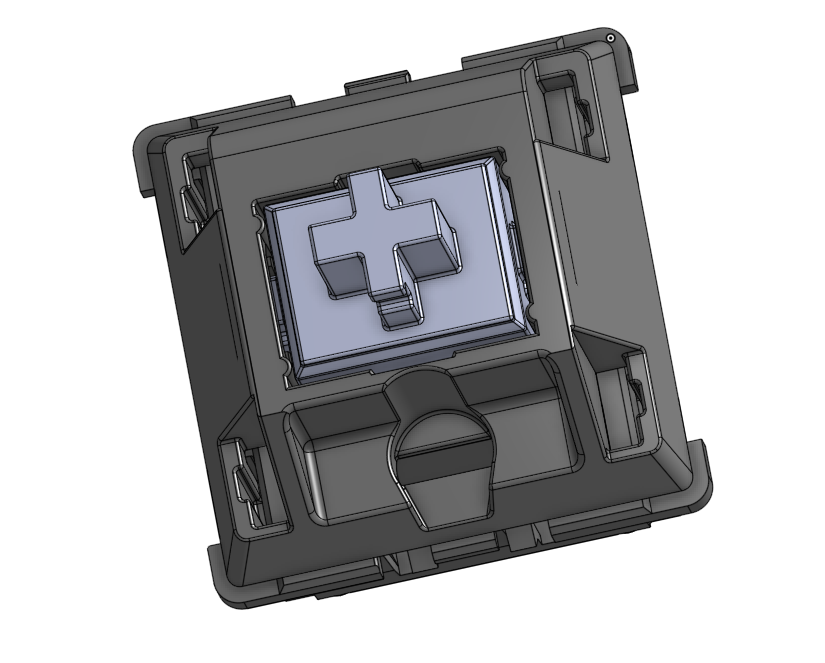
The Model only have the switch whereas _ModelRx has keycaps corresponding to their row.
After this I took a short break, and then started with the rest of the keys
Since i cannot import stl, i first converted all the remaining keys to step, and then added them to their respective sizes and rows.
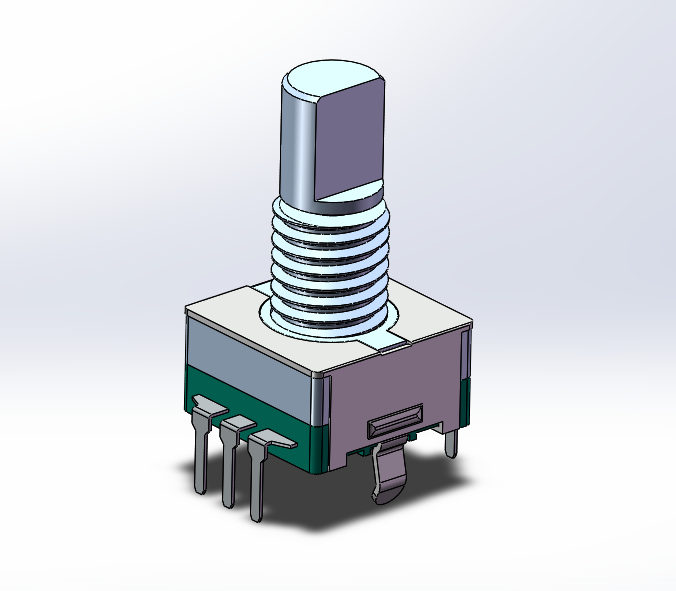
I was pretty happy with the result and thought to myself that maybe i forgot to add the keycap for backspace and didnt think much about it. Next I started the pico, encoder and battery holder models.
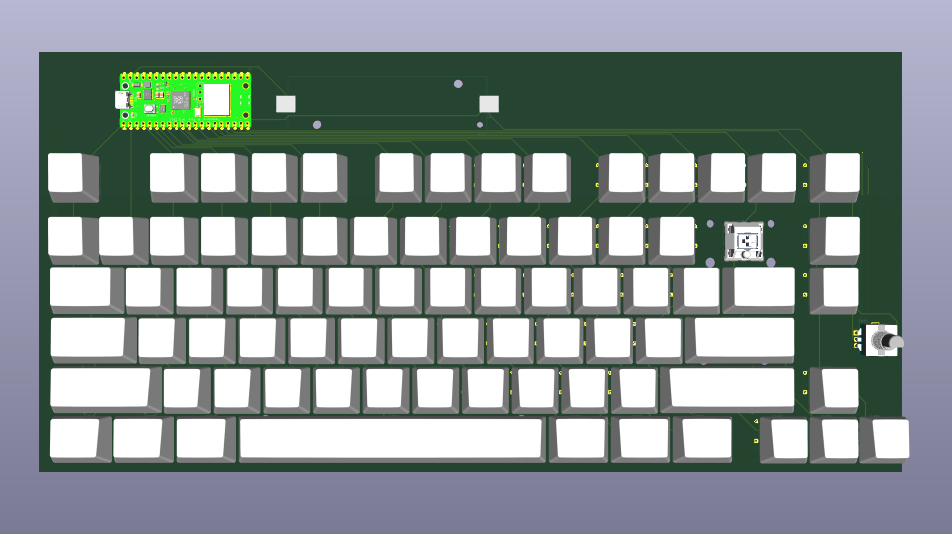
You might have noticed that the battery holder doesnt have its model and the backspace key its keycap. I kept trying again and again trying to fix but they remained stubborn.
I then got frustrated and restarted KiCad, still the same.
Then i calmed myself down, switched to a different model for each of them. It updated. Then i switched back to their actual models AND IT FINALLY WORKED.
[Ignore the knob i didnt know how tall to make it T-T]
Time Spent: 6h
July 6th:
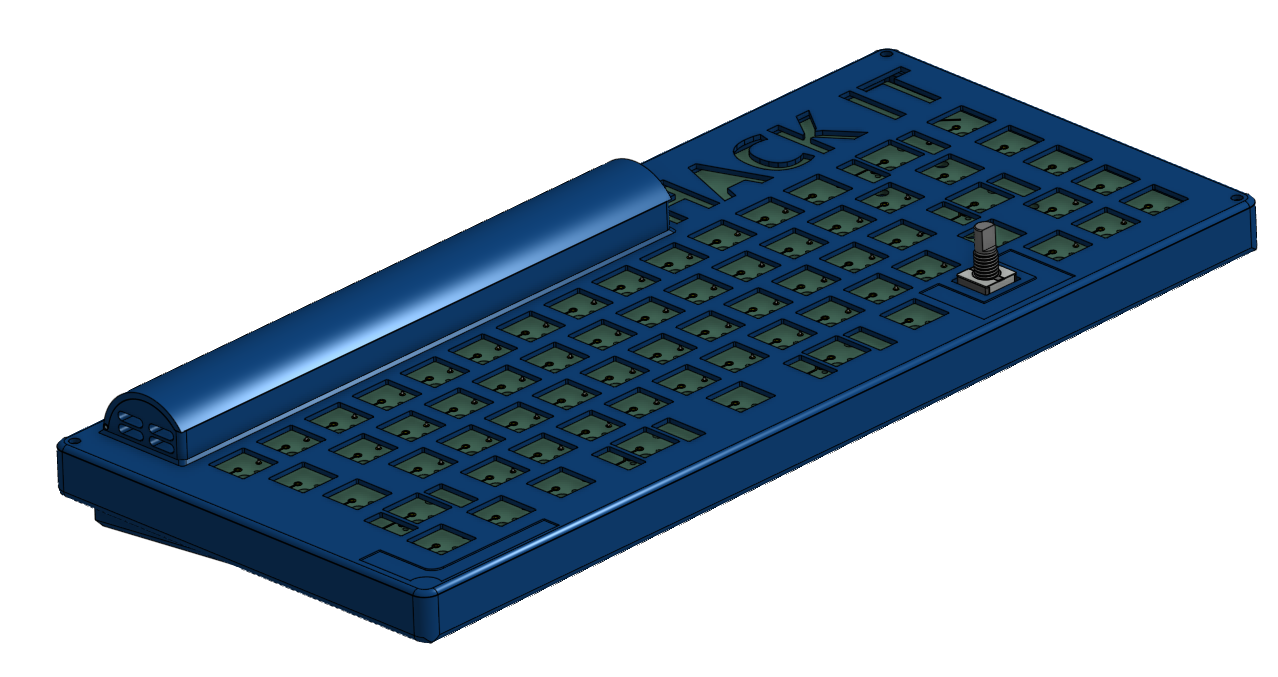
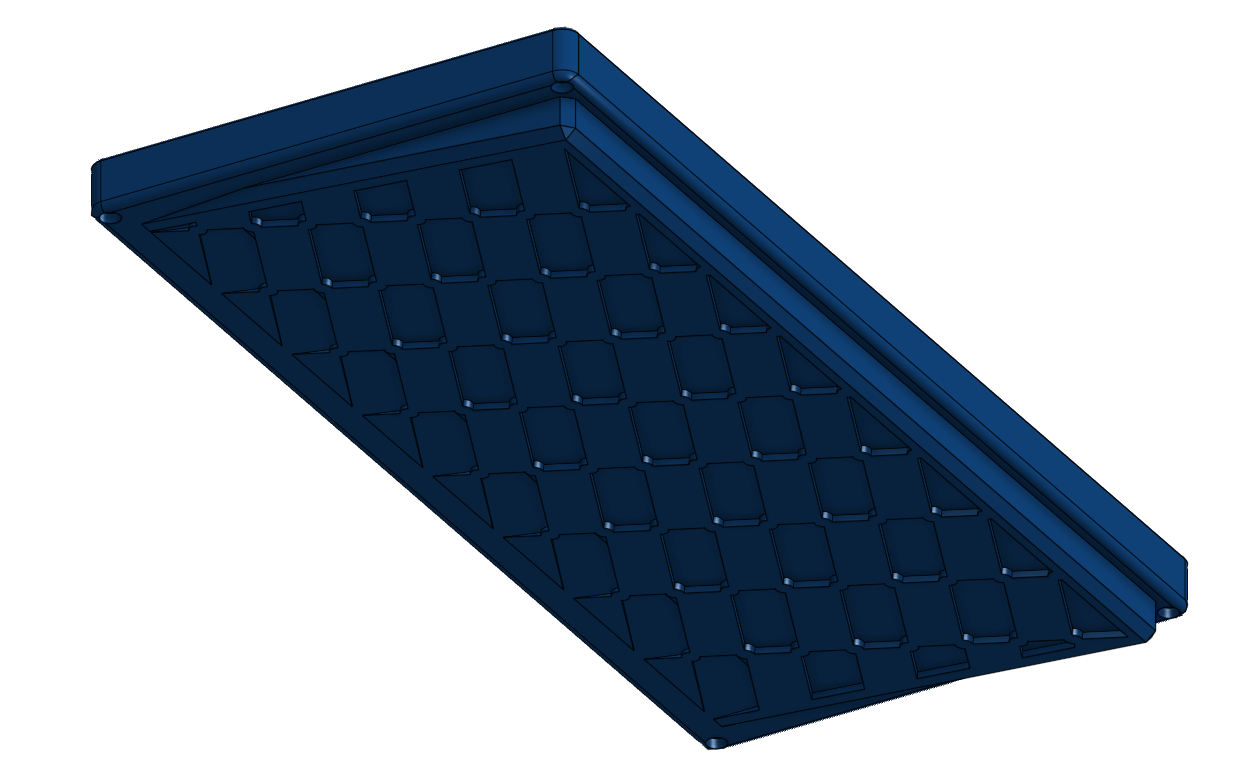
Starting the case today.
The basic outside is done, but the pcb does not look good in there
aaaaaaand i scraped it cuz i couldnt get the dimensions correct. This time ill do the dimensions without already having the pcb imported as i cannot create rectangles off of the pcb's corners.
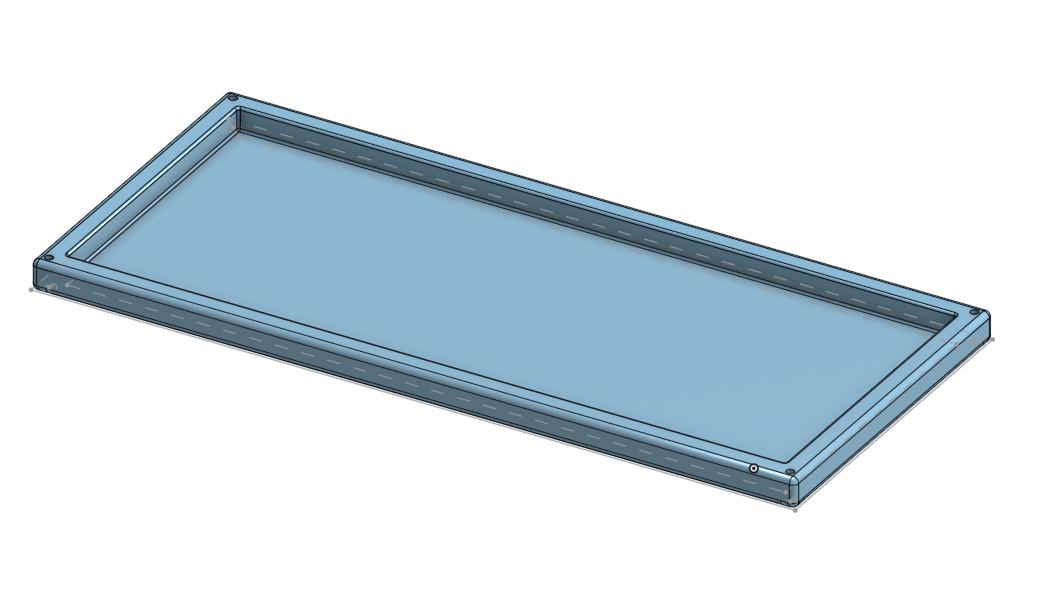
I finished the bottom case i think.

I will add a slot in the top cover through which ill change the battery. It will be covered with an acrylic sheet.
Also i found this new thingy which makes curved edges.

I did that by going in the fillet option and setting corner type to Setback
Overall pretty happy with todays work
Time spent: 5h
July 16th
It appears that my windows partition's mft got corrupted and i am unable to recover my data. So i will be restarting from scratch, and make sure to backup the kicad files as well.
Time spent: 0h
July 18th
Today, my plan is to redo the full pcb and probably finish the model for the case. My previous attempt taught me a lot so I think I can finish it today itself.
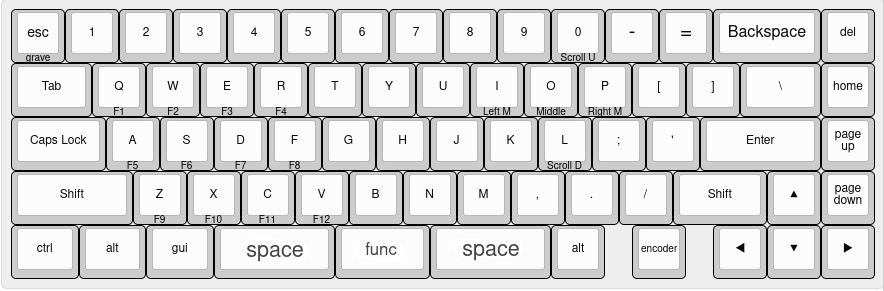
This time i decided to change the layout a bit as well. The function key will switch the keys with front legend to those keys, like function and w will be F2. On the right side are controls for mouse. I might change and add things to move the cursor as well.
Schematic is done. Forgot which library I used for the cell holder, but then realized that I had just used a battery symbol (checked previous entry).
Time to start making the PCB.
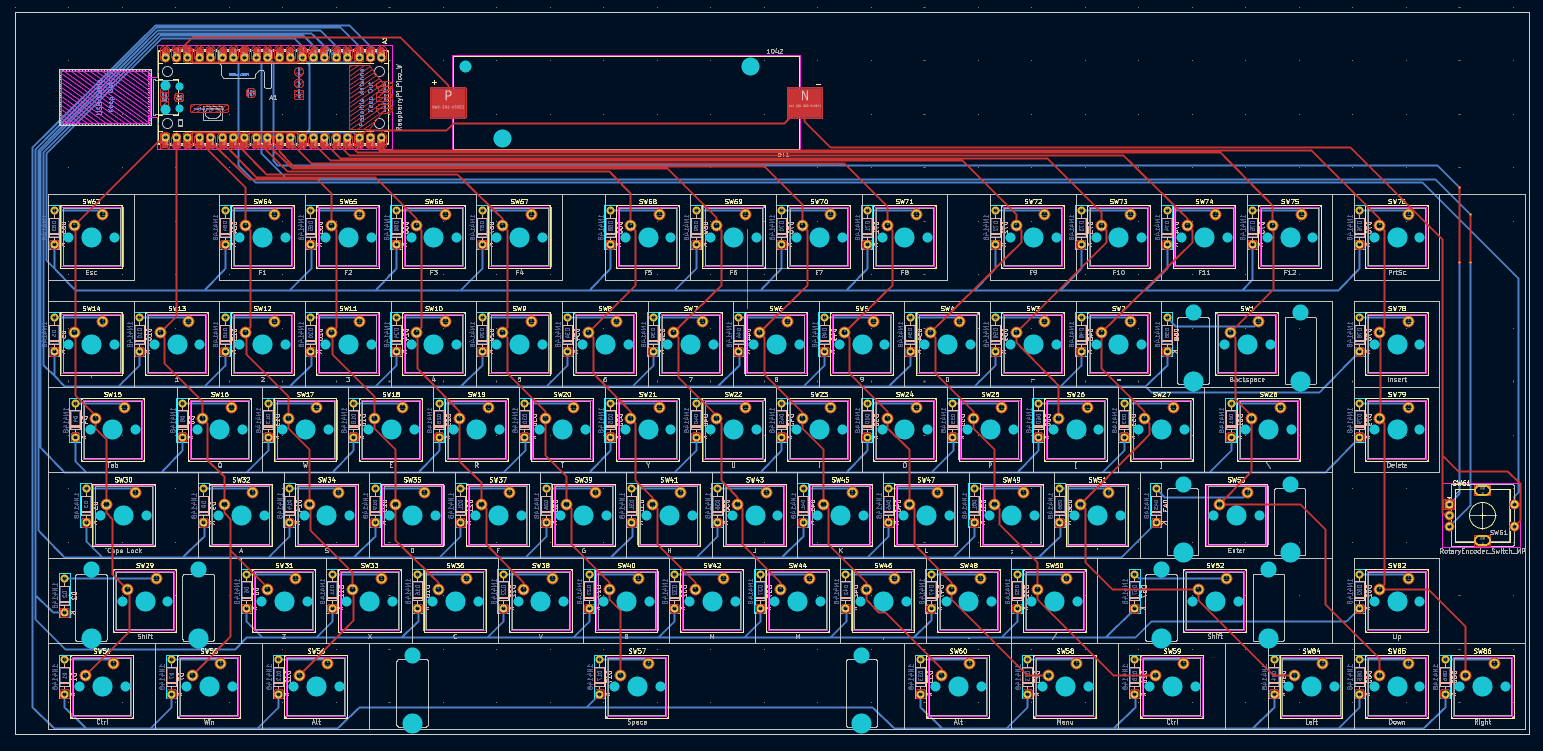
It was faster this time as I didnt think much about symmetry of diodes and just placed them. Routing was fun still.
Finished making the bottom of the case. Added a bit of incline as well for better hand positioning.
I am pretty frustrated by onshape cuz idk how to use it well so i am going to download fusion360 anyway I find. I downloaded VMWare and installed fusion360 there :). Ok i spent a long time trying to make it work on vmware but it didnt so i am learning onshape only.
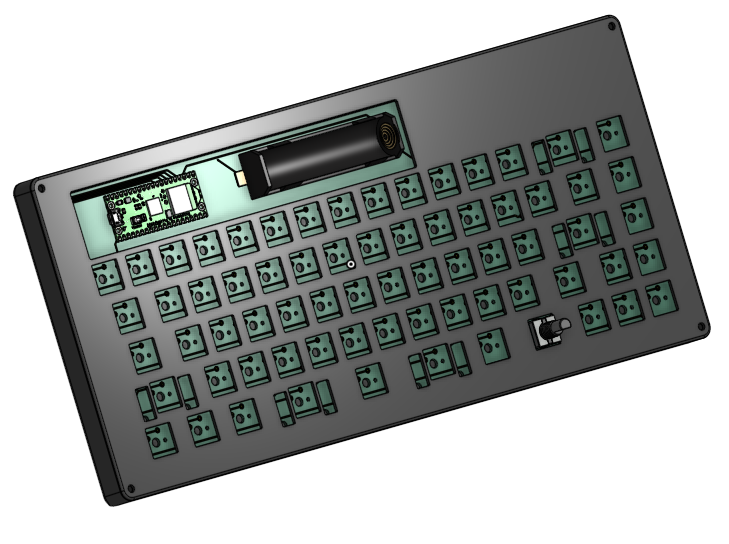
It took a long time but i finished the case. I couldnt add the keys cuz my pc couldnt handle 1170 parts T-T. I may add the keycaps tomorrow if I feel like it.
Time spent: 10h
July 22nd
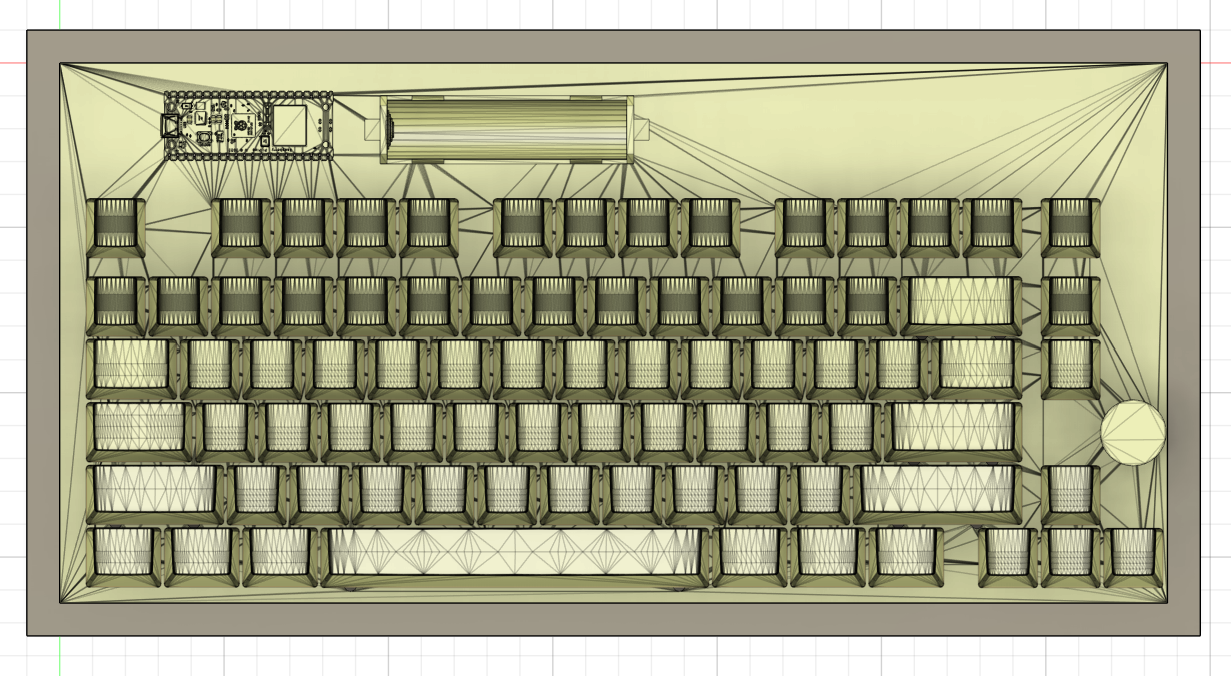
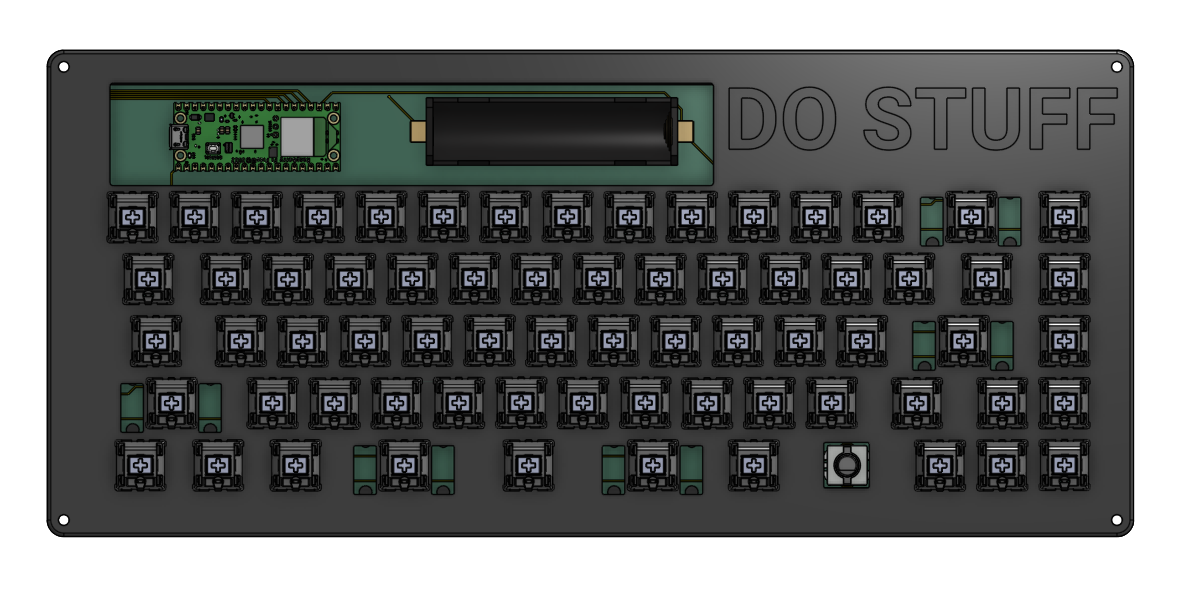
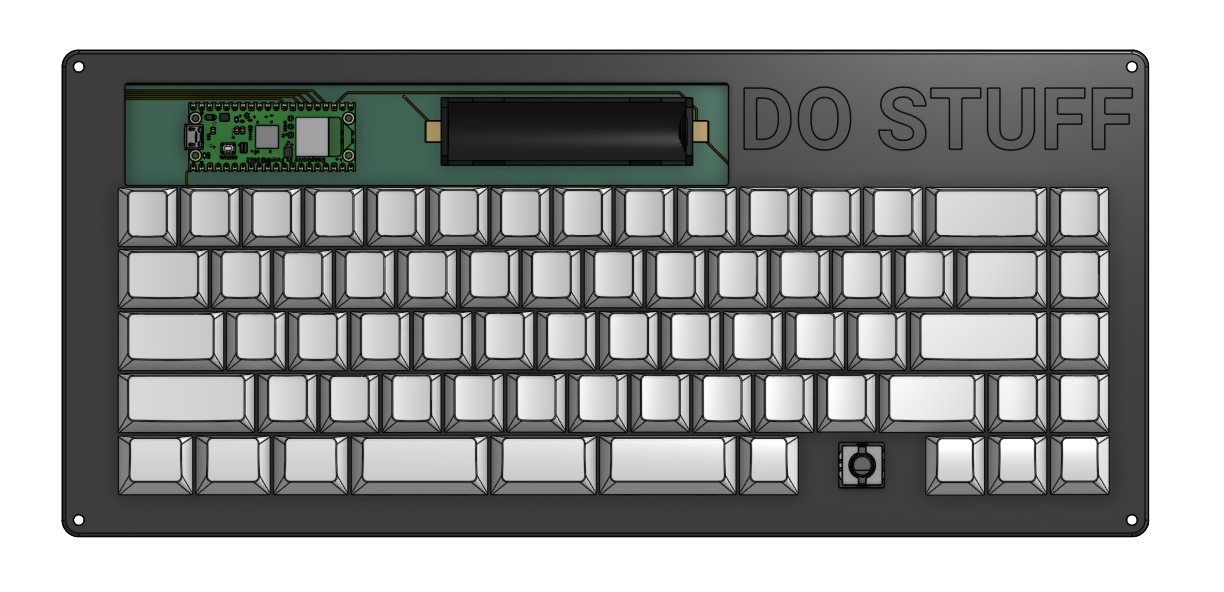
I couldn't do anything much on the previous days as I had back to back exams. Today I added all the keys and keycaps, and made a knob for the encoder
Adding the keys was simple, I just imported them into OnShape and then created 68 instances of it in the assembly.
 I can feel the models taking toll on my browser.
Then i added the keycaps, and this took a long time. I had to create different assemblies for each type of keycap like R1 1u, R2 1u etc. It was a very tedious process, I know there is an easier way but I am not experienced with onshape enough for that (and am too lazy to google). When I was arranging the keycaps on top of the switches, I had to hide everything except the row I was working of because otherwise it would LAG LIKE HELL.

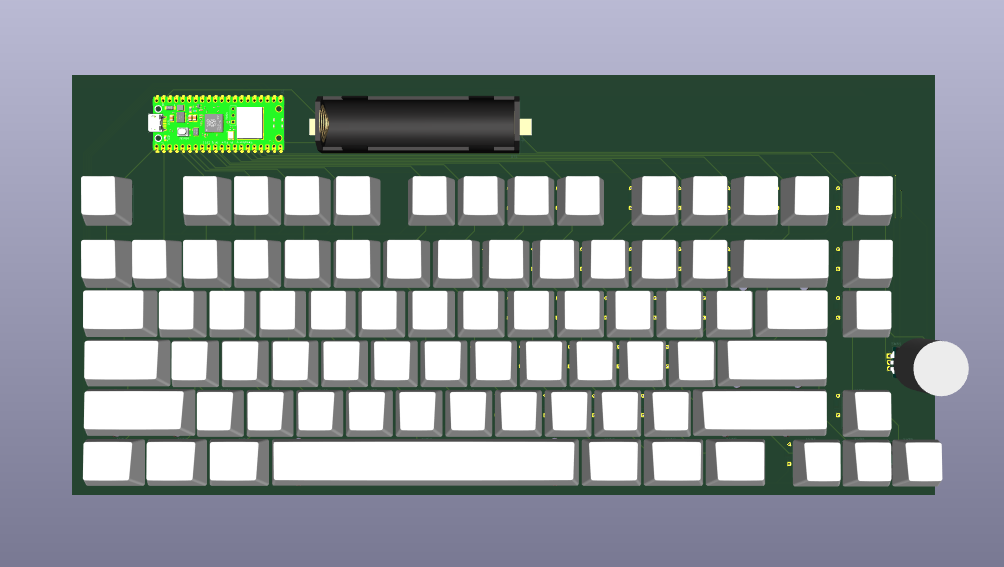
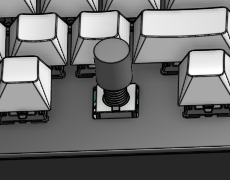
Making the knob was pretty easy. I just subtracted the encoder's shaft from a cylinder.
Also I added silkscreen art to my pcb :).
When I thought that I could finally ship my project, I remembered that I have made absolutely no firmware whatsoever. So I guess ill do that now. Oh right BOM is also left.
Ok so I wrote the firmware while referencing to the documentation. I will adjust it later when I actually get the board. Created the BOM.csv . I cant use AliExpress due to customs in India (They even blocked its domain).
Time spent: 8h
August 2nd
Case was too simple so I made changes
Time spent: 4h