
Gamepad
A hackpad but designed for the best level of gaming
Total Time spent making this: 14.5 Hours
What I spent this much time doing it?
I need to get life :(
May 21 - finding out about Highway and starting the project
Time spent: 3 Hours
I found out about the Highway to Undercity in the morning and decided that it would be really fun to do and signed up for it.
After I finished up with school that day I looked through Highway.hackclub.com and decided that it would be best to start of with a starter project and then work on a custom project. On the starter project page I only saw one option but as my current plan for the custom project was to make a custom keyboard and mouse I though that it was perfect that a hackpad was there.
I saw that they had a tutorial on how to make a hackpad on hackpad.hackclub.com and decided to follow it and see how to make one.
When I opened the tutorial it started off with making the pcb and this was new for me but I found it very intresting becasue I have some expeience with coding in languages such as Python, Js(I am currently learning it so I don't know that much but a bit), HTML, CSS. I also saw that it uses a software called Kicad, which was new to me and I was excited to see how to make a pcb.
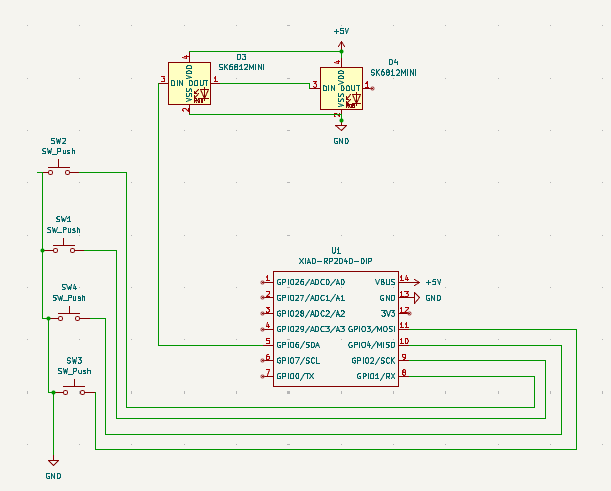
I followed the tutorial to make the schematic and at this point I thought that now that I made the schematic I will have to do the entire thing again but now as the pcb, but I was pleasantly when I found out that there was a button called convert schematic to pcb. Although it is true that I still have to arrange it and do the wiring and I went through some trouble where I have to assign each part a footprint I have to admit I did have some fun doing this.
My schematic
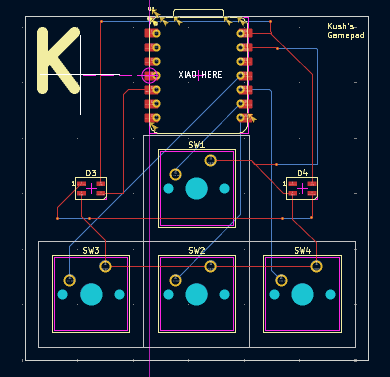
My PCB
My final pcb design
Pcb design in 3d view front
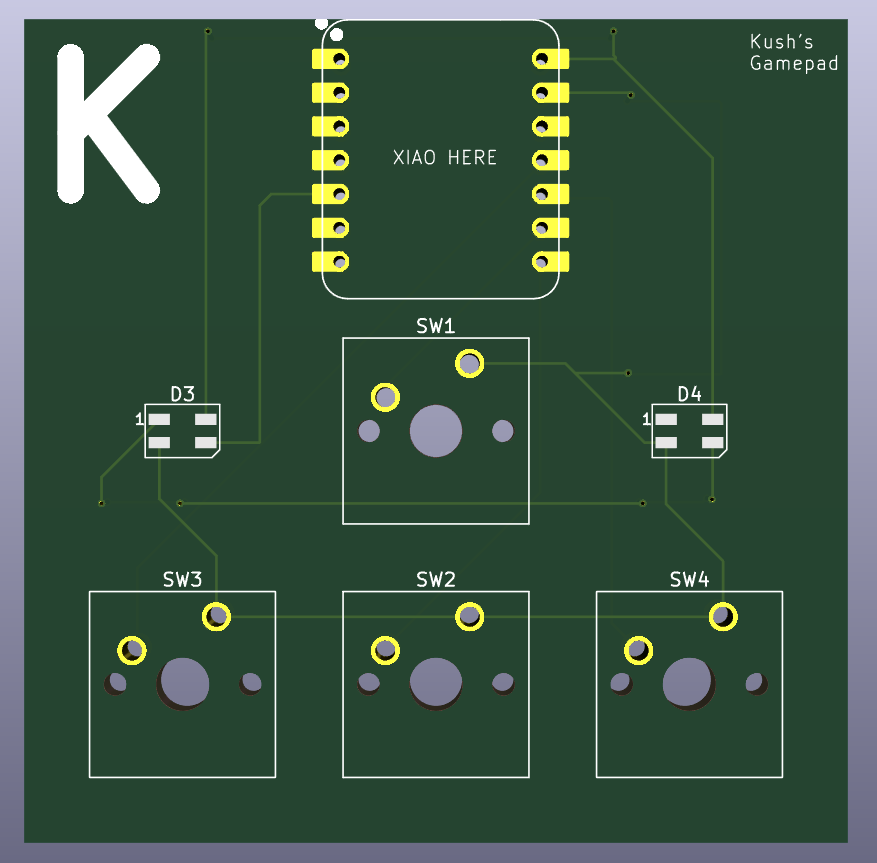
Pcb design in 3d viewer back

After I finished making the pcb I now had to make the case. I have used blender before but I thought that it would be extremly time consming to use that and to recieve the best help from the tutorial I decided to think about getting a free trial of Fusion 360.
Things I Learned today
- I learned that there is something called Highway to Undercity
- I learned that I can make a custom and starter project
- I learned that theres something called Hackpad
- I learned Kicad
- How to import libraries to Kicad
- How to make a schematic in Kicad
- How to make a pcb in Kicad
- How to do wiring in Kicad
Thats all for today see you tomorrow
May 22 - Creating the case for the project
Time spent: 4.5 Hour
I started where I stoped yesterday. I got the personal use version of Fusion and downloaded from its website. Then I continued the tutorial on hackpad website. I started making the bottom and pretty much just followed the tutorial and made the case for the bottom.
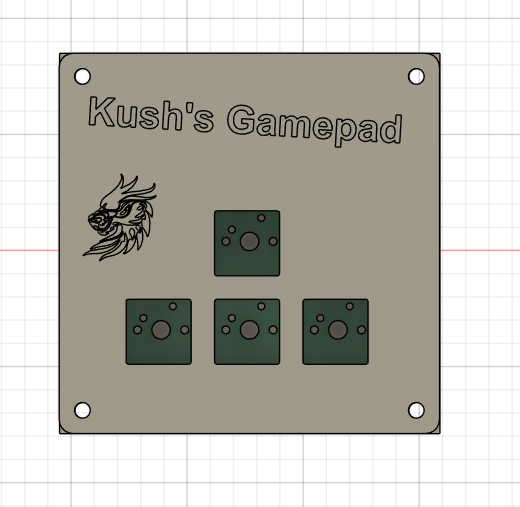
Then I started to make the top of the case and just followed what is said here as well but at the end when it said to add some text to it I decided to add a really big one instead of it being small becasue I felt like I hadn't really done anything orginal there. I also wanted to make it more modular and add 3d printable parts that you could clip on but I later decided that it would be better done when I make a full fleged keyboard and mouse later on.
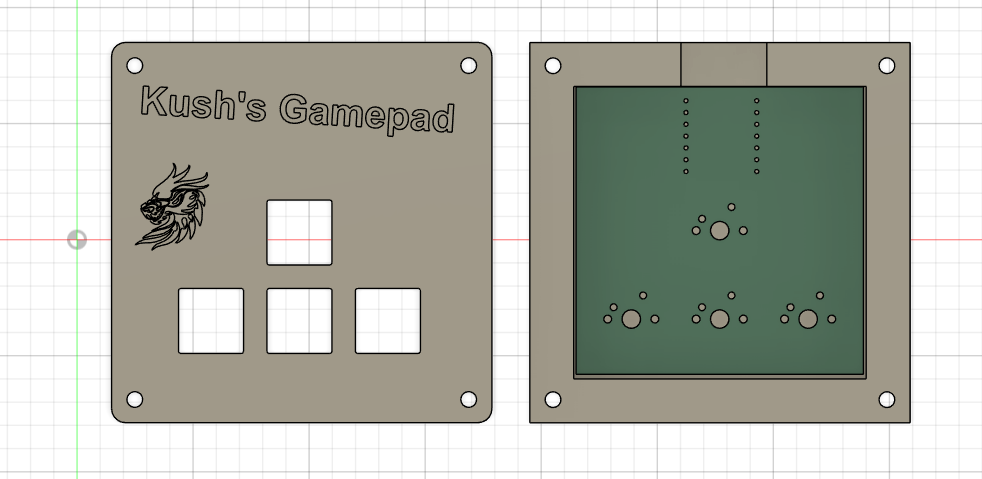
Top view of all components
View Inside -- To see how well the pcb fits
The pcb itself if around 61.9 x 61.9 mm and the case's inside lenght and width are 63 x 63 mm
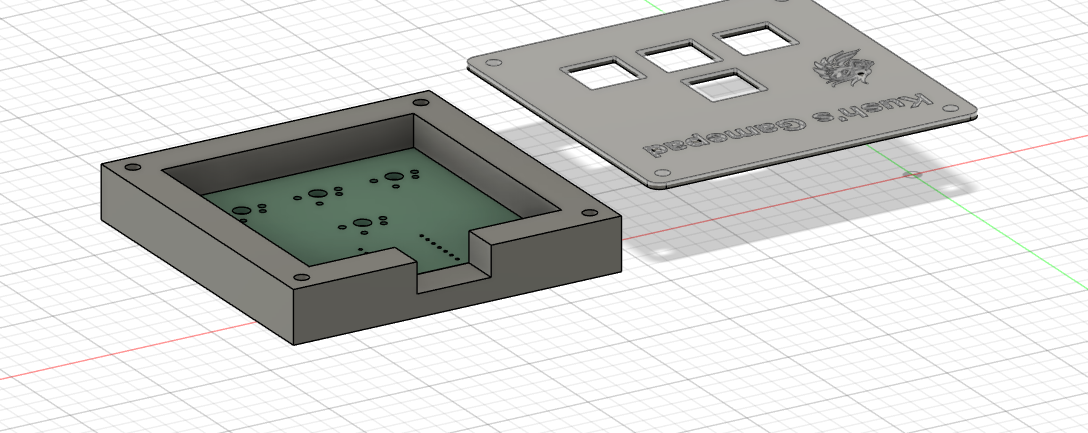
View of Notch -- For the microcontroller's port
I made the notch 18.5 mm wide according to the tutorial website.
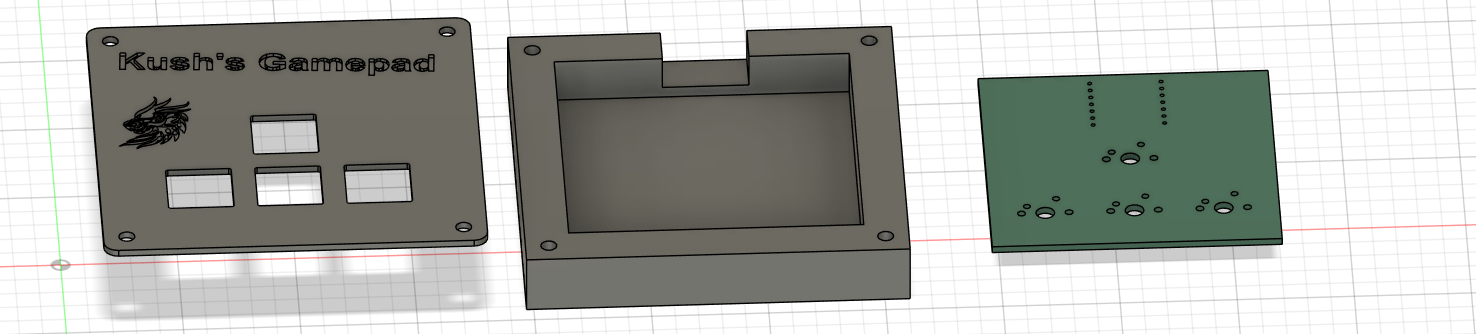
View of all Components
This is the same as the first one except its all by itself and not stacked.
Things I learned
- How to use the ruler tool in Kicad (I had not idea it existed Lol)
- How to use fusion 360
- Pretty much everything I have never used it before so everything in images you see is stuf I learned
Thats all for today see you tomorrow
May 23 - The starting ceremony
Time spent: .5 Hours
So today after I got back from school I just waited until the starting ceremony and wow it was amazing! I liked the slide show a lot and the giveaway announcements were so exciting. After the call I had some other stuff do to but quickly got back to the project. Although I supposed I didn't really do anything today I stil messed around with the pcb, case, and also did some research about wheather I should use kmk or qmk.
May 24 - Coding
Time spent: 4.5 Hours
I haven't really used kmk or qmk before but after looking around on some reddit posts and blogs I came to an conclusion that since I only have 4 keys its probably best for me to use kmk.
I started with the code provided at the guide website and then built on it. I did use some reddit posts and web blogs for guidance but I tried my best not to copy them and ofcourse right my own code. I also didn't want it to seem like a project that was just like all the others so I added a rainbow color and responsive color chaning. Although since I have never done something like this I don't really know if the color changing or the entire code itself will work. Fingers crossed though
import board
import time
from kmk.kmk_keyboard import KMKKeyboard
from kmk.scanners import Scanner
from kmk.scanners.direct import DirectPins
from kmk.keys import KC
from kmk.extensions.rgb import RGB
from adafruit_pixelbuf import colorwheel

keyboard = KMKKeyboard()

keyboard.scanner = Scanner(DirectPins(
    pins=(board.GP0, board.GP1, board.GP2, board.GP3),
    value_when_pressed=False,
    pull=True,
))

keyboard.keymap = [
    [KC.UP, KC.LEFT, KC.RIGHT, KC.DOWN]
]

rgb = RGB(
    pixel_pin=board.GP4,
    num_pixels=2,
    val_default=40,
    animation_mode=RGB.MODE_STATIC,
)
keyboard.extensions.append(rgb)

rainbow_index = 0
flash_active = [False, False]
flash_start_time = [0.0, 0.0]
flash_duration = 0.25

flash_colors = {
    0: (255, 0, 0),     # Red
    1: (0, 255, 0),     # Green
    2: (0, 0, 255),     # Blue
    3: (255, 255, 0),   # Yellow
}

@keyboard.before_matrix_scan
def update_leds():
    global rainbow_index
    now = time.monotonic()

    for i in range(2):
        if flash_active[i]:
            if now - flash_start_time[i] < flash_duration:
                rgb.pixel(i, flash_colors.get(i, (255, 255, 255)))
            else:
                flash_active[i] = False
                rgb.pixel(i, colorwheel((rainbow_index + i * 30) % 256))
        else:
            rgb.pixel(i, colorwheel((rainbow_index + i * 30) % 256))

    rgb.show()
    rainbow_index = (rainbow_index + 1) % 256

@keyboard.on_key_press
def on_key_pressed(key):
    key_to_led = {
        0: 0,  # UP
        1: 0,  # LEFT
        2: 1,  # RIGHT
        3: 1   # DOWN
    }

    led = key_to_led.get(key.key_number)
    if led is not None:
        flash_active[led] = True
        flash_start_time[led] = time.monotonic()

if __name__ == '__main__':
    keyboard.go()
This is what I have currently whle I right this journal but it might change if if i mess around with it before subbmitting so check the main.py file in production and ./CPF-AllFiles/FIRMWAREfiles/main.py
Don't forget to write feedback!
Also if you see any grammar errors just let me know
THANKS for reading and THANKS in advance
May 8
Time spent 2 hours
I got accepted and I bought the pcb from JLC, the case from #printing-legion, and I got the parts for the kit. All this happend a while back and now I just have to make all of my projects so I got this over with first.
It took me a while to do the soldering as I have never done it before but after I was finished I just put the case over it and the screws and keycaps on it. Now I was DONE!!!! lets gooooooo. Thats my 1/4 projects finished.
Other projects to do:
- Mini-Safe <--4pts
- Button-Blitz <--4pts
- Keyboard <-- 6pts
If a reviewer is reading this my Mini-safe has been aproved but I have gotten the money yet so please send it to me!
My Keyboard project also needs to get reviewed so I would very much appreciate it if you could revew it. please.
Ok well bye!!