Pomodoro Timer
What am I making?
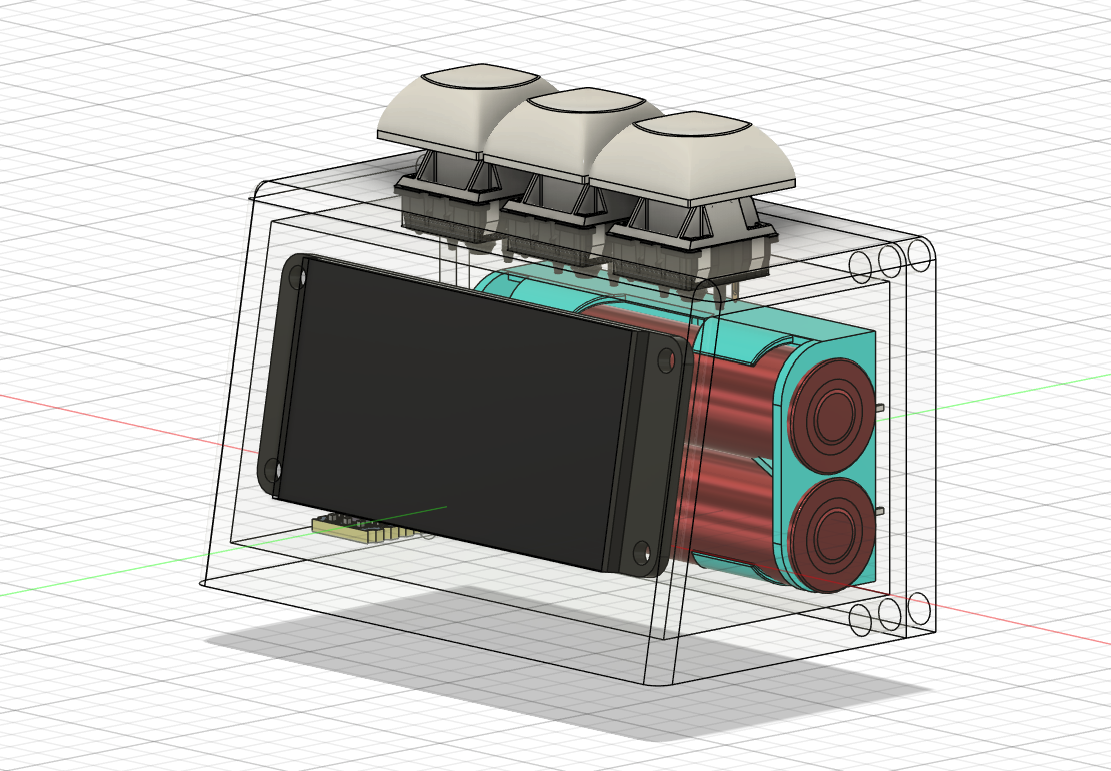
I'm making a low powered, battery operated desk timer with mechanical switches on top for control and a 2.13 inch E-Ink display.
Total Time Spent: 19 Hours
Day 1 - 9th July
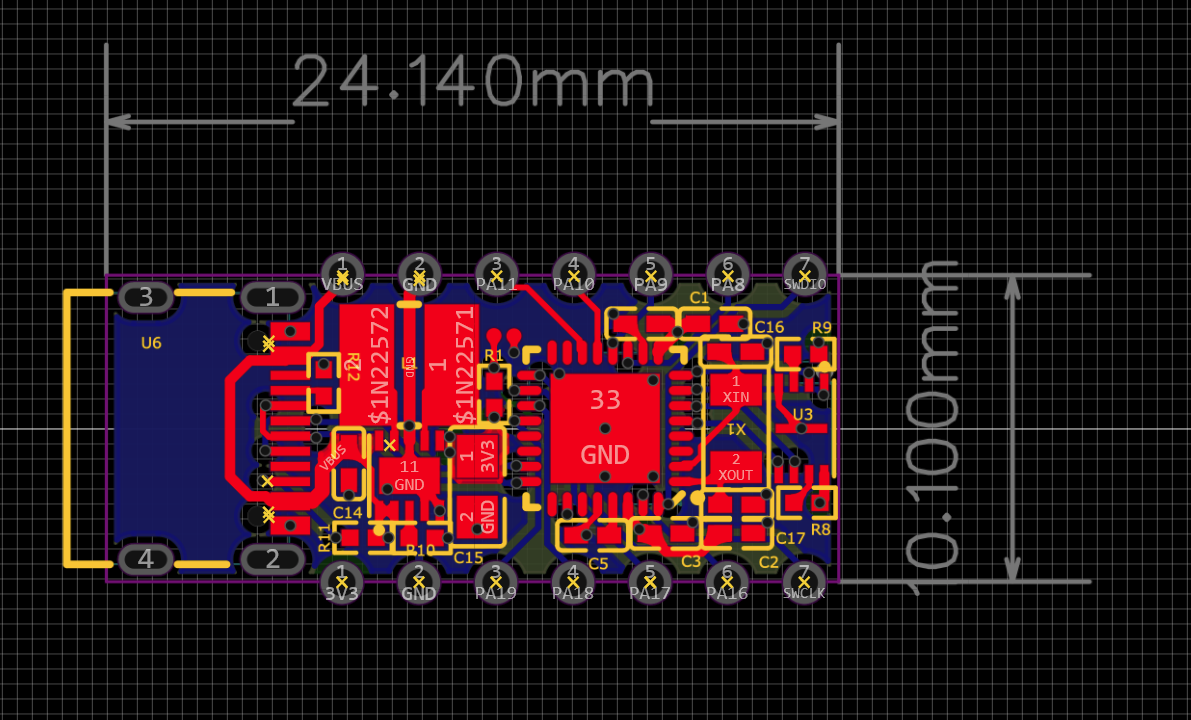
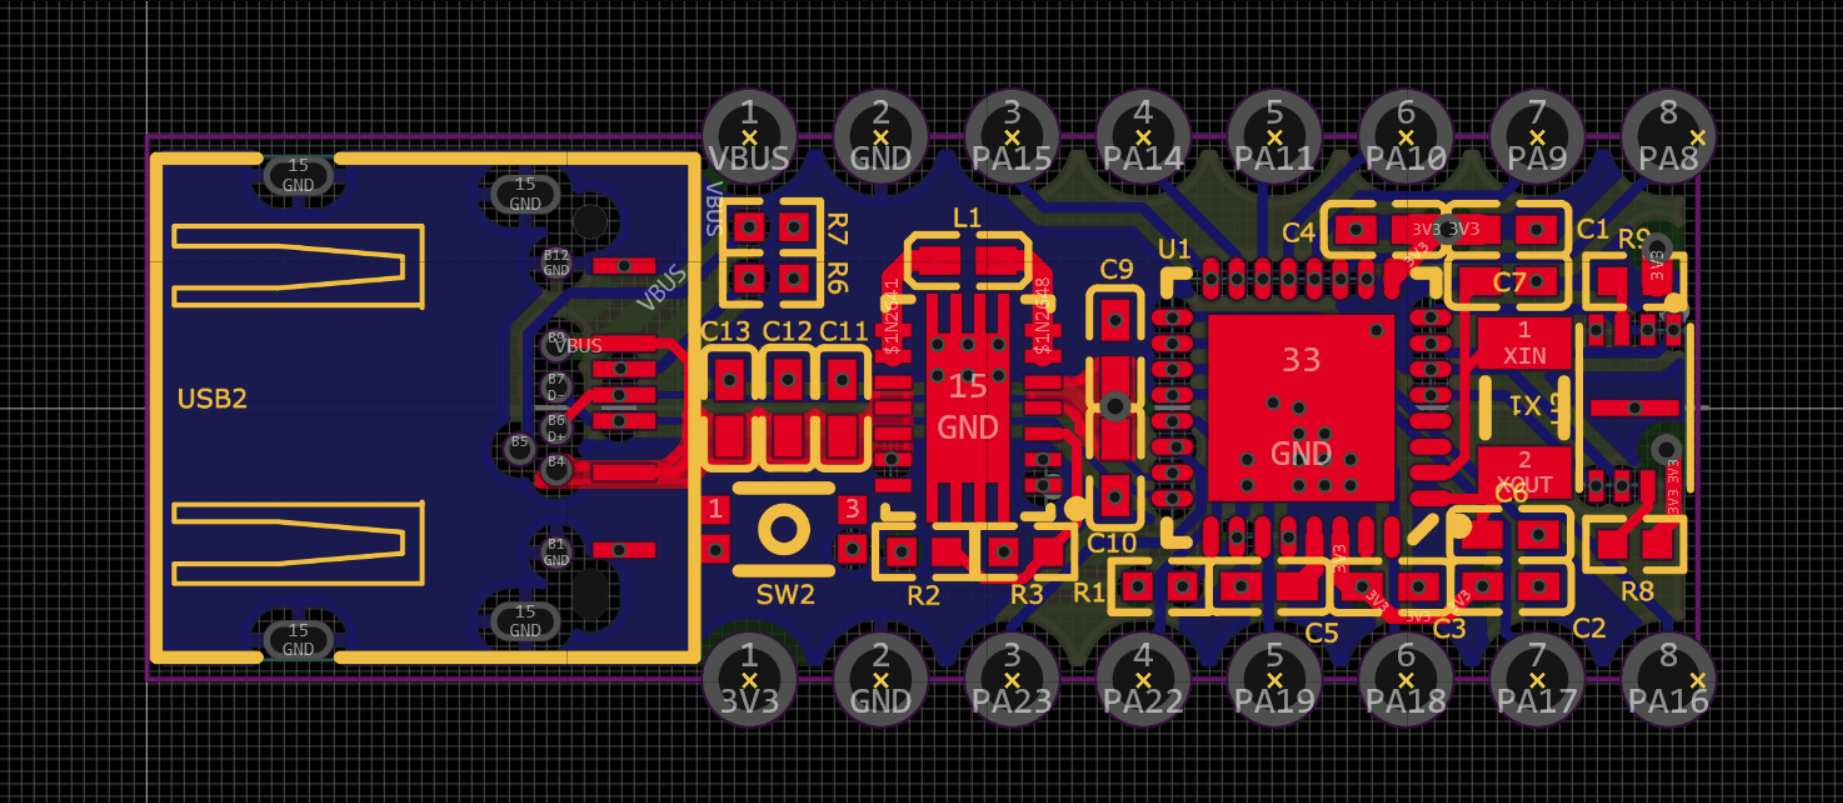
I need something very low powered for my project as its going to be running of AA batteries. I researched a lot and finally settled on an ESP32 chip as its very good for low current applications and deep sleep modes, and since I'm not going to use wifi the current consumption is even low. After a bit of research I decided to go with the ESP32-C3 chip, I looked at the datasheet and then used the schematics from it, also made a small and compact board for it.
schematics
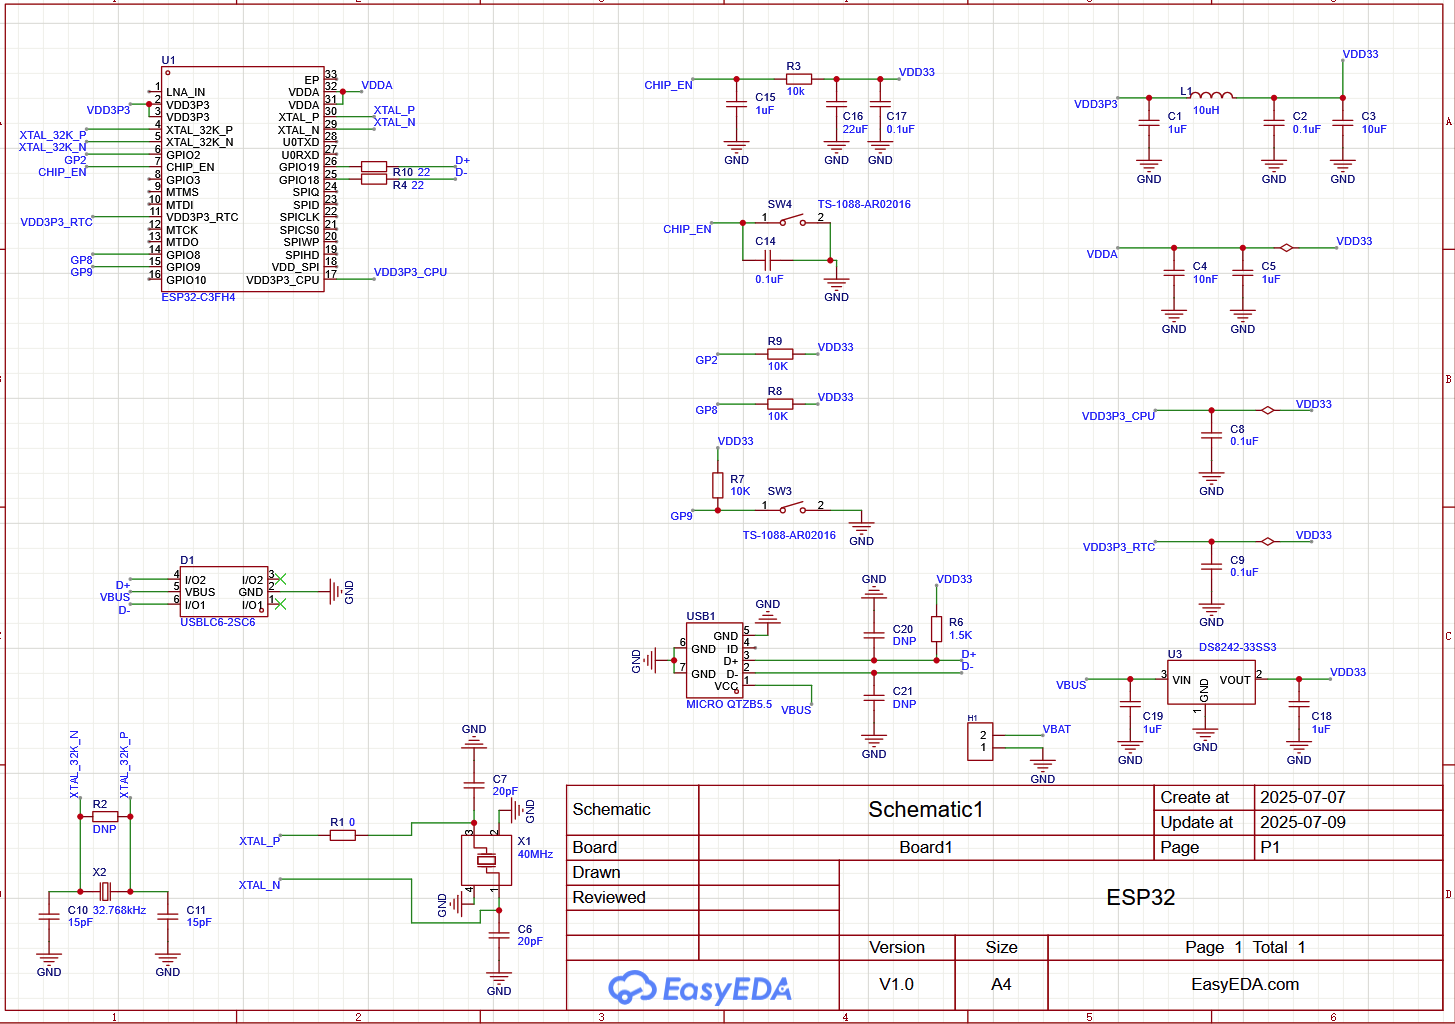
pcb
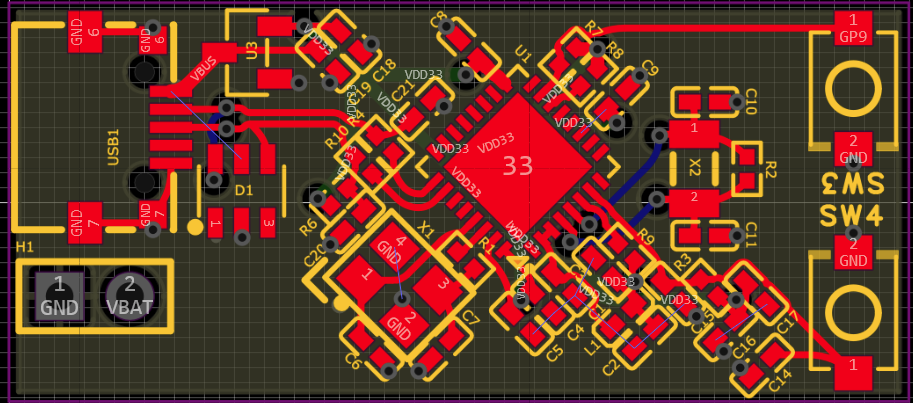
Overall I did not like the board and I think I'll switch to a M0 based MCU for even lower power consumption
Time Spent: 3 Hours
Day 2 -10th July
After some research (chatgpt) I decided to use the ATSAMD21E18A as my new MCU. Working with this was kinda weird, it dosen't have any traditional hardware design guide in sense. Had to scour the datasheet a lot for this board and look up reference designs. It used a lot less passives compared to the ESP32 in order to work, all in all I think it was like 4 passive for the board to function (just decoupling capacitors). I did decide to opt in for an external 32k crystal for time keeping as the internal crystal is BAD.
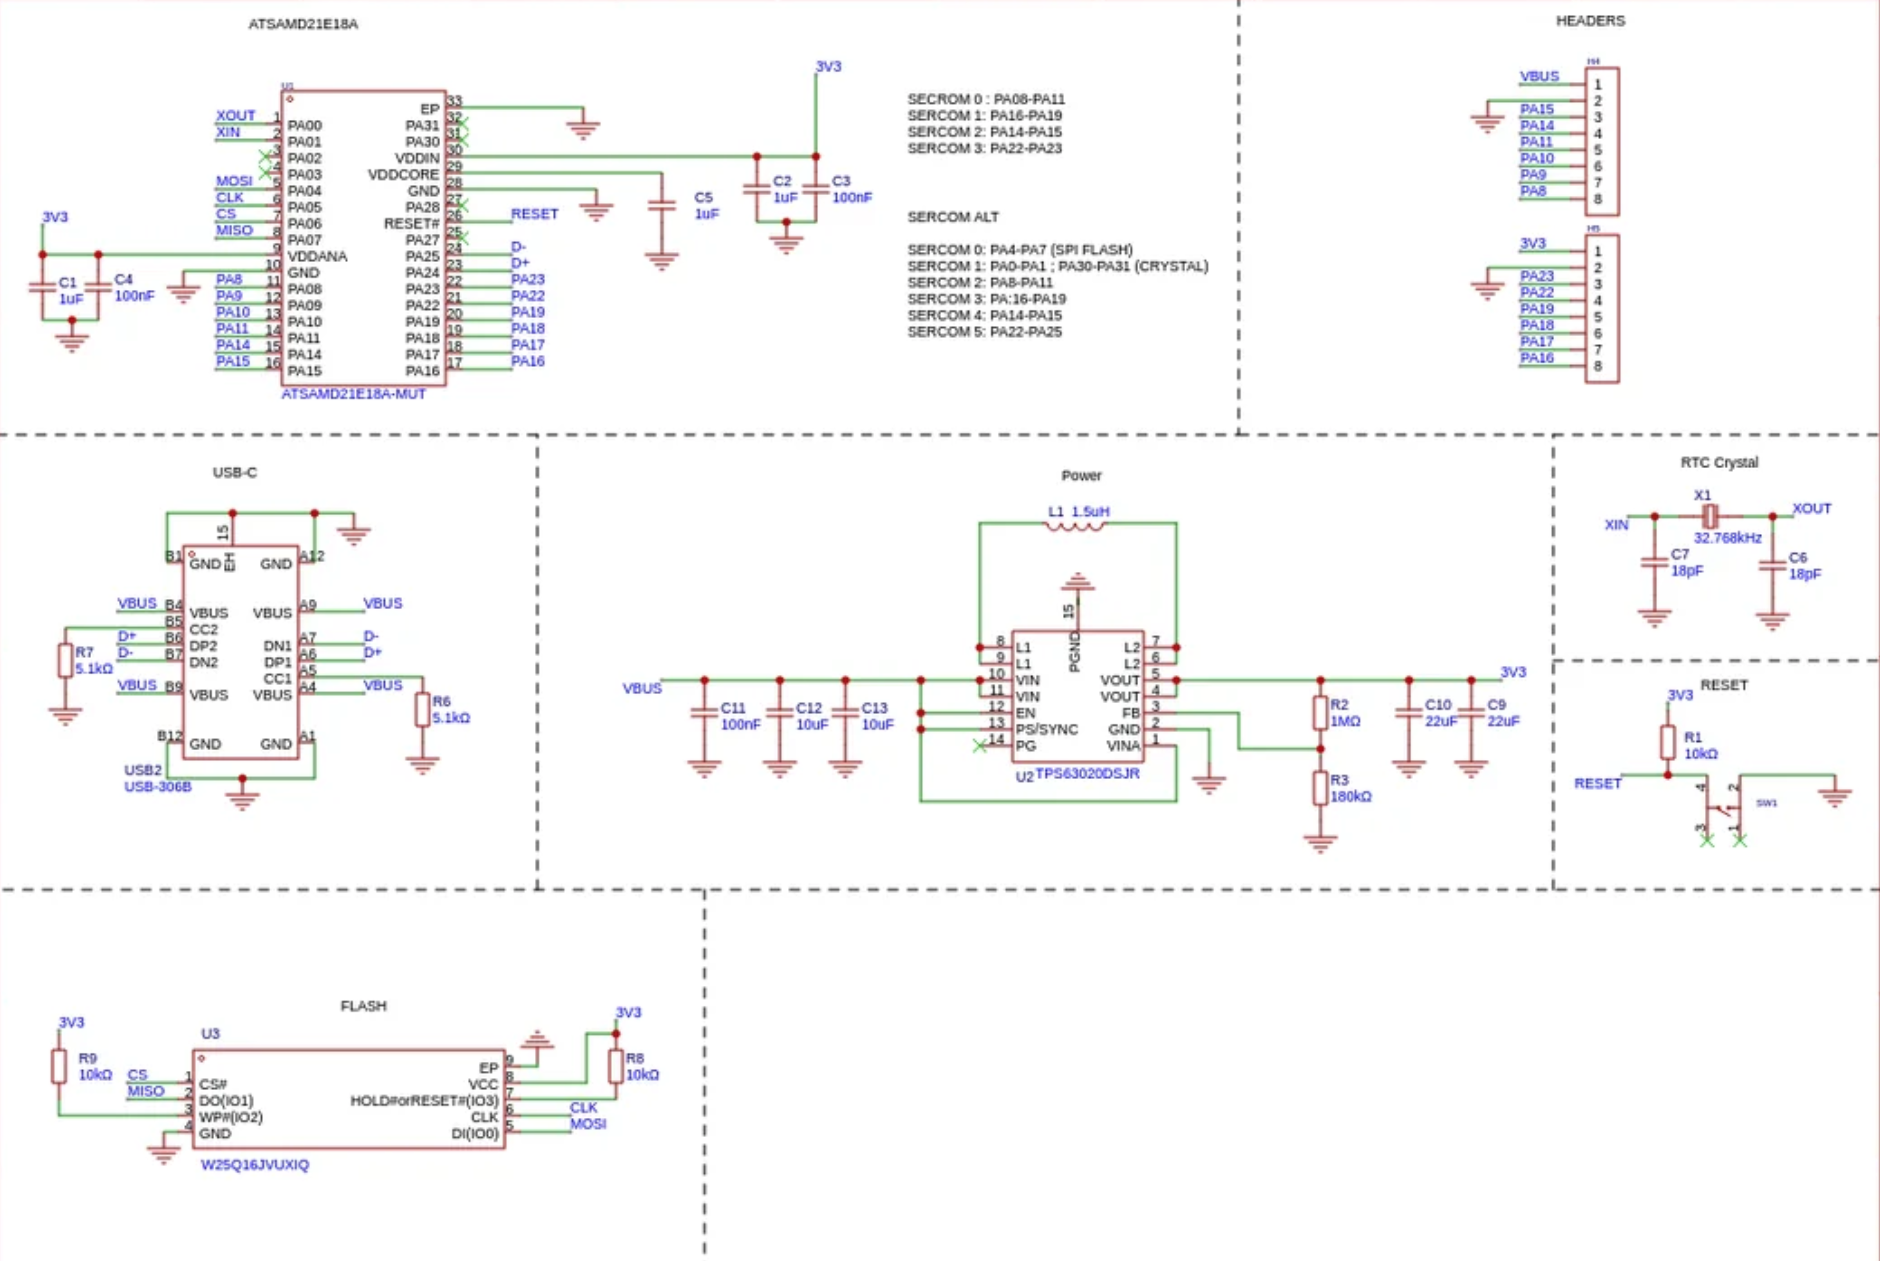
Time Spent: 6 Hours (i spent 5 hours 59 min reading the datasheet)
Day 3 - 12th July
Finished routing the inital PCB, I unfortunately had to use 0.2mm vias because 0.3 were just not gonna work because it was such a small board, 0.2mm vias did add a HUGEEEE cost
decided to redo it with 0.3mm vias, routing was a bit difficult as I couldn't via in pad now. But here is the finally result-
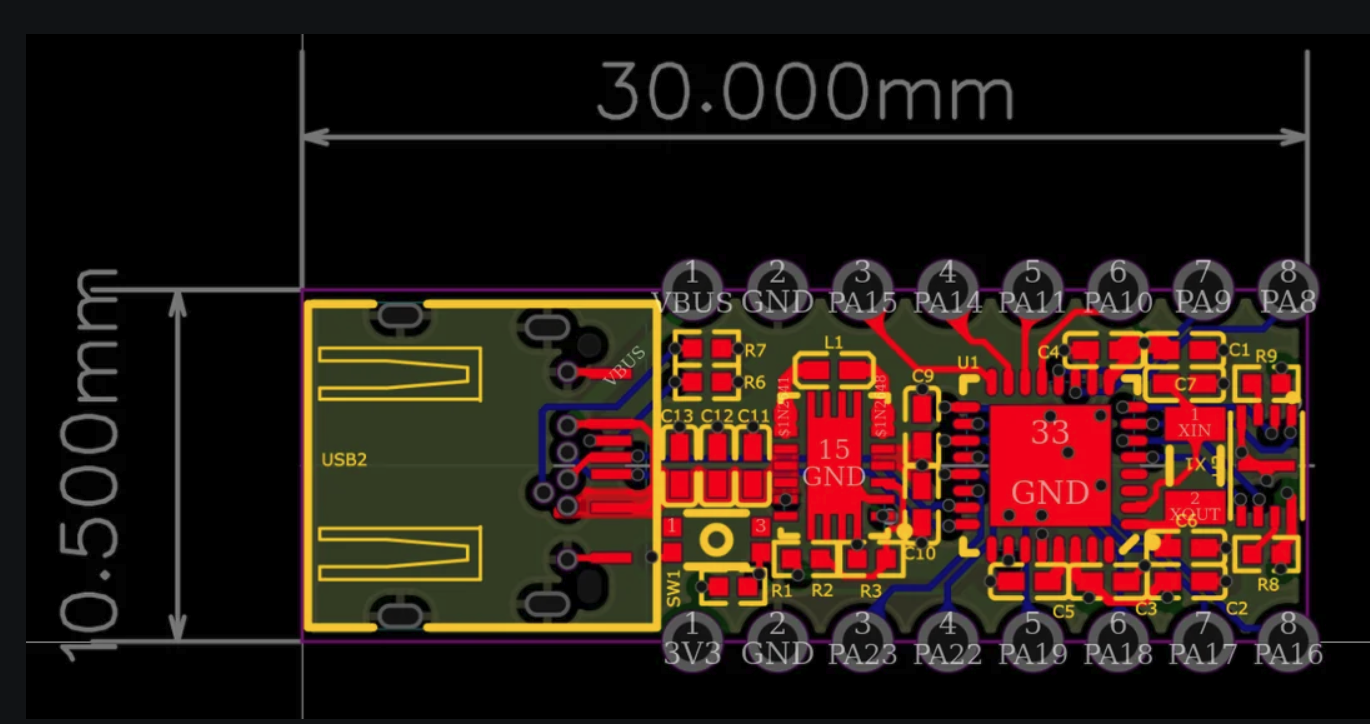
Time Spent: 4 Hours
Day 4 - 13th July
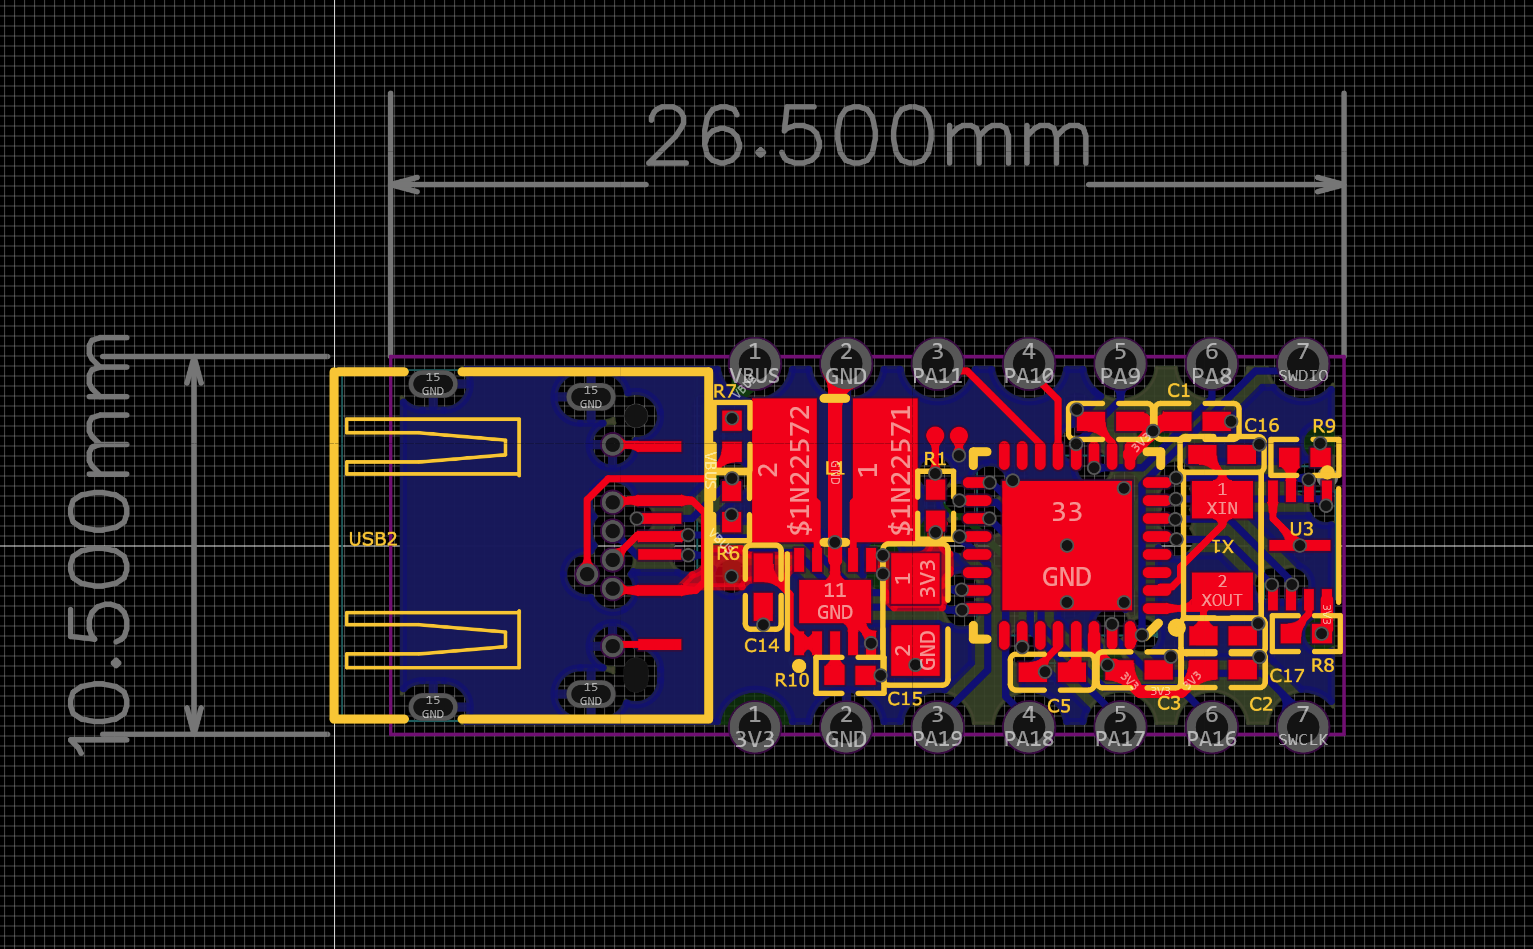
I posted the board in r/printedcircuitboard for a review, it turns out I was using the wrong inductor value, it had a really high dcr. I swapped it out for a better on and I also just decided to switch to using TPS63900 as its smaller and provides a good output current.

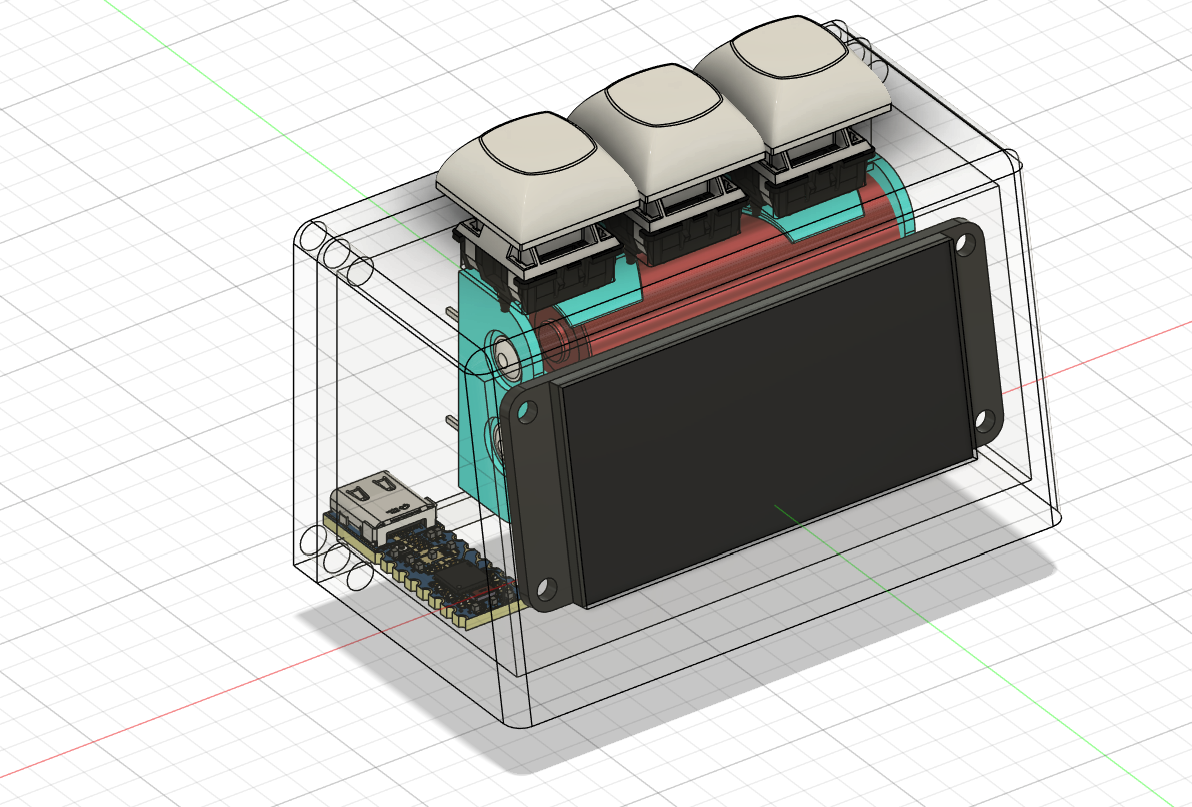
I also started on the 3D model for this project, I had to reverse engineer the 3D model for the e-ink display from the aliexpress drawings. After that I just put everything together, made a case, slanted the screen and boom thats it.
Time Spent: 5 hours
Day 5 - July 19
So I was working up on BOM today and turns out getting the board assembled is kinda expensive (about $50), I'm thinking it might be better if I just order the parts and assemble it myself, as right now im paying $21 just for the extended component fees.
I did think about using a adafruit m0 trinket but it only has 5 gpio pins so that just won't work for me :c
I updated my pcb design just a bit, I switched out my usb c connector to a more compact one.