
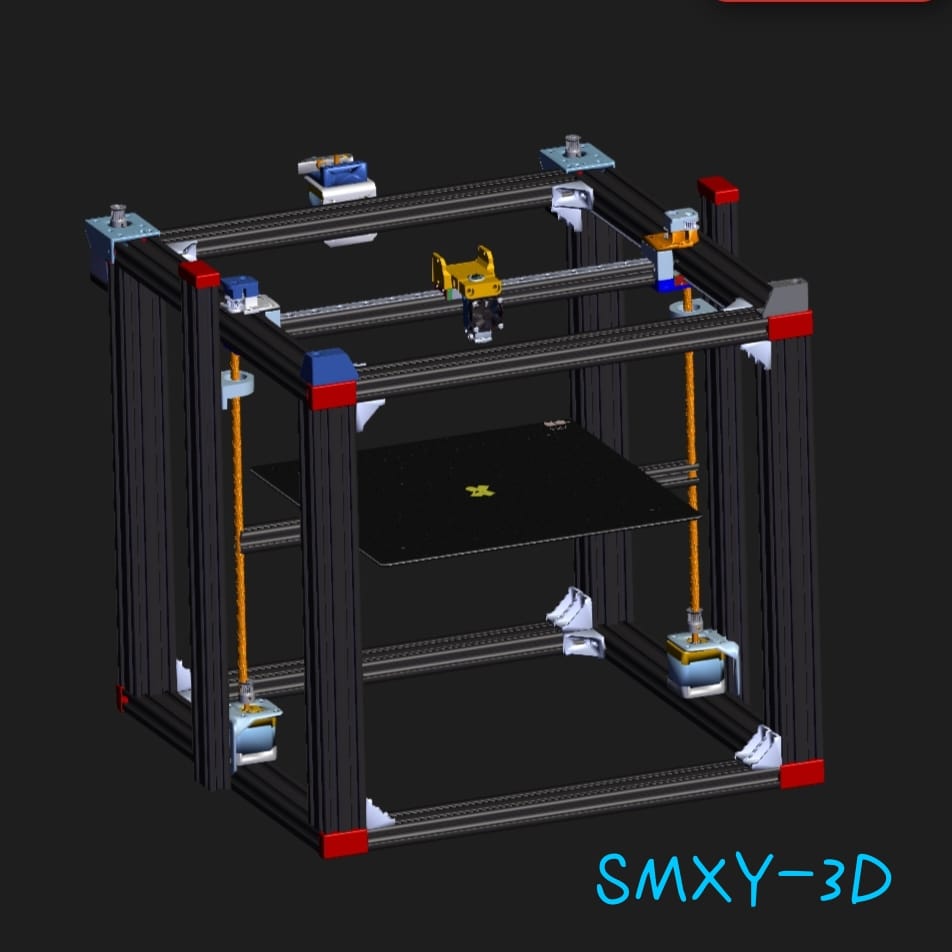
Smxy 3d
Total Time Spent: 77 Hours
June 12th : Project Ideation and Sketching
- Started planning the overall design and purpose of the 3D printer on paper.
- Researched core features to be included in a high-speed and professional printer.
- Noted ideas around rigidity, performance, and ease of upgrade.
- Finalized goals like: strong frame, high speed, and high print quality.
Key Features Finalized:
- Core-XY motion system
- MGN12 Linear Rails
- Klipper Compatibility
- 310×310×310 Build Volume
- Dual Z-Axis
- Bowden Extruder
- Octopus v1.1 Mainboard
- 4040 Aluminum Frame for stability
Time Spent: 4 Hours
June 13th : Feature Research and Frame Design
I learn and study about various printer builds to get a idea on it and note some important points about the frame layout,structure and allignment So, that my printer build is properly stable and strong to withstand the demands.
- Studied best practices in frame layout and structure.
- Compared real-world printers for strength and stiffness.
- Started listing required mechanical components.
Time Spent: 4 Hours
June 14th : Finalizing Basic Components
I researched about the 3d Printers parts and there types and use cases So , I can choose the perfect and best options for my build to get more performance and quality in printing.
- Finalized most mechanical parts after researching prices, compatibility, and reviews.
- Compared 3–4 websites for sourcing.
- Shortlisted components based on quality .
Parts Chosen:
- 2020, 2040, 4040 Aluminum Extrusions
- MGN12 Linear Rails
- V6 Hotend
- NEMA 17 Stepper Motors
- Octopus v1.1 Mainboard
- 8mm Lead Screws
Time Spent: 4 Hours
June 15th : Core-XY Gantry Research
For the Core-XY build i researched about various top Gantry design which are easy to build with less parts and rigidity.Finally i found the CoreXY Frame V2.0 the best option but it also has some flaws.
- Explored top gantry designs suitable for MGN12-based Core-XY setups.
- Found CoreXY Frame V2.0 design as a good match.
- Identified compatibility issues and noted required customizations.
Time Spent: 3 Hours
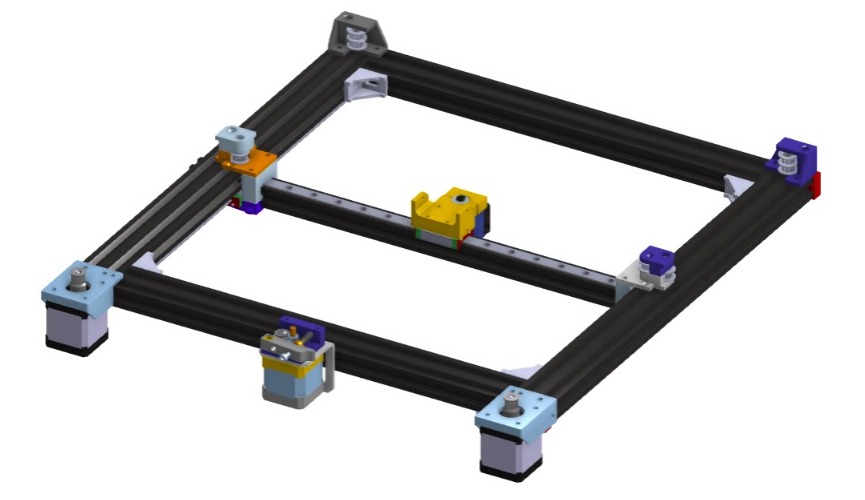
June 16th : Customization of Gantry & Parts
After knowing about the flaws in the 3d models from CoreXY Frame V2.0 I redesign them with keeping rigidity and compatibility with 2040 in mind.For this take proper measurements and make there proper models.
- Modified gantry design to support 2040 frame profiles.
- Designed a custom extruder holder.
- Enhanced structural parts for more robustness and strength.
Time Spent: 6 Hours
June 17th : Finishing Gantry Modifications
After making the top gantry parts I assembled them and check for any error in it and everything alligned perfectly.Then i make a proper assembly of the parts to see the final look.
- Finalized tweaks to the CoreXY layout and saved edited parts.
- Verified alignment and mounting logic.
Time Spent: 6 Hours
June 18th : CAD Part Collection
For full assembly I explored different websites and then dowload all the prebuilt CAD models for the parts to be used in the design and then make a proper folder for them.
- Searched for and imported CAD models of all standard components from GrabCAD & Thingiverse.
- Adjusted sizes and geometry where necessary.
Time Spent: 4 Hours
June 19th : Custom CAD Part Design
I look for all other custom parts that i need to make for assembly and after that i took the measurements and made 3d models for them. - Modeled custom brackets, joints, and mounts using Onshape. - Measured physical dimensions of real parts and matched CAD accordingly.
Time Spent: 5 Hours
June 20th : Preparing Assembly Setup
I organised all sub-assemblies and make a full assembly from it and verify the part compatibility to prevent any issues in the future during the build and designing. - Structured sub-assemblies (gantry, base, frame, etc.) to simplify final assembly. - Verified part compatibility across imported and custom parts.
Time Spent: 4 Hours
June 21st : Final Assembly in Onshape
- Assembled all parts in Onshape with proper alignment and looks.
- Focused on accurate bolt and nut placements.
- Took images and screenshots for documentation.
Time Spent: 7 Hours
June 22nd : Web Upload and Repository Setup
- Created GitHub repository with structure:
/CAD/Images/BOM/README.md
- Uploaded CAD files to GrabCAD and Thangs for open source access.
Time Spent: 3 Hours
June 23rd : BOM & Final Documentation
- Created a clean, organized Bill of Materials (CSV and Markdown).
- Documented each section in the README with:
- Features
- Instructions
- Images and Renders
- Wrote a mini journal and wrapped up documentation.
Time Spent: 3 Hours