
Splad
A split ergonomic keyboard with a trackball and screen(s)
Journal
[!NOTE]\ Total time spent: 17h
21/07/2025
Researching components, I'll probably go with the Raspberry Pi Pico 2WH.
[!NOTE]\ Total time spent: 2h
22/07/2025
Nice OLED - https://www.aliexpress.com/item/1005005906852549.html Trackball Breakout - https://shop.pimoroni.com/products/trackball-breakout?variant=27672765038675
Ok so on each side: * 5 columns on the main part, staggered. In 3 rows, to make the main section. * An extra column on the outer side (for extra stuff - the alphabet will cover the main part). * Then a few keys underneath and out towards the screen for thumb modifiers etc (shift, other layers, etc).
Did a reddit post: https://www.reddit.com/r/KeyboardLayouts/comments/1m6a7mj/layouts_for_those_without_a_left_ring_finger/
Ok so each side will have 18 keys + 3 modifier keys = 21 keys, 42 in total. Thats a 5x5 matrix so 10 GPIO pins needed.
I have decided to use the Raspberry Pi Pico 2 W.
Nevermind, its later and back to the nice! nano v2 as it has LiPo charging built in, a USB C port, Bluetooth, etc.
Going to use this display: https://www.aliexpress.com/item/1005006141235306.html And this trackball (I will have to create a schematic etc for it ;-;): https://www.aliexpress.com/item/1005009386877838.html
Set up a basic key matrix:

[!NOTE]\ Total time spent: 5h
23/07/2025
Finished symbol (I numbered them after dw lol):
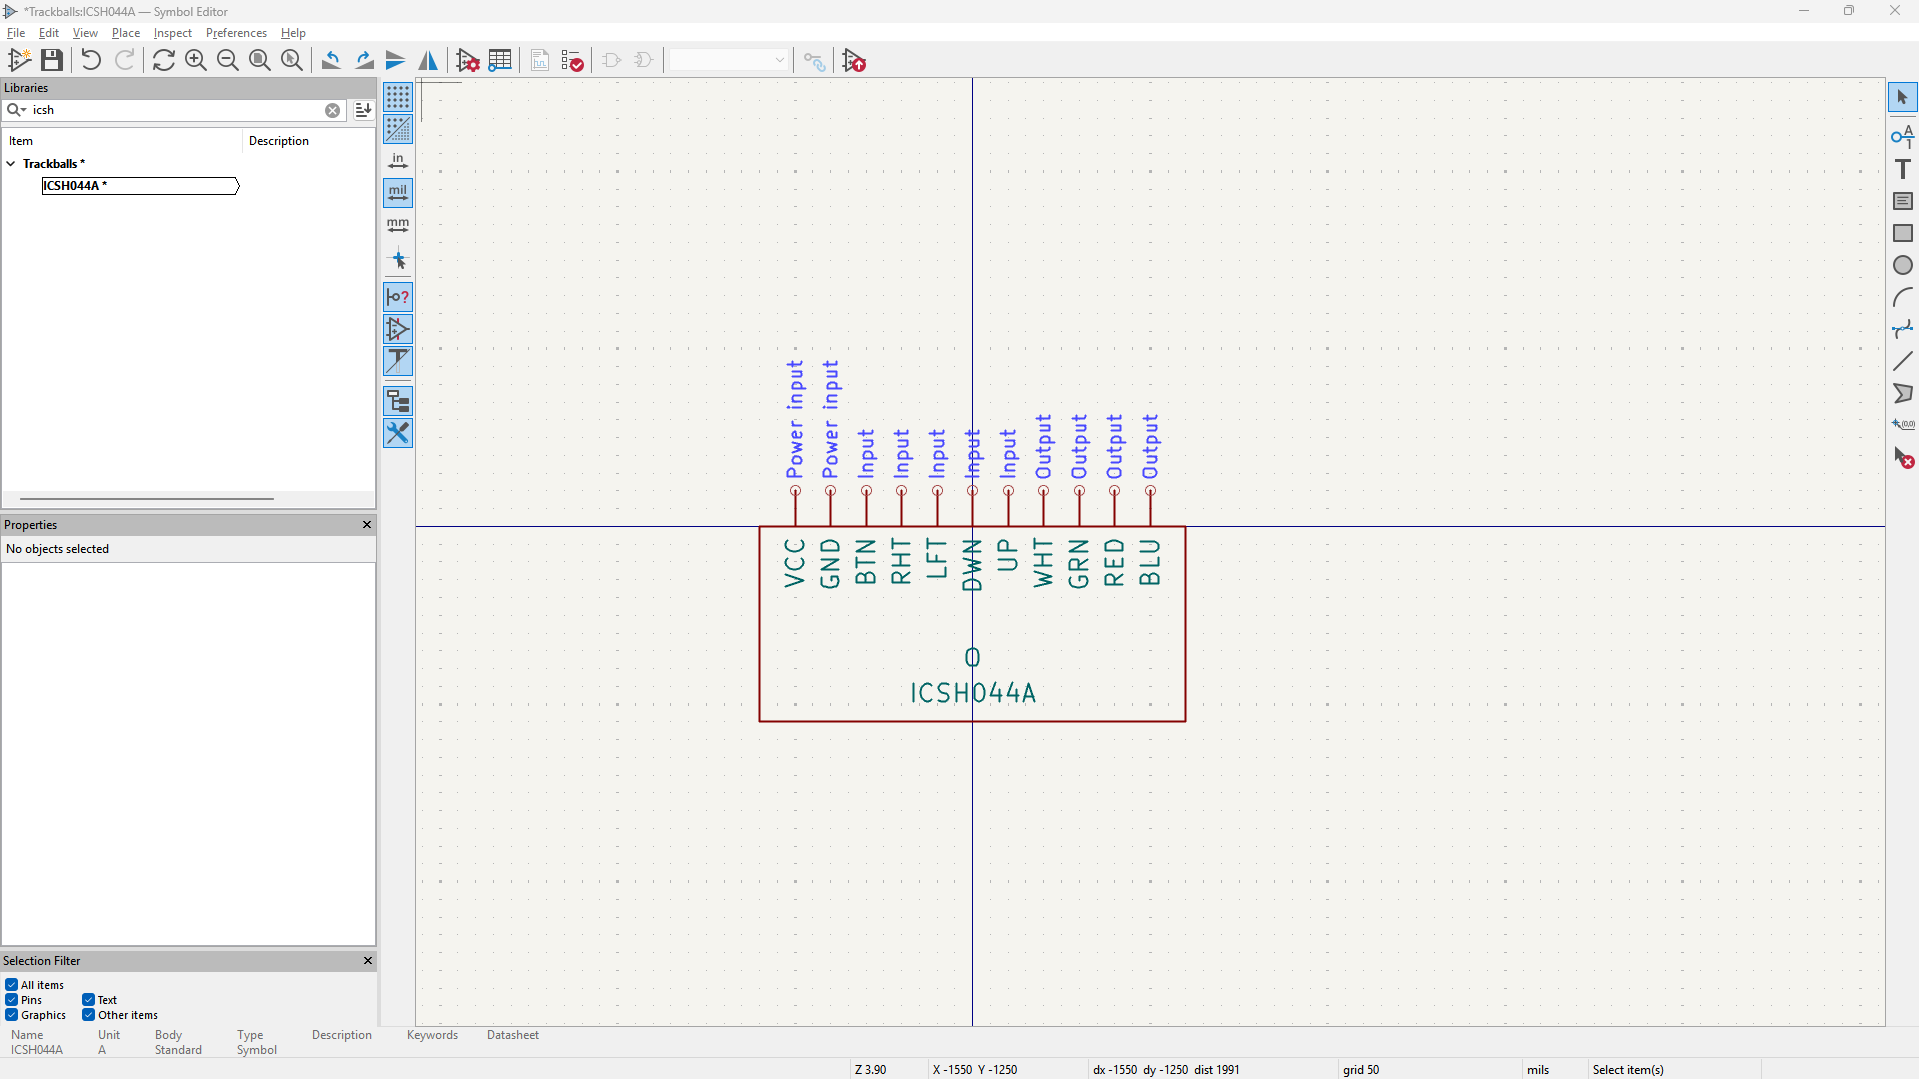
I have decided not to wire to the lighting pins because I don't want the trackball to light up.
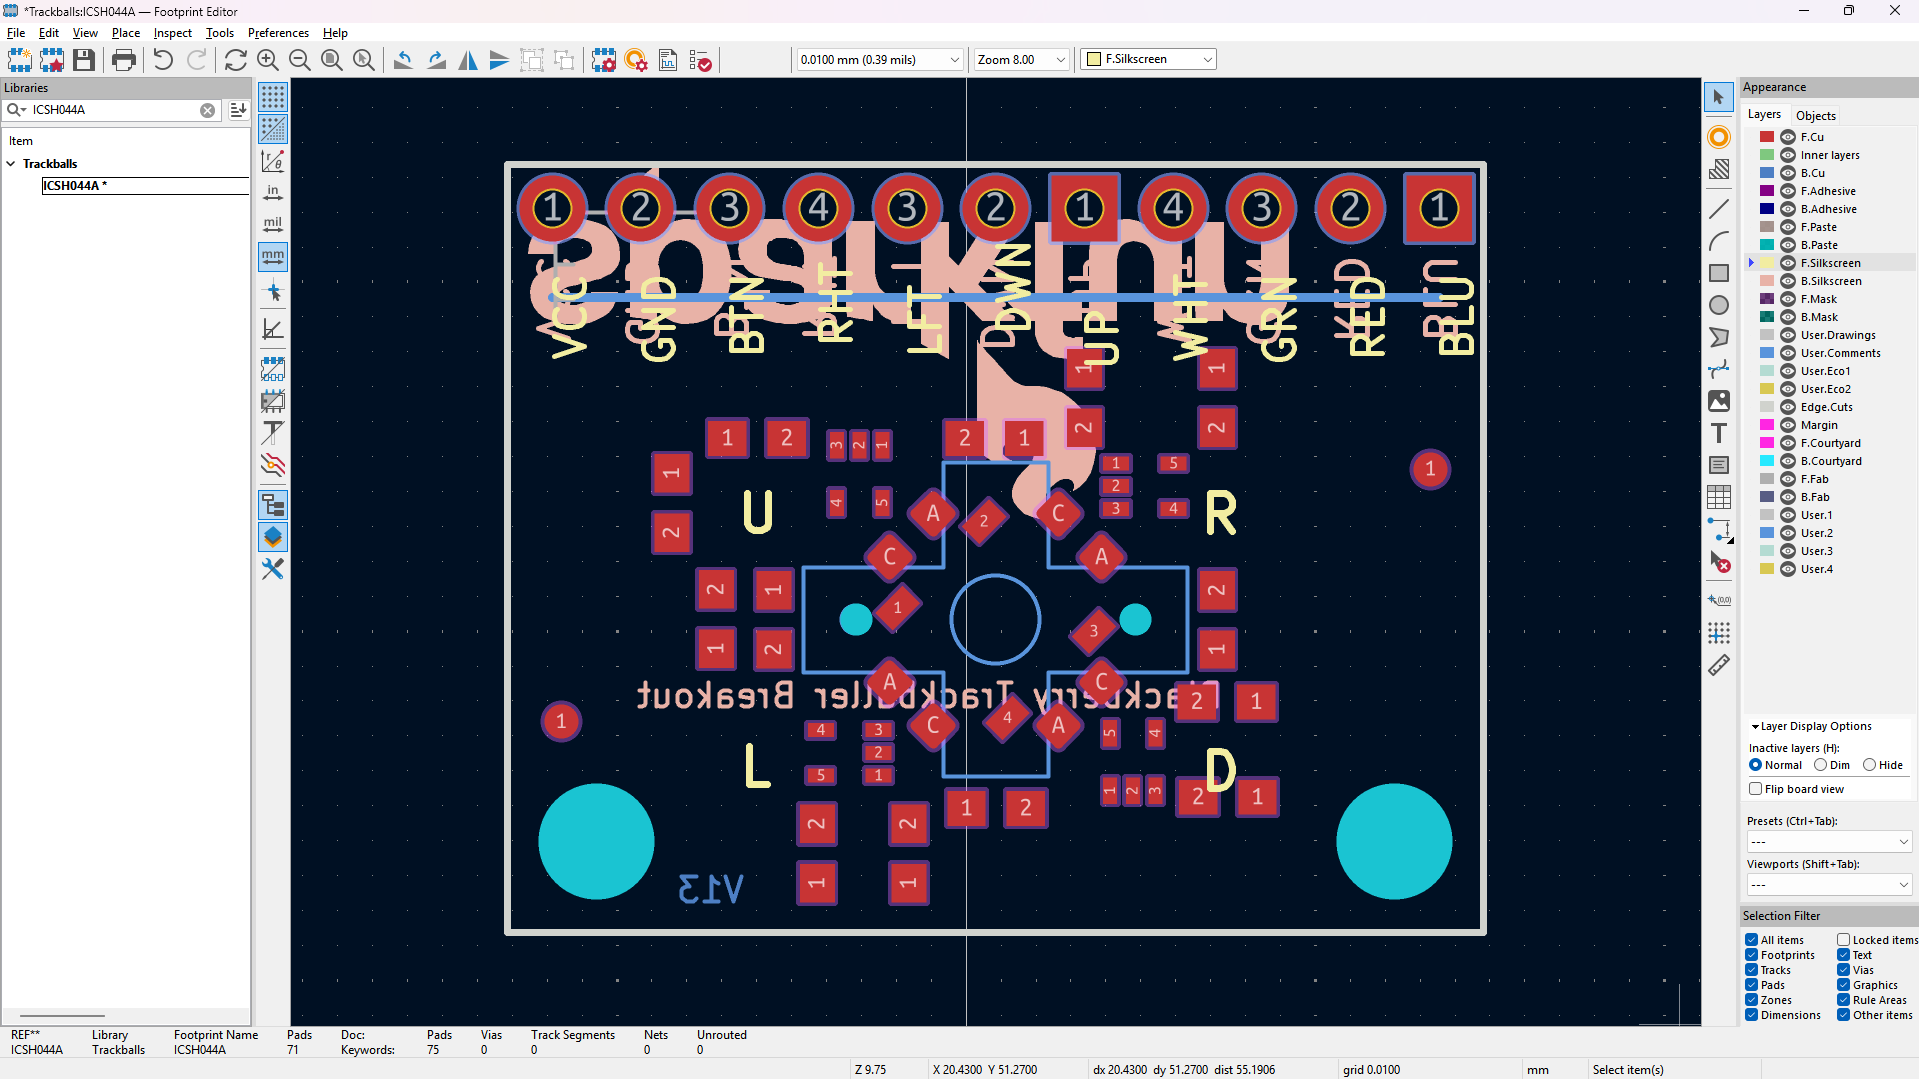
Found this Sparkfun one which has Eagle files I'll convert into KiCad for the footprint: https://github.com/sparkfun/Blackberry_Trackballer_Breakout/blob/master/Hardware/SparkFun_Blackberry_Trackballer_Breakout.sch. Its got the same pins just slightly different dimensions
Pretty sure this is good - I had to change a bunch of dimensions and stuff but it's fine, and also swap the labelling of the pins:
I have decided to use the nice! view (or compatible from AliExpress) due to a MUCH longer battery life (it reflects light, OLEDs emit it - source, Reddit, the best source ofc). Srs tho Reddit is so useful.
Finished the schematic (special mention to the Electrical Rules Checker which saved me a lot of heartaches later down lol):
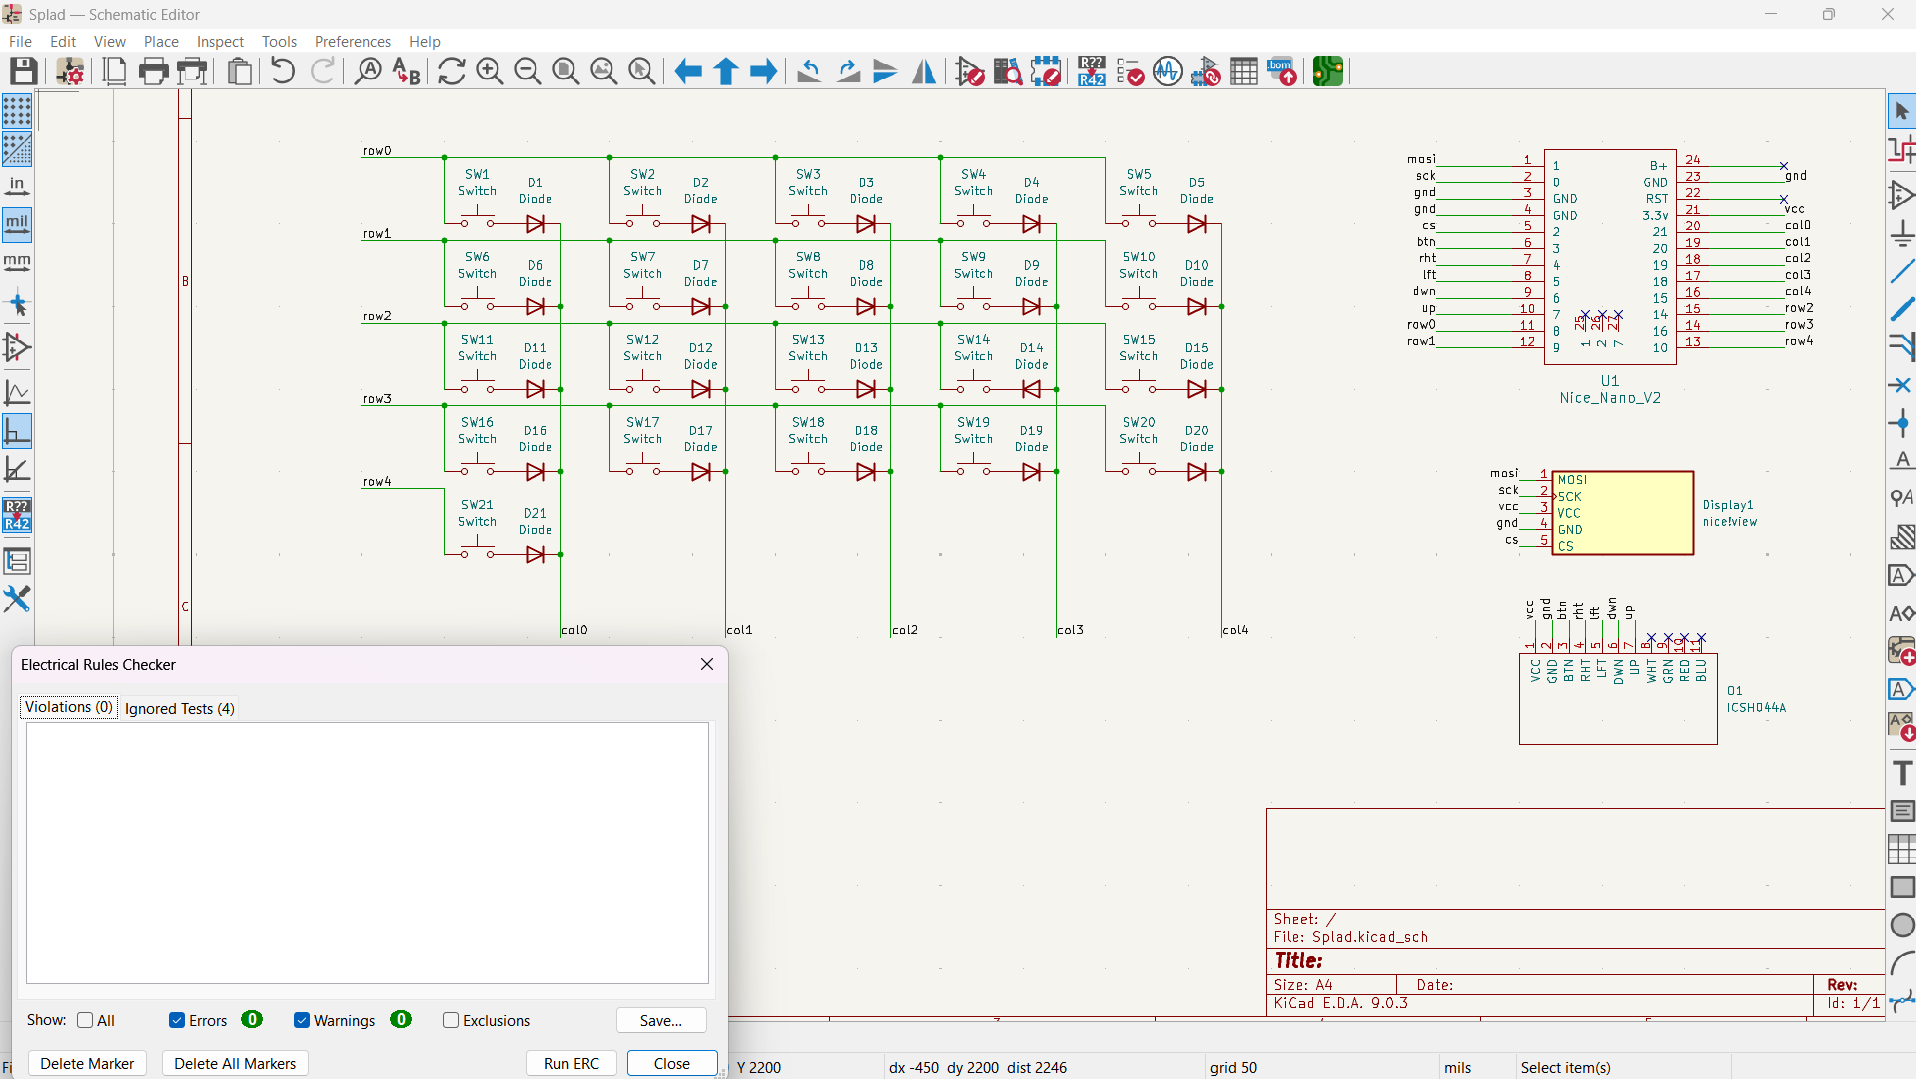
I have decided to add a button to RST as well.
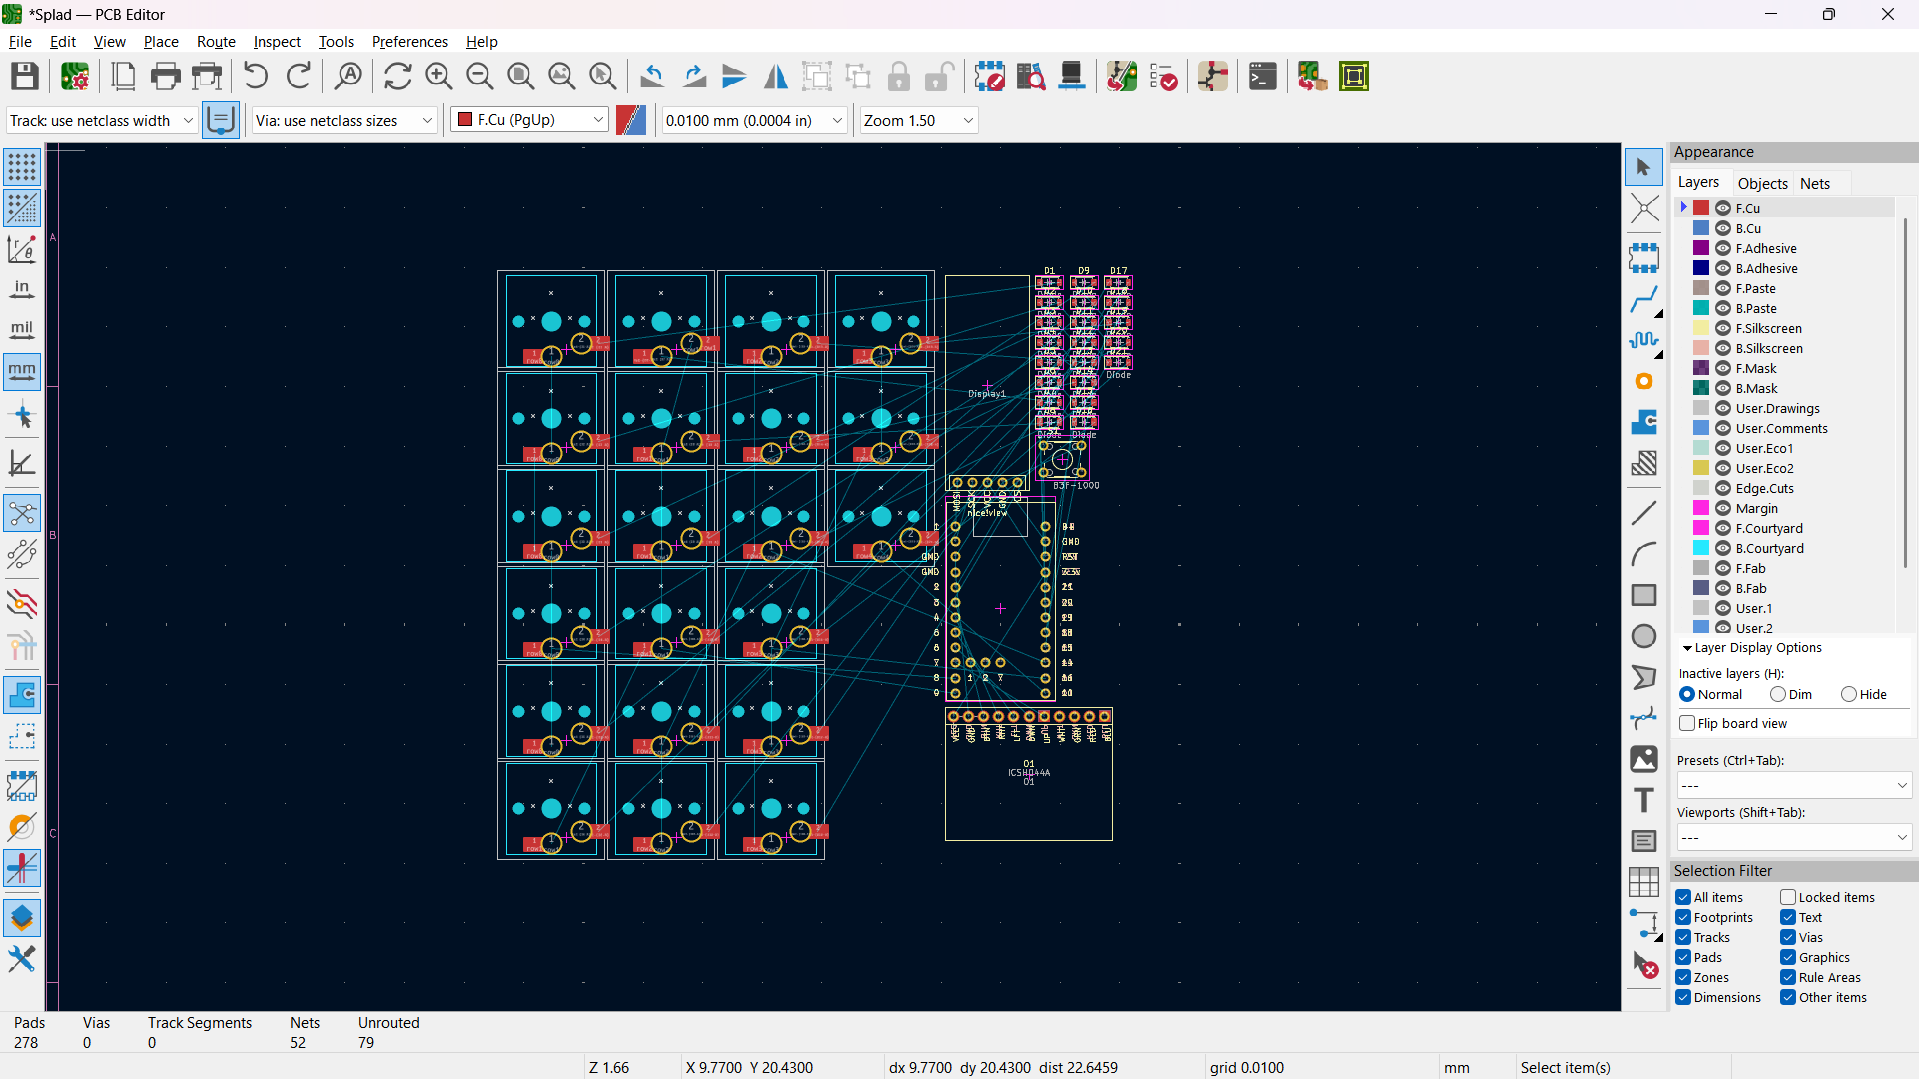
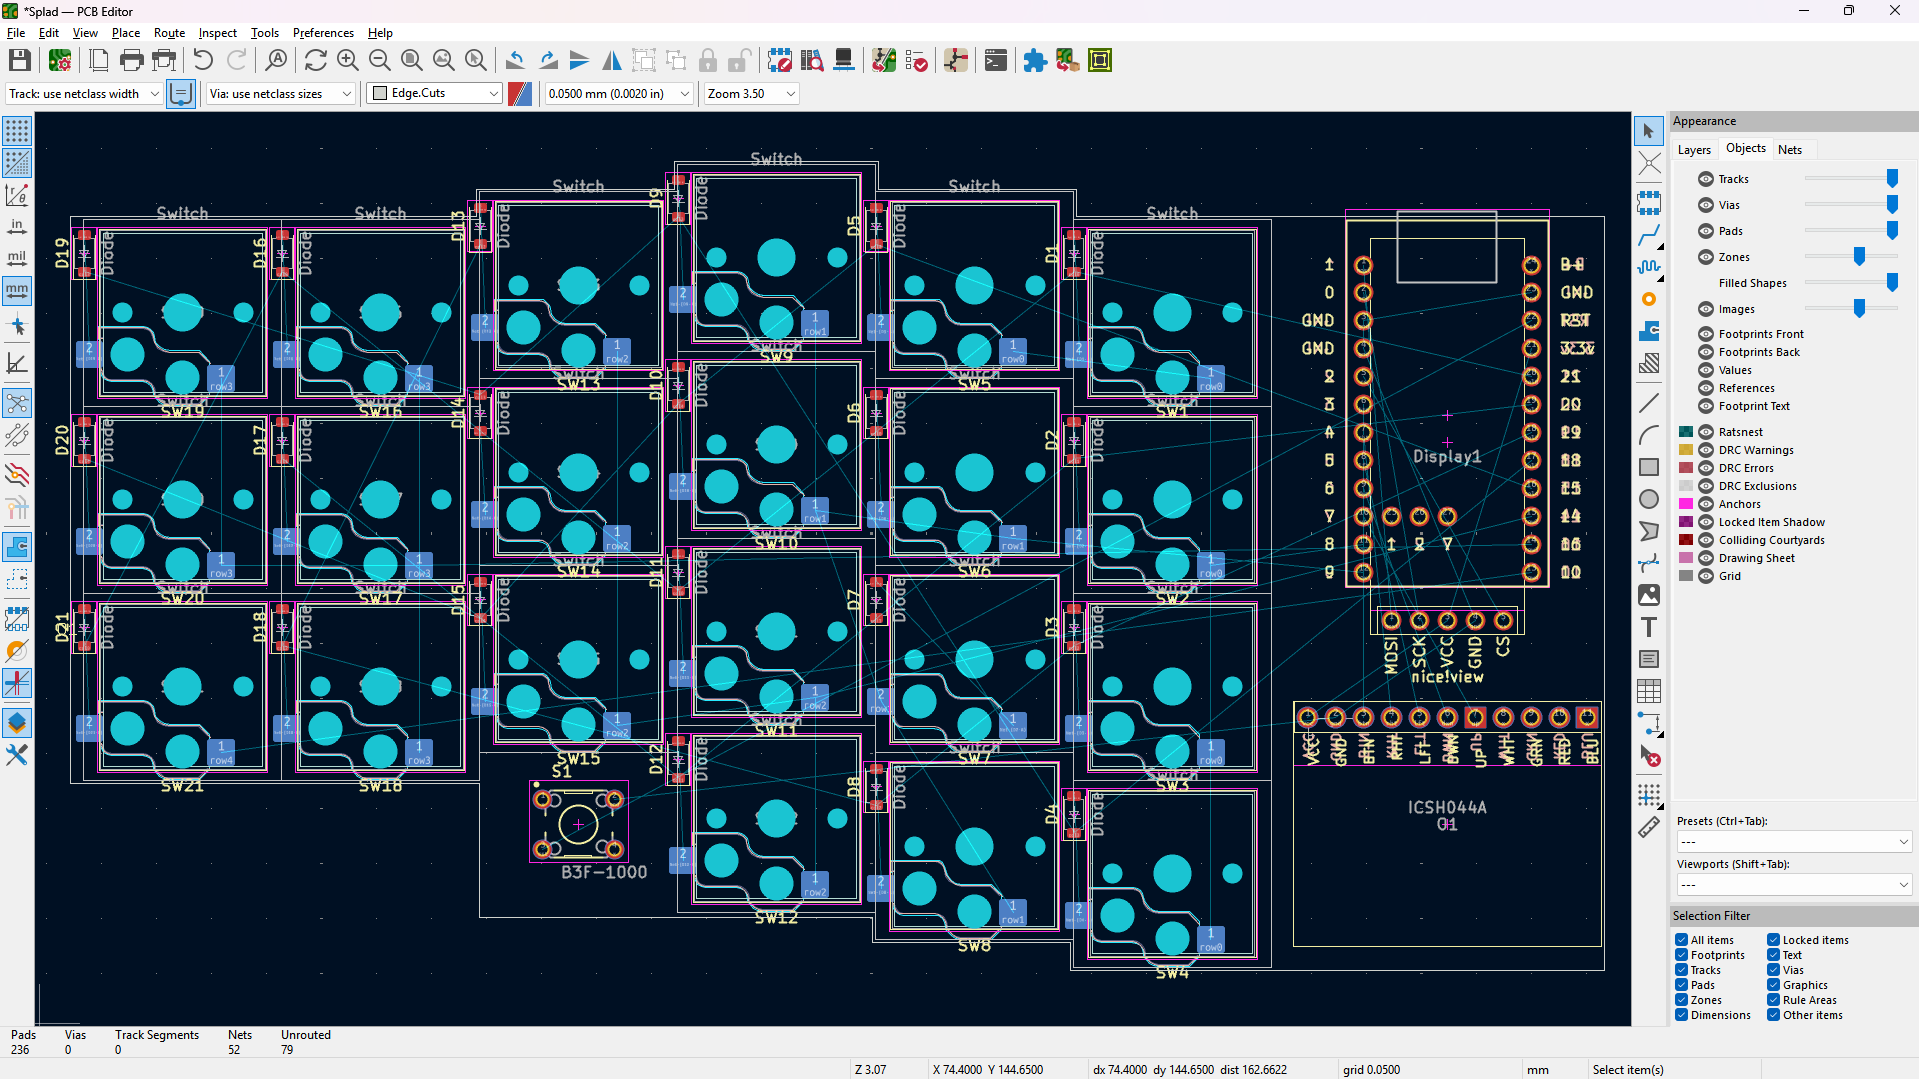
Started by importing stuff into the PCB editor.
Useful for column stagger: https://flatfootfox.com/ergogen-part1-units-points/
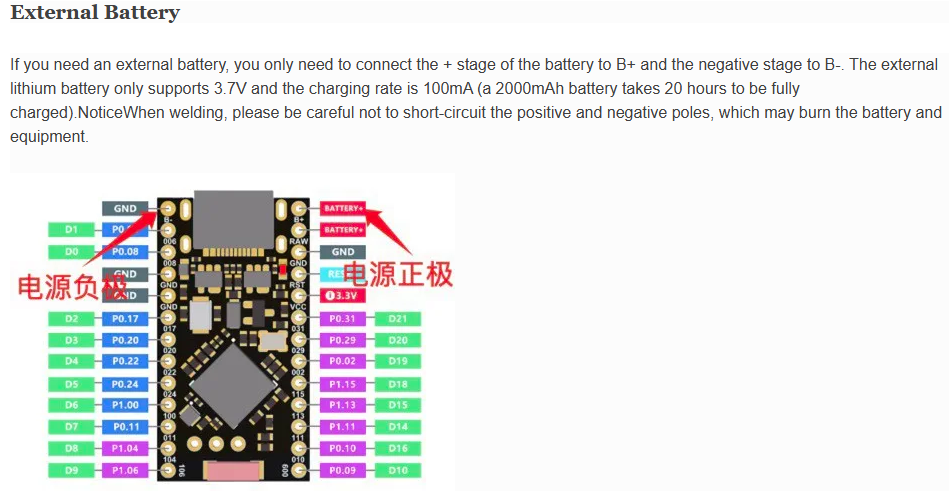
Useful thing I found about connecting a battery:
0.25mm for outside line
Not done routing yet but main shape done:
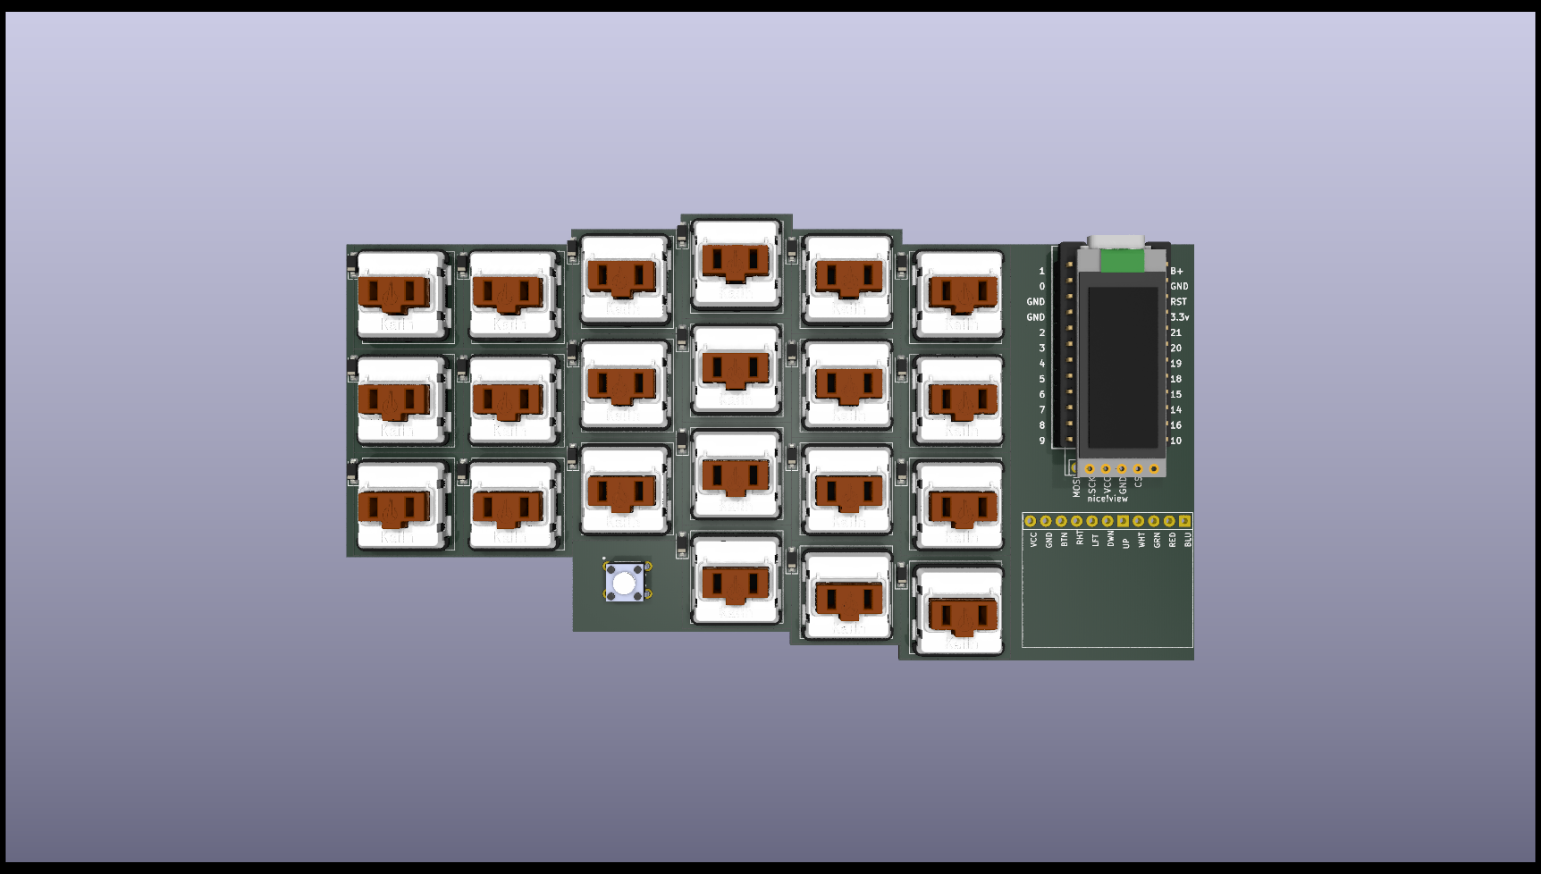
For now I'll work on the case as I might have to move components depending on how the case goes which would mean rerouting if I route now.
[!NOTE]\ Total time spent: 10h