
CAD keyboard
Keyboard made specificaly for cad shortcuts
Overview
Goal
Make a numpad like keyboard for common CAD shortcuts so hands do not have to move between the mouse and keyboard because shortcuts are often far apart requiring hand movement
Requirements
Necesity
- Enough Keys for all commonly used CAD shortcuts
- Needs to be defined further after more research
- Able to have key mapping change to different shortcuts
- should have basic presets for different CAD programs
- Small enough to fit on desk next to laptop
- Comfortabe to use
Nice to have
- Group similar shortcuts together
- Looks nice
- Has digits 0-9 and decimal
Journaling
May 24
- Created my goal and started writing requirements
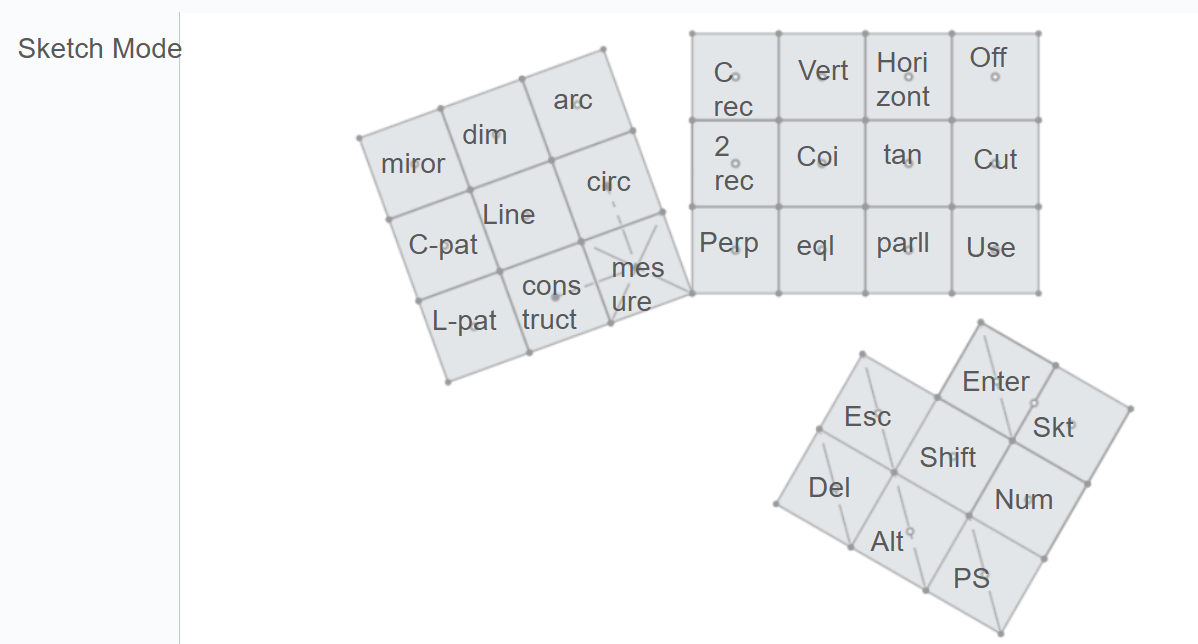
- Decided what shortcuts are needed for sketching
- 6 line creation shortcuts
- 6 line adjustment shortucts
- 6 constraint shortcuts
- alt, shift, esc required regardless
- I need to decide how to simplify because 21 keys is likely to many and this is before considering part-studio + assembly shortcuts
- I also started skimming through some pre-existing keyboard desgins on google and extended numpad or ergonomic style half keyboard designs seem promising but I need to nail down requirements before starting design.
** Aprox 1hr **
May 26
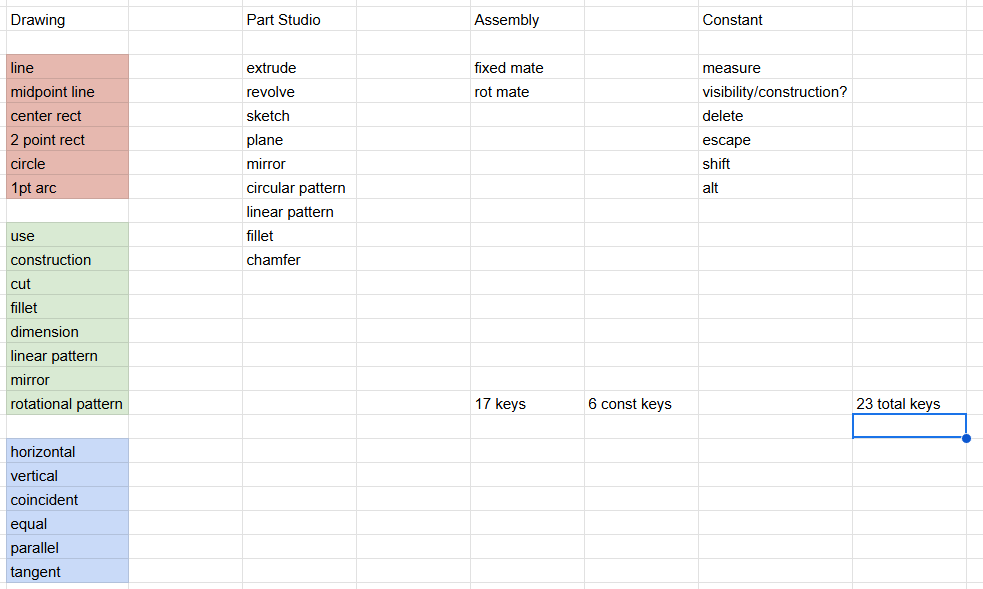
- Created a spreadsheet for all the shortucts I want the keyboard to be able to produce
- Messed around with grouping 2 shortcuts per key reduce the number of keys required
- 2 per key still requires 23 keys before even considering adding numbers
- Adding a numpad does not seem viable at this time, 3 contexts may be required rather then 2 to have it without it being the size of a full keyboard.
- I am currently leading towards the half keyboard design because it is still relitively small compared to a full sized keyboard but provides more keys with easier access then a numpad style.
- I belive that I will have to 3dp many test layouts before I find the best one.
** Aprox 0.5hr **
May 29
I did some research on mechanical keyboards
- https://www.keyboard.university/100-courses was very helpful for the basics and there was one page with pictures of differnt ways to mount the pcb to the case which I suspect will be helpful when desiging the case
- A few websites about keycaps and switches however much more research will be required before picking a style because there are far more types of each then I ever imagined there could be
- https://www.youtube.com/watch?v=7LyziNdFlew watched this video as an intro on how to design the pcb for the keyboard
- https://www.youtube.com/watch?v=7LyziNdFlew this was just a very cool video which ended up mostly being about the usb protocal for the keyboard
I also printed out some basic test keyboard layouts with keycaps from here https://www.thingiverse.com/thing:4593219 so I could see what felt better
- Numpad style (image rotated 90 deg for some reason)
- Was not very comfortabe
- I don't think there is any possible way to get the number of keys that I want on to this style and still have it be useable.
- Space is less of a constraint then I want so its smaller size is less of an advantage
- Rectangular style makes it easier to design
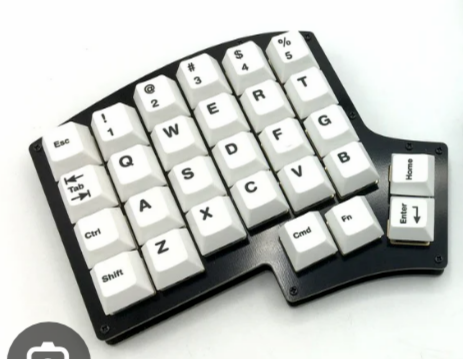
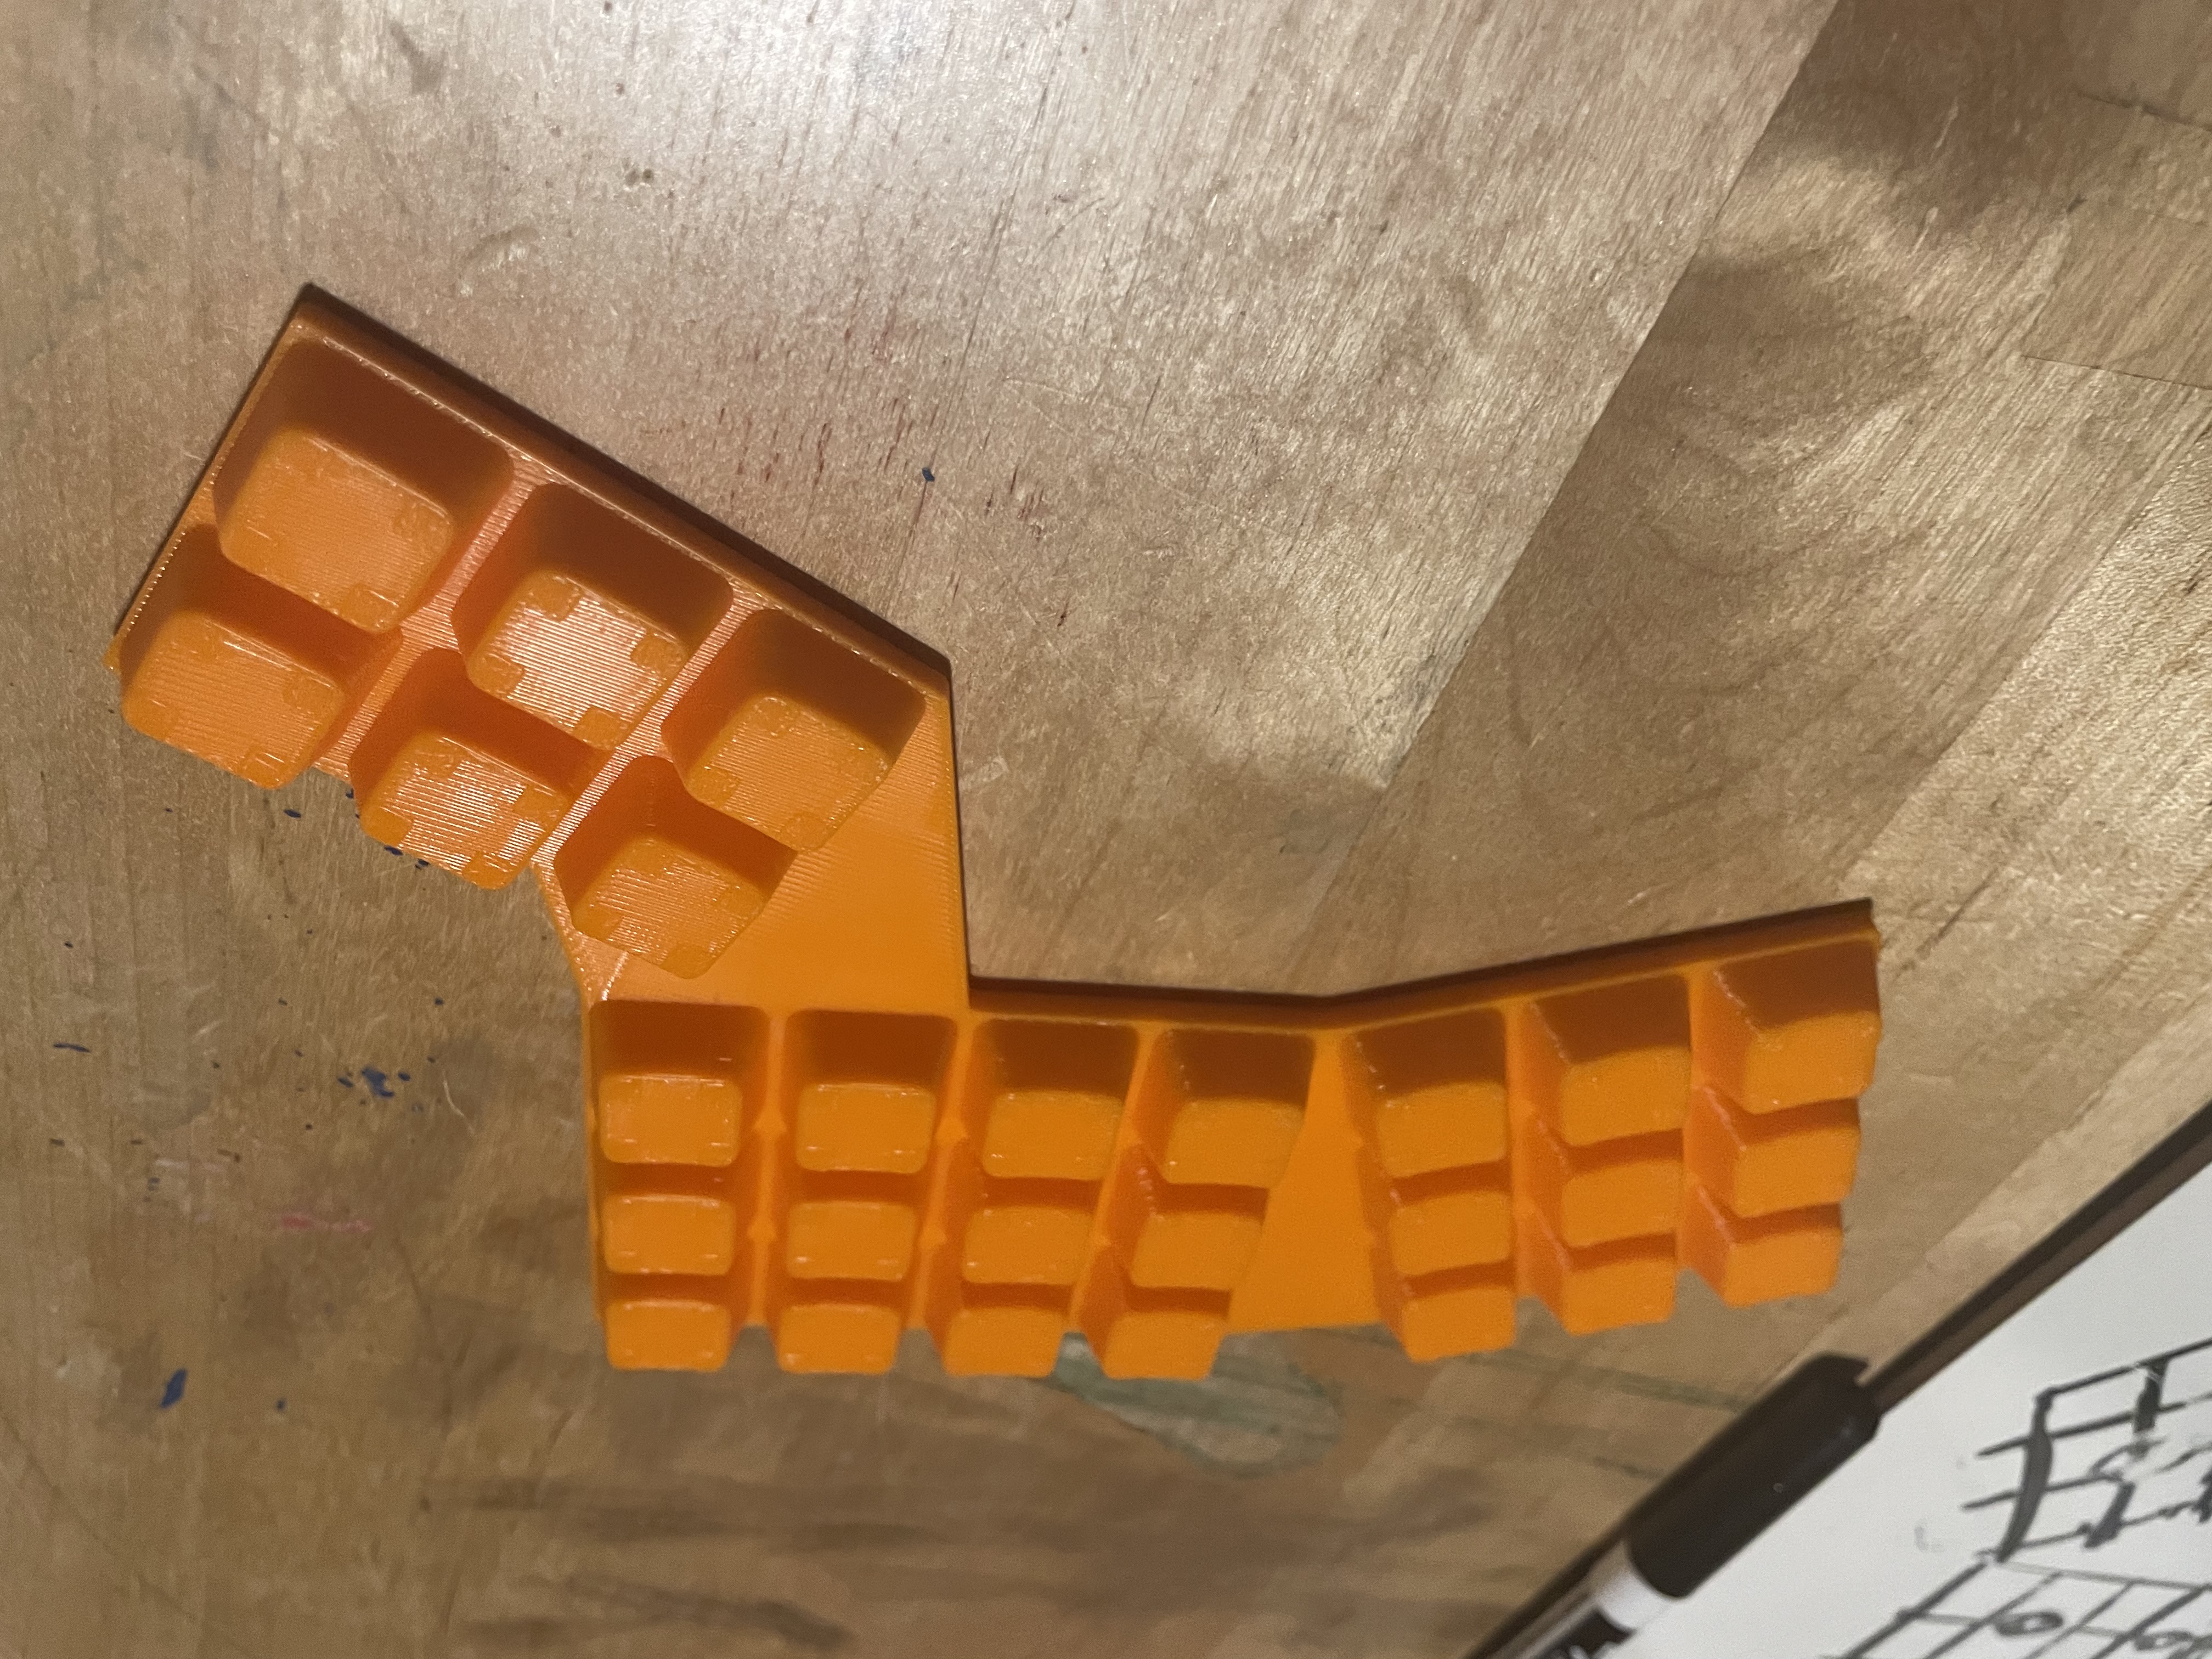
-Half Keyboard style (image also rotated 90 deg for some reason)
 - Is likeley to be able to fit the number of necessary keys (Another column to the left for the pinky can easily be used)
- Currently the thumb keys are too far and hard to reach
- Lower row can be hard to reach
- Feels more comfortable for my hand
- Is likeley to be able to fit the number of necessary keys (Another column to the left for the pinky can easily be used)
- Currently the thumb keys are too far and hard to reach
- Lower row can be hard to reach
- Feels more comfortable for my hand- Numpad style (image rotated 90 deg for some reason)
At this point I don't see a good reason not to go with the half keyboard design since it fits all requirements and the numpad style does not.
- More testing is needed to improve placement of the thumb keys
- I want to test out making clear groupings of keys
** About 2-2.5 hrs **
June 4
I took a break to work on other projects but paid attention to how I used shortcuts while cading
- It will be very inconvinient to not have most sketch shortcuts avalible without having to hold a modifier key
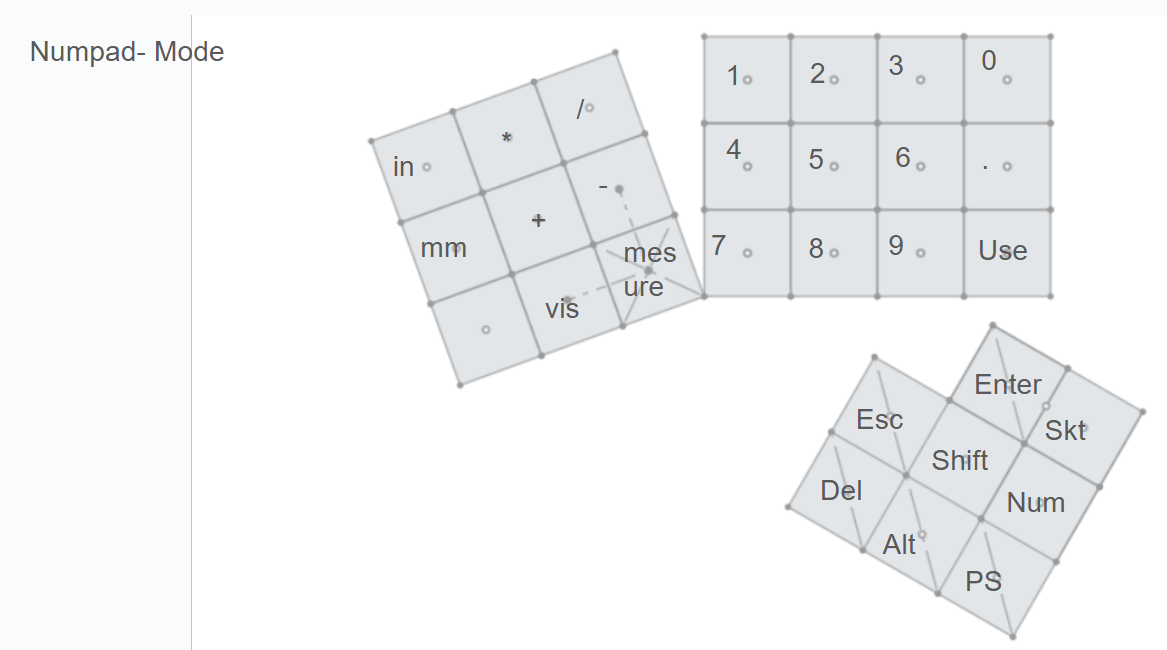
- Having the ablility to do numpad inputs will be a necessity so I don't have to constantly switch between this keyboard and main for num inputs
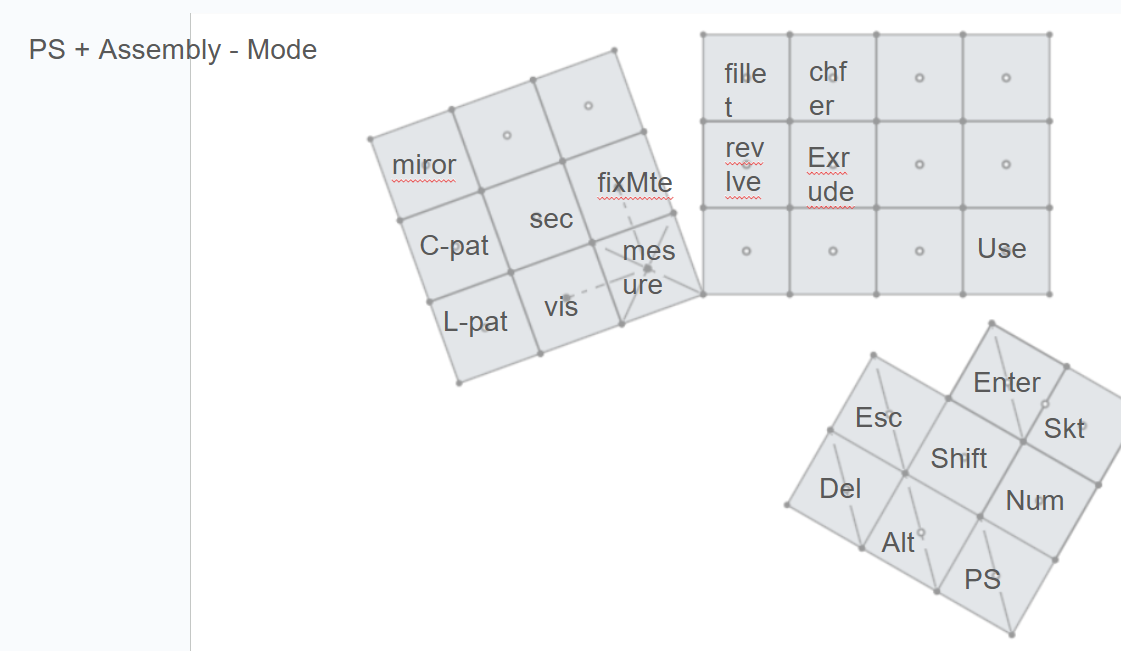
- Shortcuts have very little benefit outside of sketching. The majority of cad time is spent sketching and the only useful shortcuts in assemblys is the standard mate + visablitiy.
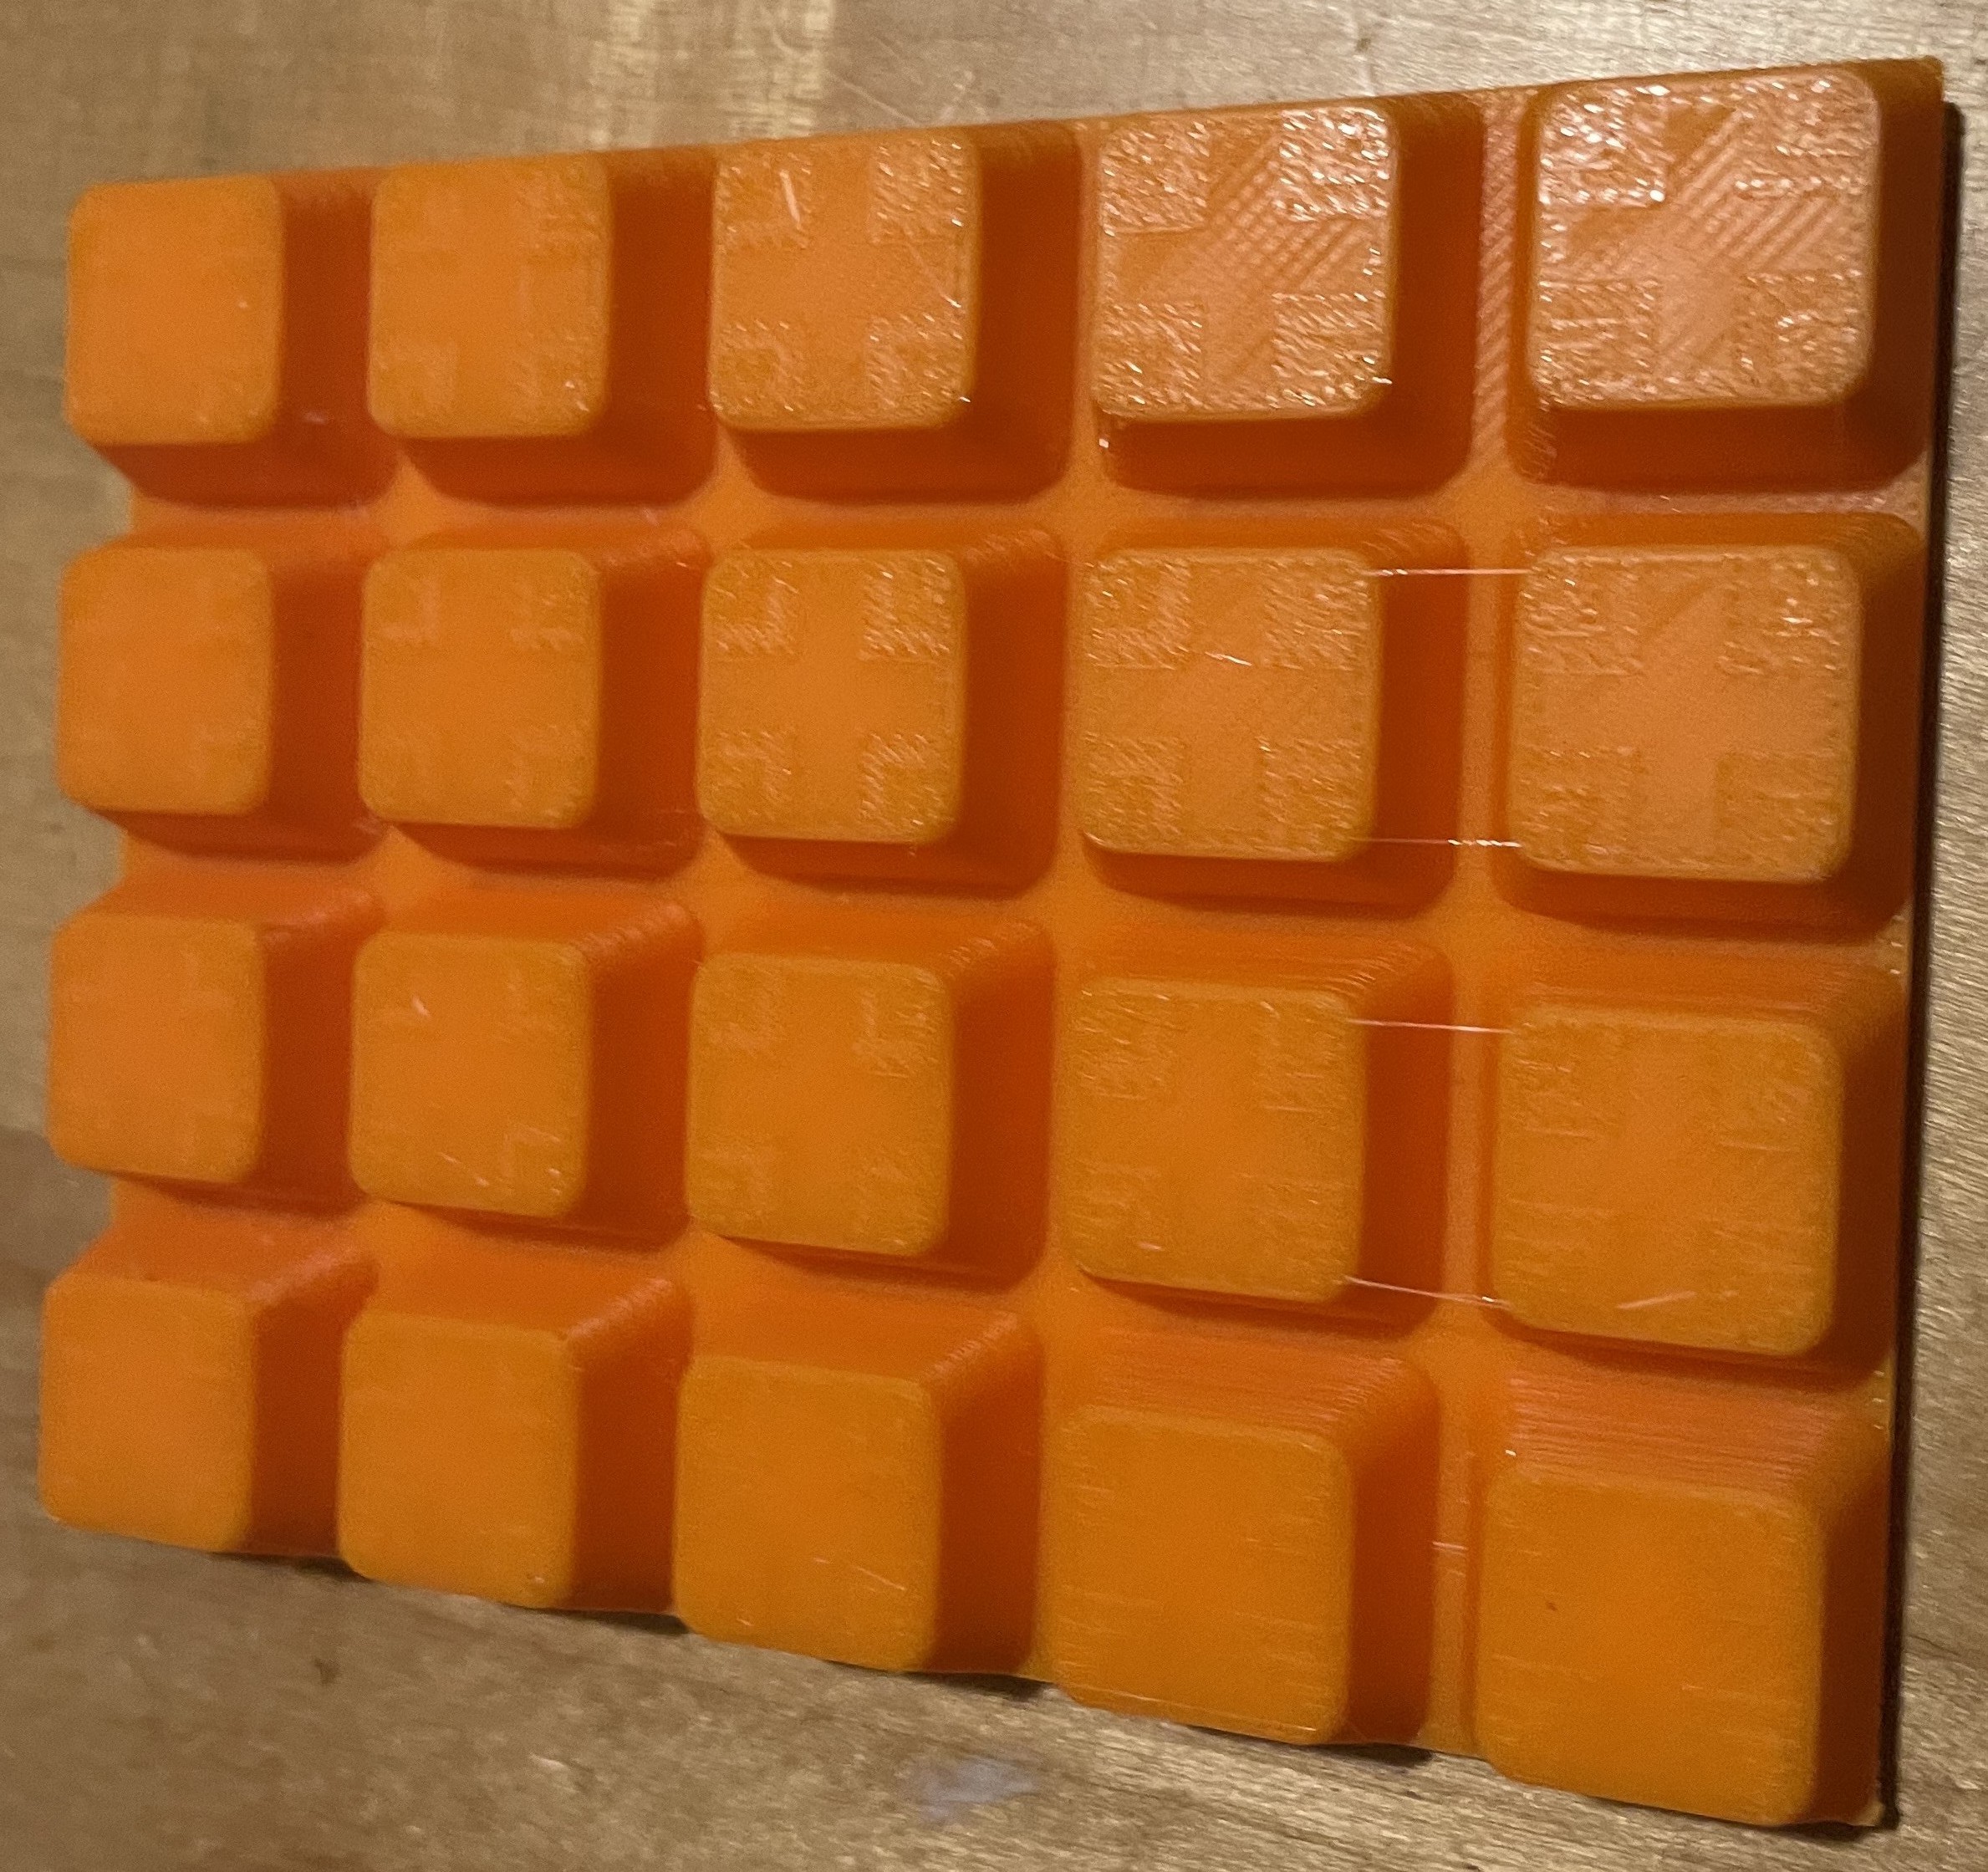
With this in mind I made another prototype layout that I think is the best one yet.
- It has 21 keys all in easy reach
- 9 additional thumb keys
- fairly confortable
- One downside is that about 3 keys are a bit of a stretch to reach
The current idea with this current prototype is to have some of the thumb keys act like a caps lock to switch between contexts. For example...
- A sketch context
- A Part Studio + Assembly context
- A numpad context
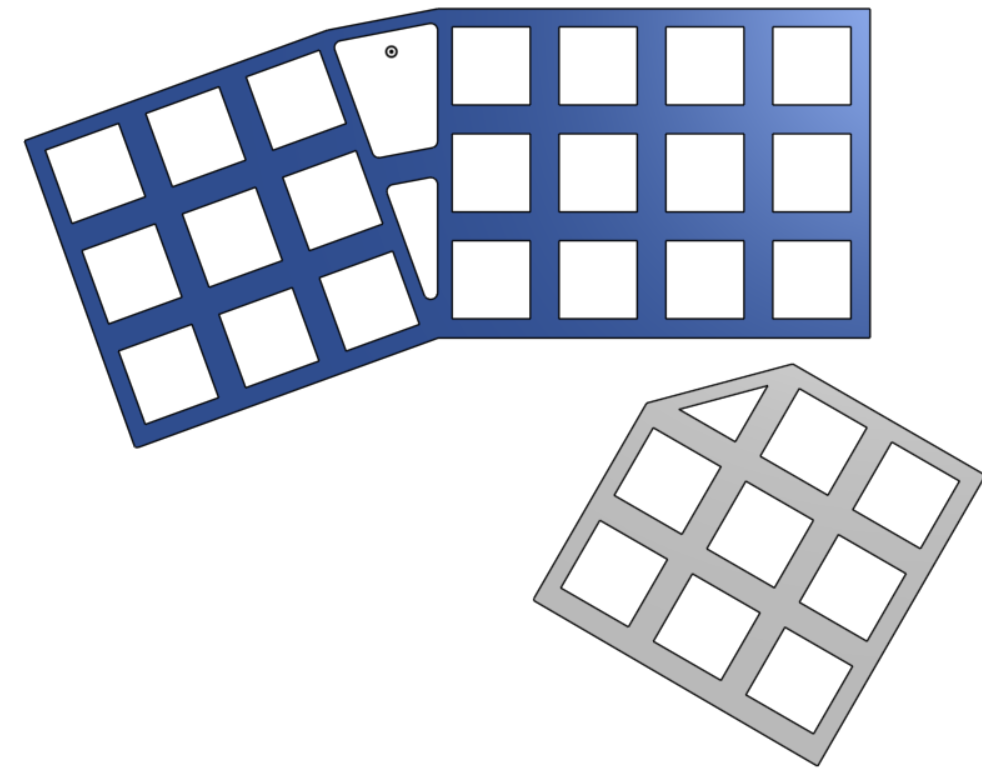
I started this prototype by drawing out designs on a white board and adjusting them until I ended up with this
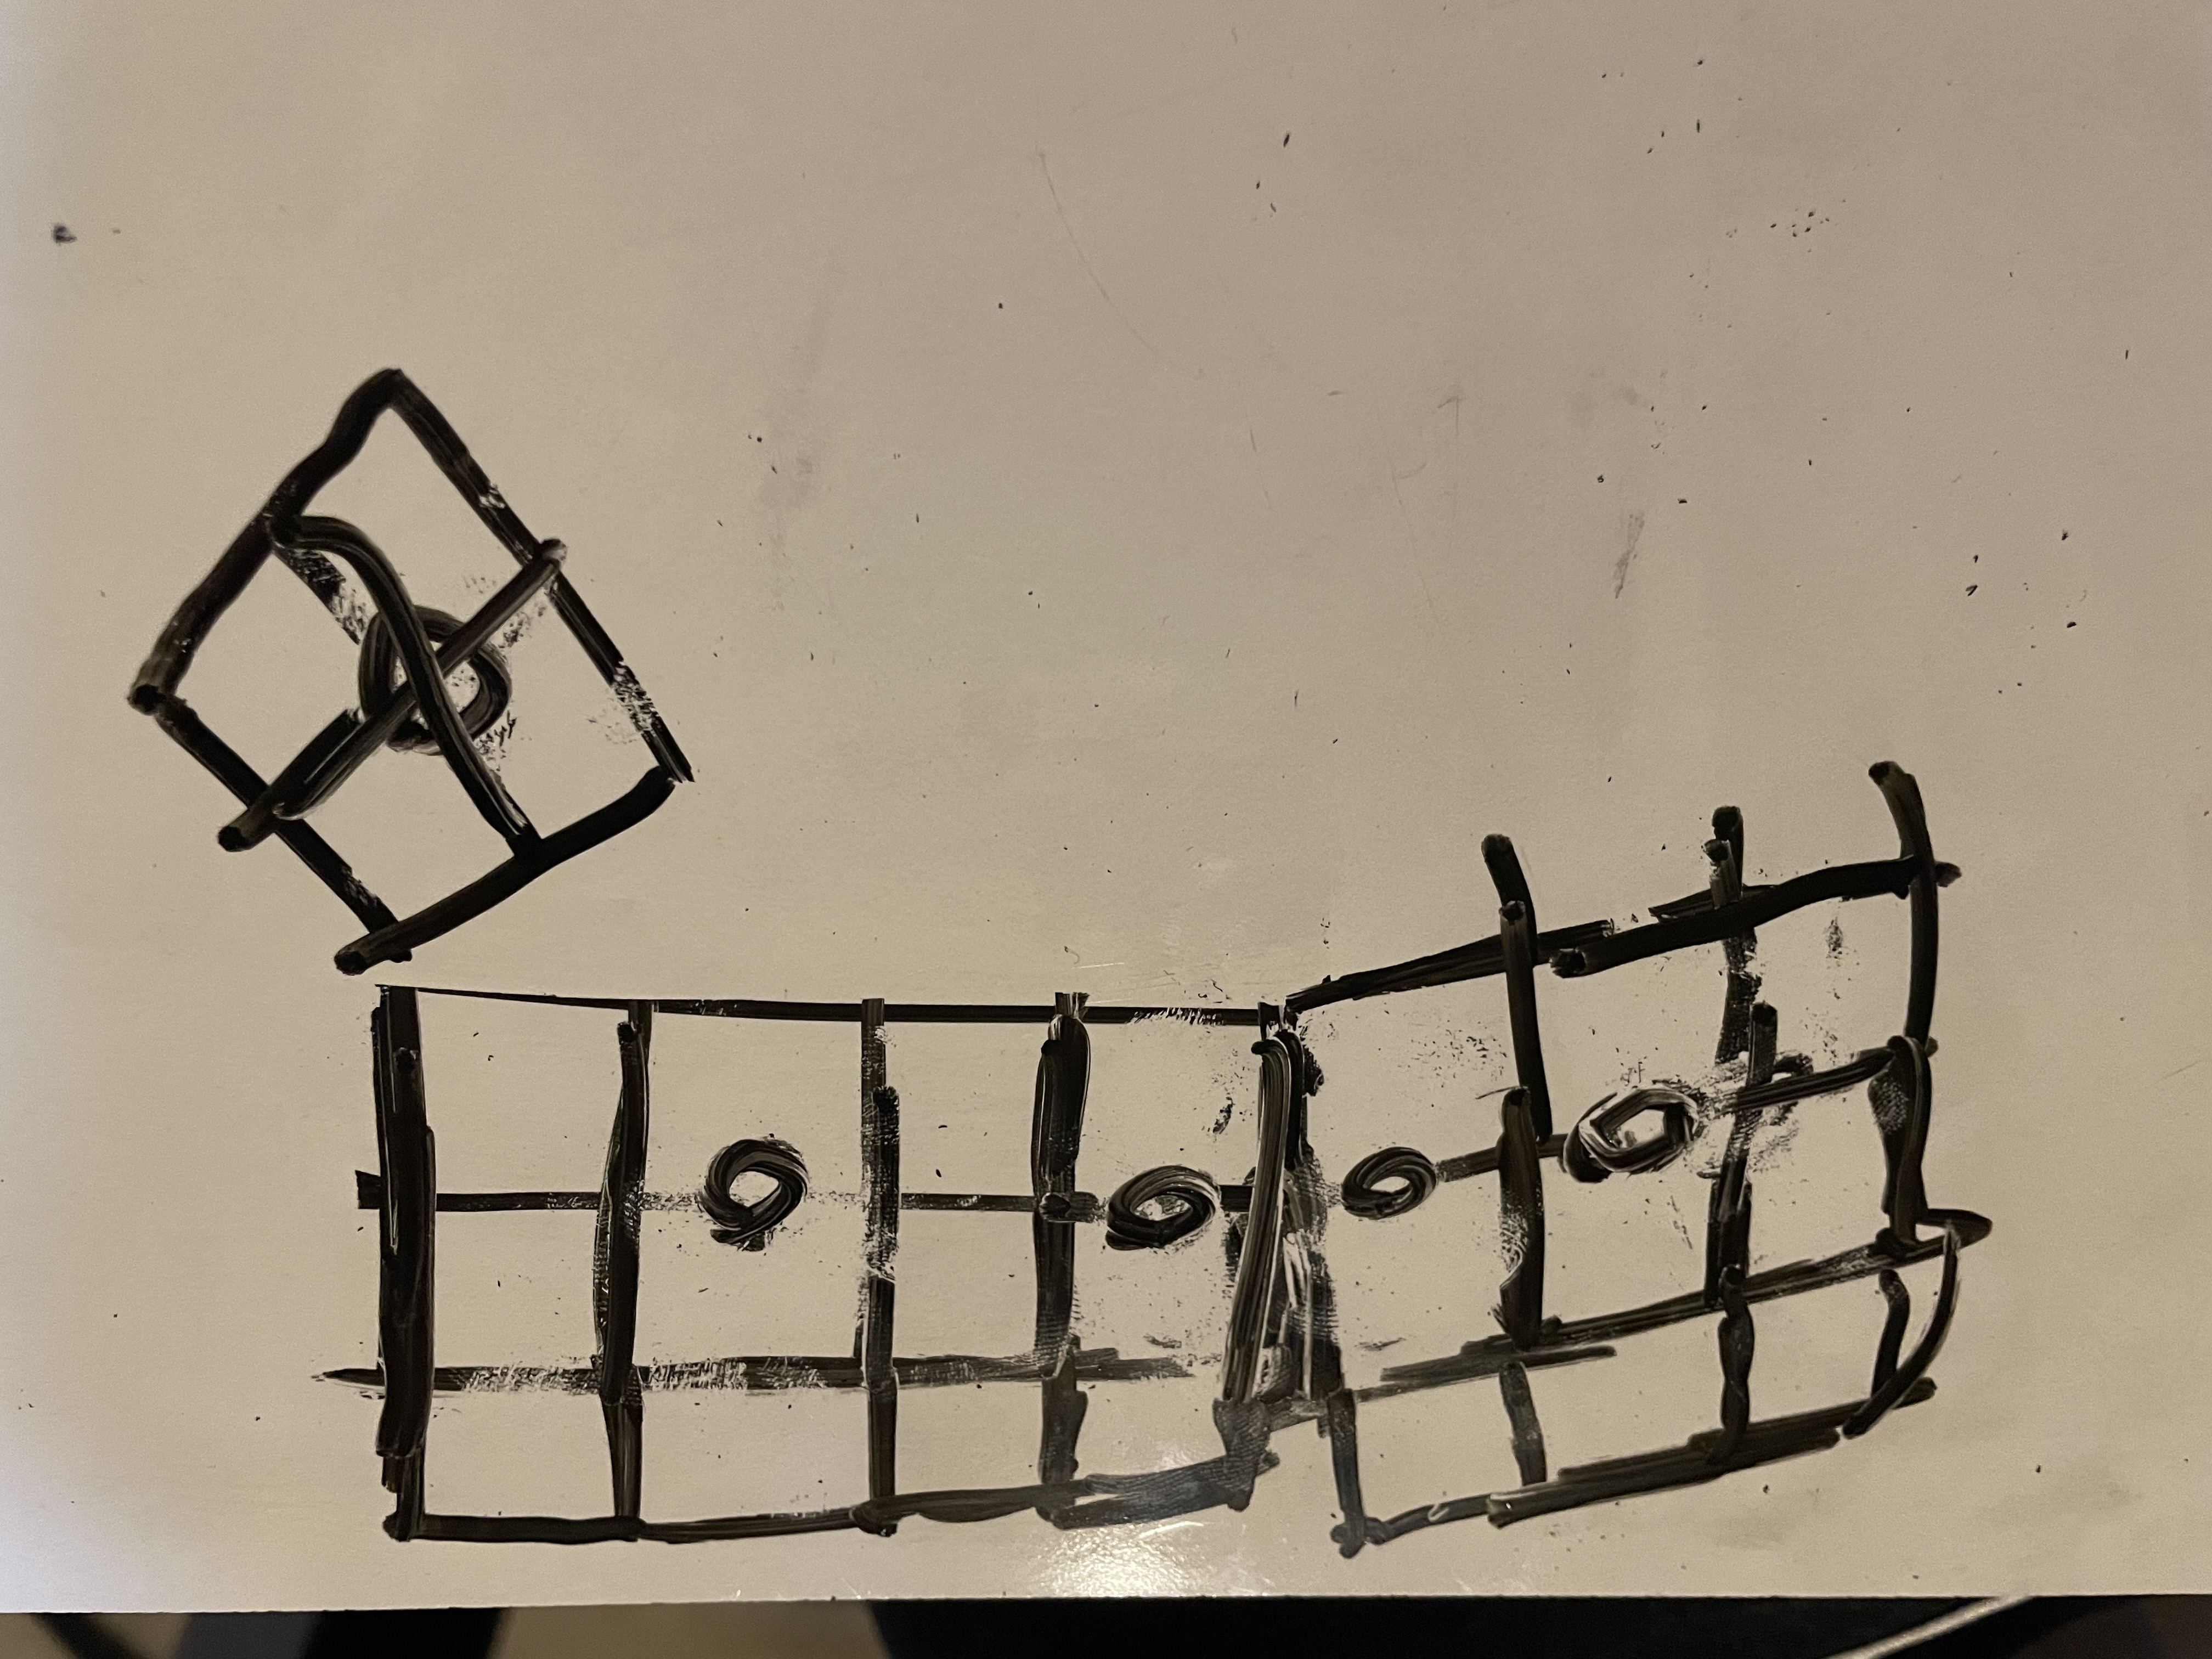
Then I laided it out in cad and printed it to test it out irl and to scale.
The only thing to change with this design is to replace the thumb keys with a 3x3 set of keys centered around the bottom left key to make them easier to reach and press.
The next step now is to make a shortcut layout that I like to ensure that this design will work.
** About 45 min **
June 5
- Planned out all the keybinds. While I'm sure they'll end up changing, it works to move on to the rest of ther projects.
** About 30 min **
June 6,7,9
I spent a lot of time trying to research what microcontroller and firmware I need to make this project work. Unfortunetly there was a lot of information that I struggled to wrap my head around. I knew from the start that I wanted a full board rather then just a chip so that I could solder it far easier despite the larger size it entialed. With this it seemed like the main options were the Arduino Nano, Teensy, and Pi pico. On the firmware side I did not find very many options. I started by searching for information on manually programing it, but I was unable to find any info on how to do this. Therefore, I moved on to searching libraries and QMK was pretty much the only result. By decideing to use QMK I am restricting myself to useing only supported microcontrolers which include the Teensy and Pi pico. I ended up deciding on using the Pi because there was a lot of info about it on the QMK website, had all the IO I needed, and could be bought really easily. The only downside of using it is that it uses a USB B micro port instead of a more standard USB C.
After chosing the microcontroller and firmware I moved on to desiging the PCB. I decided to use KiCad for this because it is free and has a lot of info online about it. This was the first PCB I have ever designed and I found there to be quite a bit of a learing curve to the proccess. I leaned heavily on this video: https://www.youtube.com/watch?v=iznKltVU1yw&t=2375s to design the board. The biggest struggle for me was making the rotated sections becuase KiKad really only deals with 90deg incriments with the occasional 45deg. This resulted in me needing to design these segments alligned with the grid then rotating it before finaly draging it into positon. Overall designing this board has been a great experience and a very useful skill to begin to learn.
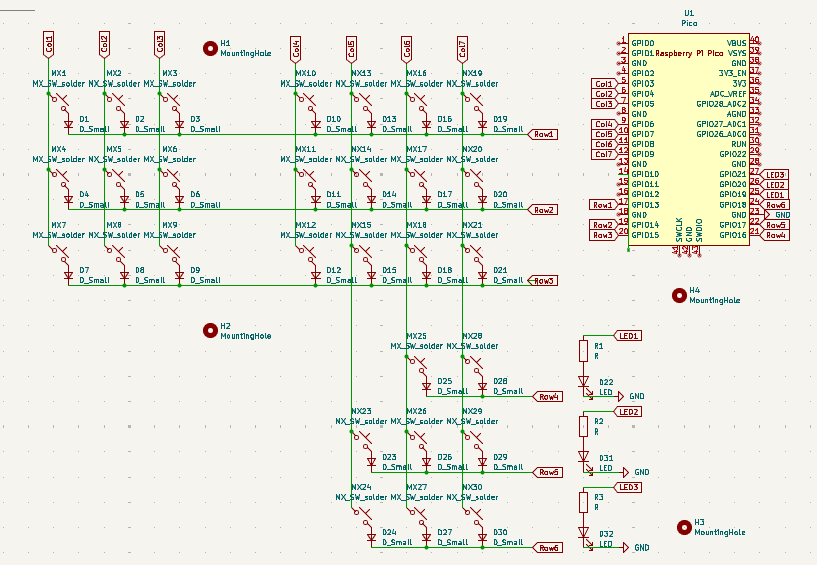
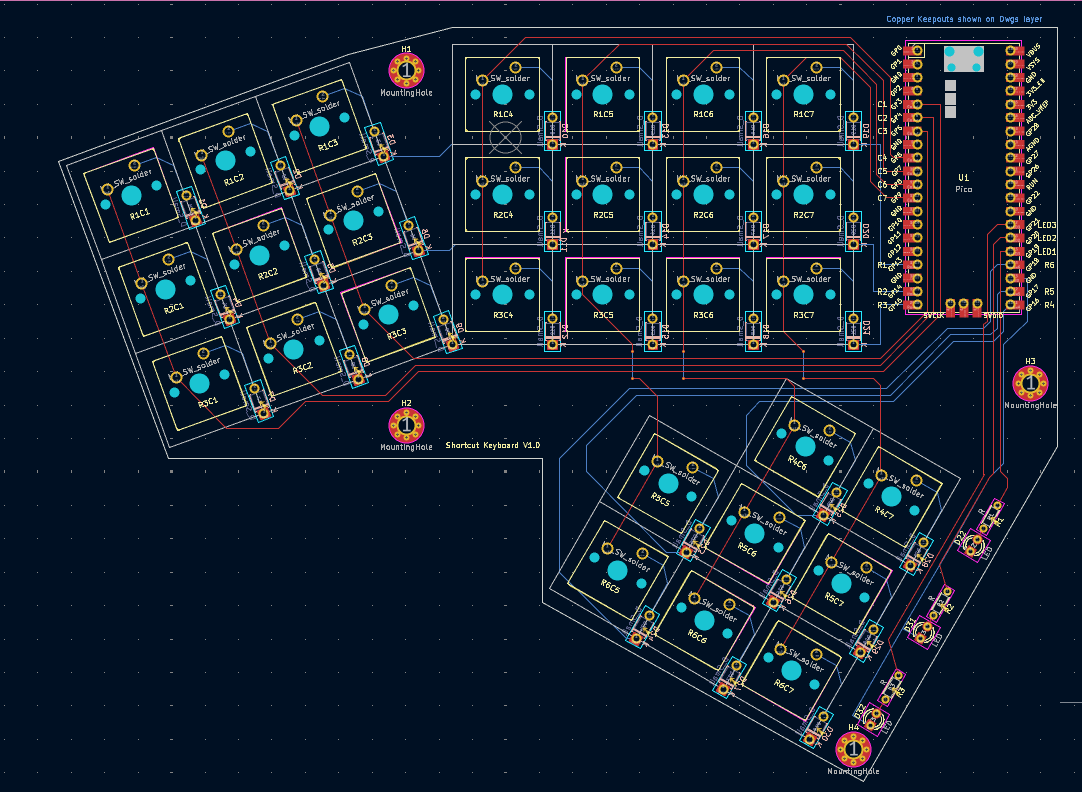

** About 8hrs **
June 12
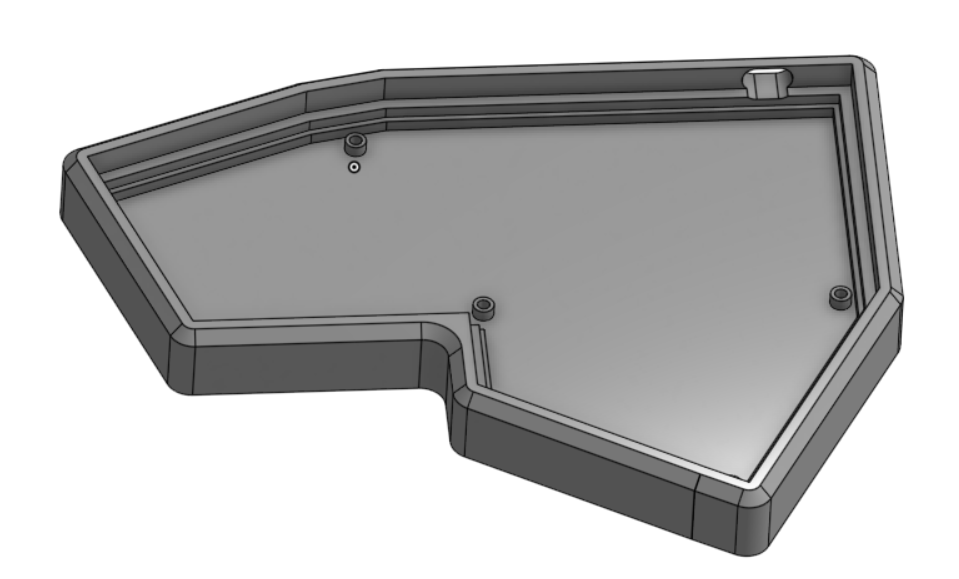
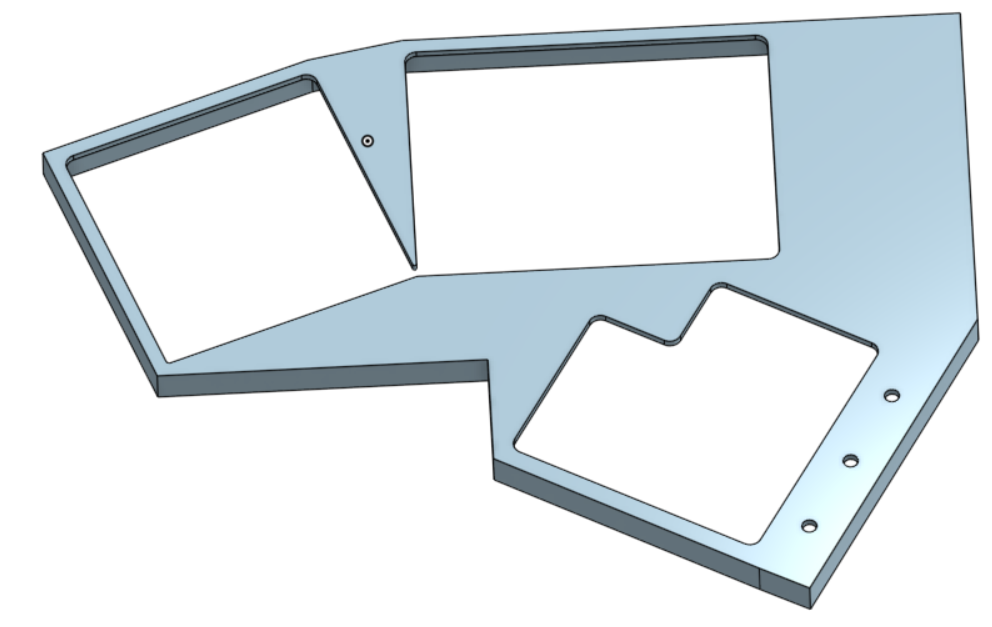
- Today I worked on creating the case for the pcb to be housed in. I plan for the case to be entirely 3d printed because that is the manufacturing capability I have ability.
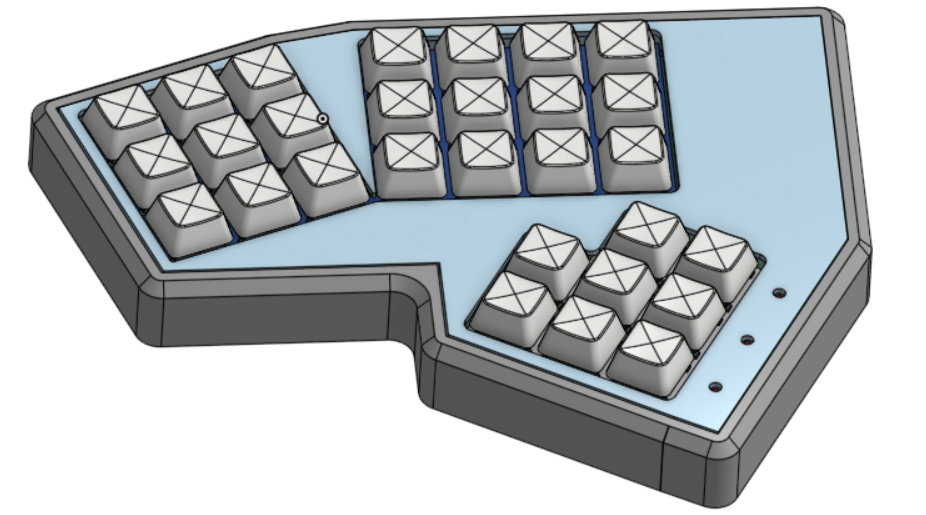
This is what I ended up creating, made up of 4 pieces
- The base piece houses the pcb and the cover
- Then there are 2 pieces to hold the switches
- And finaly a cover to make it look nicer
- The base piece houses the pcb and the cover
In the end I don't love this design. The cover is barely held on and the more I mess around with this layout the less comfortable it feels to use. To this end, I'm going to work on new better layouts.