
Peppermint3d
Total Hours: 19.5
| Key | Value |
|---|---|
| Title | Peppermint3d |
| Author | Yahia Haggag |
| Description | My first custom bed slinger 3d printer designed to be sturdy and sleek |
| Created At | 2025-07-27 |
7/27/2025
As a complete noob to 3d printing and hardware I felt completely lost at first, so I started researching. I researched the different kinds of 3d printers and I finally settled on the bed slinger. I chose the bed slinger because it's a great choice for a first builds due to its simplicity and intuitive design. When choosing the specs for my printer I was focused on making it cheap and precise, therefore I've decided to use linear rails for the X and Y axis for precision and a lead screw actuator and v slot rails for the Z axis instead of linear rails to reduce costs. For the print head, I decided to use a direct drive bmg extruder to reduce stringing, and I coupled it with the e3d v6 volcano hotend, since it was really cheap and good enough for my needs, I also added a proximity sensor. For the print volume, I decided to go with 214214250 which is mostly sufficient for the things I print. To run this entire thing I decided to go with the BIGTREETECH SKR MINI E3 V3.0 board, because it's really cheap, really well docummented and runs klipper. I also estimated to cost to be 290USD based on local prices.
Time Elapsed: 7 Hrs
7/28/2025
I hopped on fusion360 and got straight to designing I didn't do much as I was very unfimilliar with fusion but i managed to create a simple frame which I thought was strudy enough to support my 3d printer. I focused on strengthining my x axis by using 2040 extrusions and using a corner bracket and t plate combo because the x axis moves the most and it can be quite heavy
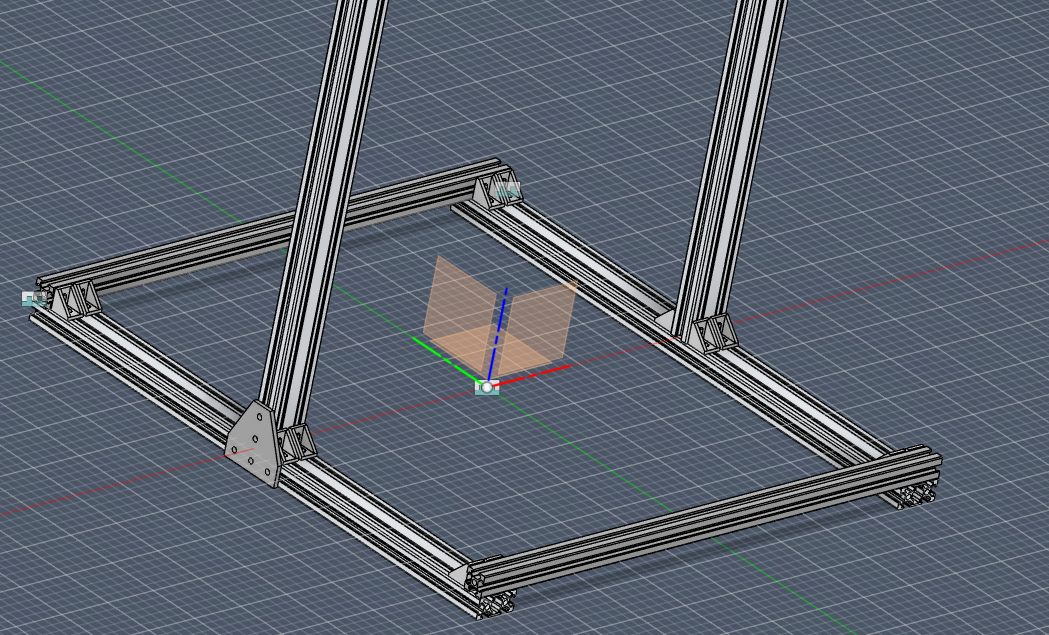
Time Elapsed: 2 Hrs
7/29/2025
I designed this endstop which is triggered by the linear rail carriage, this endstop helps me shorten the length of the linear rail as much as possible thus reducing cost. I also found out that the linear rail sizes I had initially calculated were incorrect, and now they're 350mm. I used the bed mount from the prusa mk3 since it was the only one available in my country that I could find the datasheet for online, and it also supports linear rails. So I had to use it since fabricating my own bed mount was going to be super expensive.

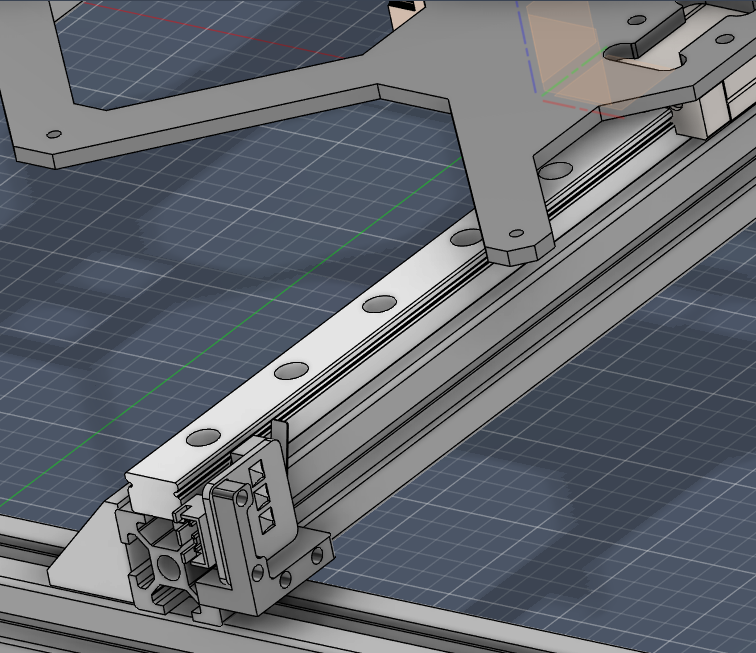
Time Elapsed: 1.5 Hrs
7/30/2025
Created a belt system for the y axis and added 4 anti vibration rubber feet


Time Elapsed: 2 Hrs
7/31/2025
I decided to lock in and I finished the entire z axis! I used openbuilds universal gantry plate because it's made of metal and has high surface area which means I can make the print head super heavy and I don't really have to worry.
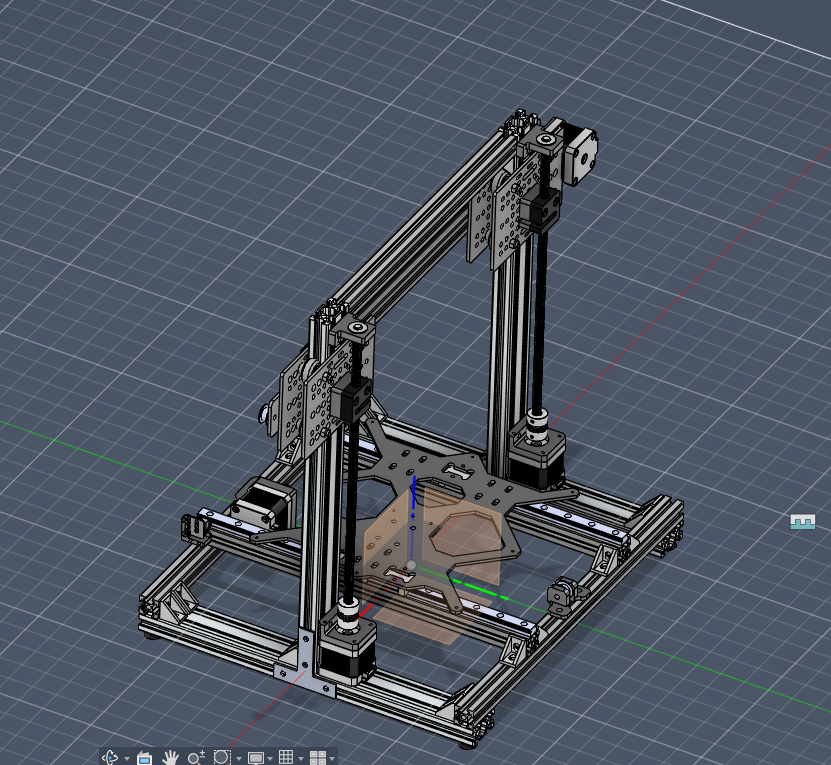
Time Elapsed: 4 Hrs
8/1/2025
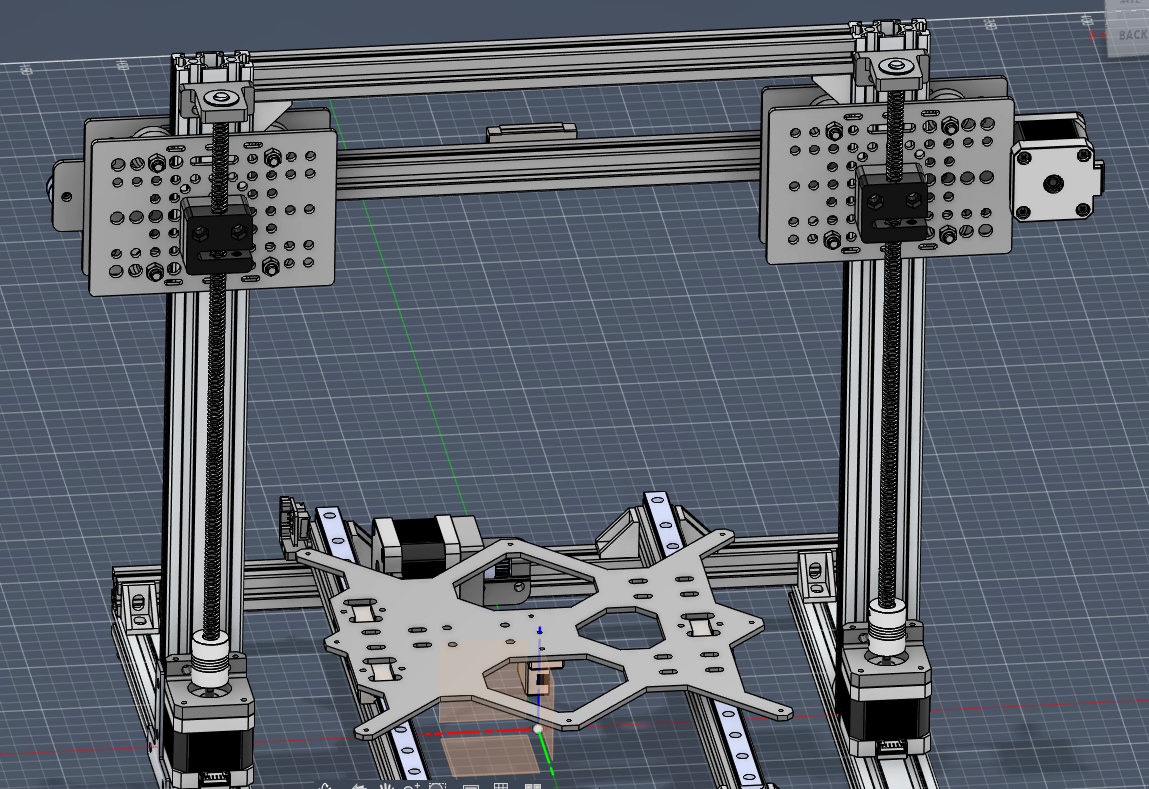
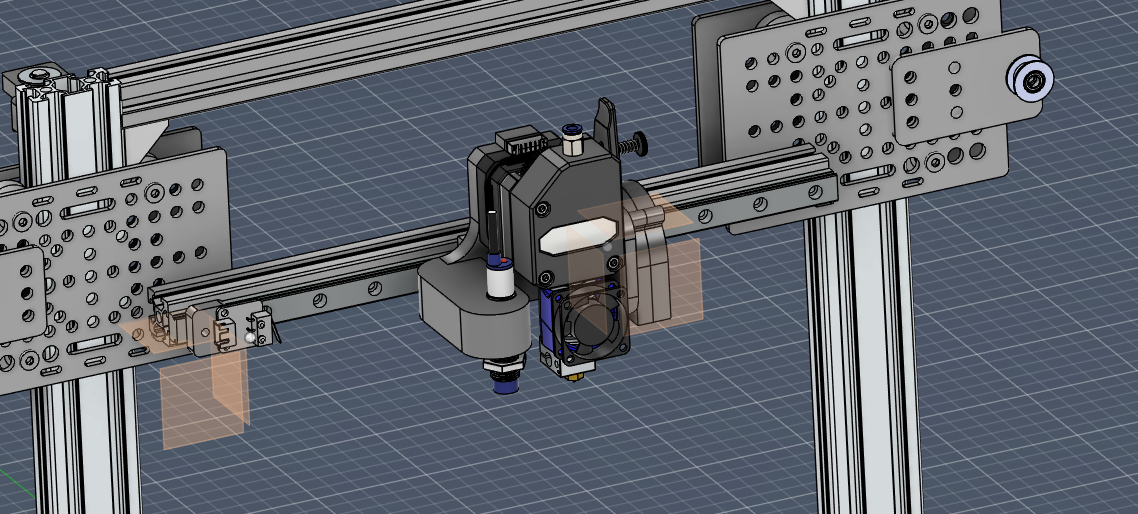
Speedran the x axis and printhead because of the deadline
Time Elapsed: 3 Hrs
8/5/2025
Completely revamped the design of the printhead and added a printhead cover after discovering a major flaw in how the printhead was assembeled.

